Tools
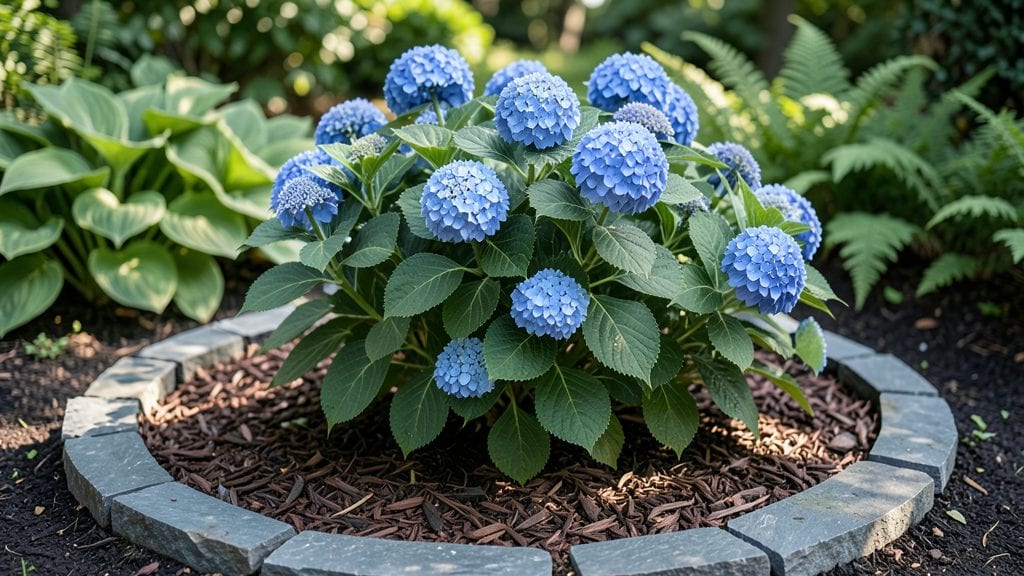
Creating a mixed border garden starts with understanding how layers create depth and movement—something my first attempt missed completely by planting everything at the same height. The magic happens when you combine perennials, shrubs, and annuals in a way that keeps the space dynamic from spring through frost.
I learned the hard way that a border isn’t just about pretty flowers; it’s about texture, color shifts, and plants that support each other.
You’ll need a mix of sun-loving and shade-tolerant plants, along with a rough sketch of your space. Start with taller plants at the back—think roses or ornamental grasses—then add mid-height perennials like coneflowers, and finish with low-growing annuals or ground covers.
The key is 3-5 layers so eyes have something to follow year-round. My favorite combo? A clematis climbing a trellis with lavender and sedum at its base—it’s foolproof and thrives with almost no fuss.
What you’ll end up with is a garden that feels alive in every season: spring bulbs peeking through, summer blooms cascading over, and winter interest from evergreens or seed heads.
The best part? Once established, these borders require minimal work—just deadheading spent blooms and occasional pruning. You’ll spend less time weeding and more time enjoying the show.
This design works for small urban plots or sprawling backyard edges—just scale the plant sizes to your space. The biggest mistake? Overcrowding. Leave room for plants to grow into their spots, and you’ll avoid the cramped, chaotic look that ruins so many borders.
Let’s build something that keeps turning heads all year.
📚 In This Guide
- What you need
- Instructions
- Tips and common mistakes
- Wrapping up and next steps
What you need
- ● Perennial & Annual Plants: 3–5 shrubs (e.g., hydrangeas, boxwoods, or dwarf lilacs) for structure
- ● 7–10 perennials (e.g., coneflowers, black-eyed Susans, or lavender) for mid-height layers
- ● 5–8 annuals (e.g., petunias, marigolds, or salvia) for vibrant color bursts
- ● 3–5 ground covers (e.g., creeping thyme or ajuga) for texture and erosion control
- ● Soil Amendments: 2–3 bags of compost (for enriching soil)
- ● 1 bag of mulch (pine bark or shredded leaves, 2–3 inches deep)
- ● Fertilizer: Slow-release granular fertilizer (10-10-10 ratio, ~1 lb per 10 sq ft)
- ● Hand Tools: 1 garden trowel (for transplanting small plants)
- ● 1 pruning shears (bypass or anvil type, sharp blades)
- ● 1 hand fork (for aerating soil)
- ● Larger Tools: 1 garden shovel (for digging)
- ● 1 wheelbarrow (for hauling soil/mulch)
- ● 1 hose with spray nozzle (for watering)
- ○ Optional (But Helpful!): Soil pH test kit (to check acidity/alkalinity)
- ● Knee pads or a garden stool (for comfort)
- ● Garden gloves (heavy-duty for pruning)
- ● Sunlight assessment: Full sun (6+ hrs/day), partial shade (3–6 hrs), or full shade (under 3 hrs)? Choose plants accordingly!
- ● Soil test: Check drainage and pH (ideal: 6.0–7.0 for most plants).
- ● Space planning: Sketch a rough layout (consider mature plant sizes!).
- ● Water source: Ensure easy access for regular watering.
Step-by-step instructions for designing a mixed border garden
Let’s create a layered garden that delivers seasonal interest without the guesswork.
Plan Your Garden Layers for Structure and Flow
Begin by sketching a rough layout on paper, dividing your border into three distinct layers: the backdrop, the mid-layer, and the foreground. The backdrop should consist of tall perennials like Shasta daisies or Hollyhocks, which anchor the design and provide height. These plants should reach 3-5 feet tall, creating a natural screen. The mid-layer, typically 18-36 inches high, includes plants like Coneflowers or Black-Eyed Susans, which add texture and color. Finally, the foreground features low-growing perennials such as Creeping Thyme or Sedum, which spill gently over the edges and fill in gaps.
Measure your space and mark the mature widths of each plant to avoid overcrowding. I like to leave 12-18 inches of space between plants in the mid-layer and 6-12 inches in the foreground to allow for airflow and future growth. This spacing prevents competition for nutrients and reduces the risk of disease. Think of your border as a living tapestry—each layer should complement the others in height, color, and texture.
Prepare the Soil for Optimal Plant Health
Before planting, clear the area of weeds, rocks, and debris, then loosen the soil to a depth of 12 inches using a garden fork. This ensures roots can penetrate easily without resistance. Amend the soil with 2-3 inches of compost, mixing it thoroughly to improve drainage and fertility. If your soil is particularly heavy or clay-like, add 1 part perlite to 3 parts soil to lighten the texture. Test the soil’s pH—most perennials thrive in a range of 6.0-7.0, so adjust with lime or sulfur if necessary.
Water the amended soil deeply to settle it before planting. You’ll know it’s ready when the surface feels slightly damp but not soggy. This preparation step is critical—skipping it can lead to poor root establishment and stunted growth. I always plant after a good rain or watering to reduce transplant shock and encourage quick root development.
Plant Perennials in the Correct Sequence
Start by planting the tallest perennials in the backdrop layer, spacing them according to their mature widths. Dig holes twice as wide as the root ball but no deeper, then place the plant in the center, ensuring the top of the root ball sits even with the soil line. Fill the hole with soil, pressing gently to remove air pockets, and water thoroughly to settle the roots. Move to the mid-layer next, repeating the process with medium-height plants like Rudbeckia or Salvia. Finish with the foreground plants, which should spill naturally over the edges.
Mulch the entire border with 2-3 inches of organic mulch, such as shredded bark or straw, to retain moisture and suppress weeds. Avoid piling mulch directly against plant stems, as this can trap moisture and cause rot. Water the entire border deeply after planting to encourage root growth. The first few weeks are critical—keep the soil consistently moist but not waterlogged until the plants are established.
Maintain Seasonal Care for Year-Round Beauty
Once planted, your mixed border will require minimal maintenance but benefits from seasonal check-ins. In early spring, remove dead foliage from perennials and apply a slow-release fertilizer to encourage new growth. Throughout the growing season, water deeply once a week, adjusting for rainfall. In late summer, deadhead spent blooms to prolong flowering and prevent self-seeding where unwanted. Divide overcrowded perennials every 3-4 years to maintain vigor.
Watch for signs of stress, such as yellowing leaves or wilting, which may indicate overwatering, underwatering, or pest issues. I’ve found that a morning watering schedule reduces fungal diseases by allowing foliage to dry before nightfall. Prune leggy growth in early spring to encourage bushier, more compact plants. With proper care, your mixed border will reward you with continuous blooms, texture, and seasonal interest from spring through fall.
Tips & tricks for perfect mixed border gardens
Creating a thriving mixed border requires thoughtful planning and attention to detail—here are the essential tips to ensure your garden flourishes year after year.
Layering for Visual Impact: In Step 1, when planning your layers, consider the mature heights of your plants to create a seamless transition between the backdrop, mid-layer, and foreground. For example, pairing Hollyhocks (3-5 feet) in the backdrop with Coneflowers (18-36 inches) in the mid-layer ensures a balanced, natural flow. I always sketch a simple elevation drawing to visualize how each plant will contribute to the overall height and texture before purchasing anything. This avoids the common mistake of planting tall perennials too close to the front, which can overwhelm the design.
Soil Preparation is Non-Negotiable: Step 2 emphasizes the importance of amending your soil with 2-3 inches of compost and testing the pH to ensure it falls within the ideal range of 6.0-7.0. If your soil is particularly dense, I recommend adding 1 part perlite to 3 parts soil to improve aeration and drainage. One tip I’ve learned the hard way: never skip the deep watering step after amending. The soil needs to settle and absorb moisture before planting to prevent root shock. I always wait until the surface feels slightly damp but not soggy—this is your cue that the soil is ready.
Planting Sequence Matters: In Step 3, planting from tallest to shortest ensures that each layer has the space it needs to thrive without competing for sunlight or nutrients. When digging holes, remember to make them twice as wide as the root ball but no deeper—this encourages roots to spread horizontally rather than growing downward. After planting, I press the soil gently around the roots to eliminate air pockets, then water thoroughly. This step is critical for establishing strong root systems right from the start, which translates to healthier plants in the long run.
Maintenance is Key to Longevity: Step 4 highlights the importance of seasonal care, but I can’t stress enough how critical it is to stick to the once-a-week deep watering schedule during the growing season. Morning watering is ideal because it allows foliage to dry before nightfall, reducing the risk of fungal diseases. Additionally, dividing perennials every 3-4 years prevents overcrowding and rejuvenates plants, ensuring they continue to bloom vigorously. I’ve found that a quick check for yellowing leaves or wilting in early summer can save a struggling plant before it’s too late.
Pro Tips for Mixed Border Garden
- Creating a thriving mixed border requires thoughtful planning and attention to detail—here are the essential tips to ensure your garden flourishes year after year.
- Layering for Visual Impact: In Step 1, when planning your layers, consider the mature heights of your plants to create a seamless transition between the backdrop, mid-layer, and foreground.
- Soil Preparation is Non-Negotiable: Step 2 emphasizes the importance of amending your soil with 2-3 inches of compost and testing the pH to ensure it falls within the ideal range of 6.0-7.0.
Frequently asked questions
Got questions about creating or maintaining a mixed border garden? You’re not alone! Here are some of the most common queries—and their practical solutions—to help you design a stunning, low-maintenance border that blooms all year.
What’s the best way to start a mixed border garden on a budget?
Begin with perennials (they return yearly!) and native plants—they’re often cheaper and thrive with minimal care. Shop at local plant swaps, check discount racks at nurseries, or propagate cuttings from existing plants. Even a few well-placed shrubs or ornamental grasses can create depth without breaking the bank.
How long does it take for a mixed border to look established?
With the right mix, you’ll see progress in 1–2 seasons. Fast growers like coneflowers or black-eyed Susans fill gaps quickly, while slower shrubs (e.g., hydrangeas) take 2–3 years. Mulch heavily in the first year to suppress weeds and retain moisture—this speeds up the process!
Can I mix annuals with perennials in a border garden?
Annuals (like pansies or marigolds) add instant color and fill gaps while perennials establish. Just plan for seasonal swaps: Use cool-season annuals in spring/fall and heat-loving ones (e.g., petunias) in summer. Replace them yearly to avoid overcrowding perennials.
How do I keep pests and diseases from ruining my mixed border?
Prevention is key! Space plants properly for airflow (aim for 18–24 inches between perennials). Choose disease-resistant varieties (check plant tags), and rotate crops if you’re growing edibles nearby. Neem oil or companion planting (e.g., marigolds with tomatoes) can deter pests naturally.
What’s the easiest way to protect my mixed border in winter?
Mulch is your best friend! Apply 3–4 inches of mulch (straw, shredded leaves, or wood chips) after the first frost to insulate roots. For tender perennials, add a lightweight row cover or burlap wrap. Avoid heavy mulch on spring-blooming plants (like bleeding hearts)—it can smother them.
How do I refresh a tired mixed border without replanting everything?
Start with deadheading spent blooms and pruning overgrown stems. Add new layers (e.g., low-growing ajuga or heuchera) to fill gaps, and swap out a few underperformers for bold foliage plants (like hostas or heucheras). A fresh mulch layer can also work wonders!
Wrapping up and next steps
A mixed border garden is more than just a pretty sight—it’s a living masterpiece that brings color, texture, and life to your outdoor space year-round. By blending perennials, shrubs, and seasonal blooms, you create a resilient, low-maintenance haven that thrives with minimal effort.
Whether you’re a seasoned gardener or just starting, this layered approach ensures beauty without the fuss.
Ready to transform your garden? Start small—pick one corner or a single bed—and let your creativity bloom! 🌸 With the right plants and a little patience, your mixed border will reward you with stunning, ever-changing beauty that keeps evolving with the seasons.