
Tools
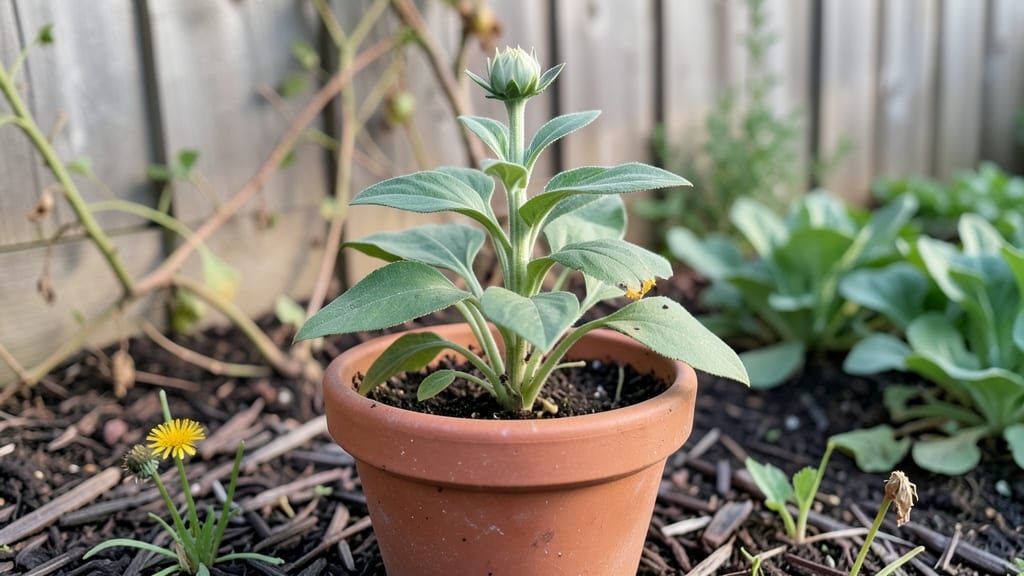
Starting your first garden doesn’t have to feel overwhelming—it’s about turning a patch of earth into a vibrant, low-maintenance haven where you can watch life grow. 🌱 I remember my first attempt: a single sunflower seedling that bloomed taller than me, proving even the smallest start can yield something extraordinary.
The key is beginning with plants that thrive on neglect, like marigolds, zinnias, or cosmos, and focusing on a space that gets at least six hours of sunlight daily.
You’ll need just a handful of basics: a trowel, gloves, a watering can (or hose attachment), and a bag of good-quality potting soil or compost. For small spaces, containers work perfectly—just ensure they have drainage holes.
My first garden lived in a 5-gallon bucket on my apartment balcony, and it produced more herbs than I could use. The biggest mistake beginners make? Overcomplicating it. Start small: a 4-by-4-foot bed or a single container is plenty to learn the ropes.
Within weeks, you’ll see those first green shoots pushing through the soil, and by summer, your garden will burst with color and life. The air will smell sweeter, your stress will melt away, and you’ll realize how rewarding it is to grow something with your own hands.
This isn’t just about flowers—it’s about confidence, patience, and the quiet joy of watching nature respond to your care.
Whether you’re working with a backyard plot, a balcony, or even a sunny windowsill, the principles stay the same: choose the right spot, pick resilient plants, and keep it simple. Here’s how to make your first garden not just possible, but thriving—and why it’s worth every minute of effort.
📚 In This Guide
- What you need
- Instructions
- Tips and common mistakes
- Wrapping up and next steps
What you need
- ● Soil: 1–2 bags of high-quality potting mix (1–2 cubic feet per plant) or garden soil (if amending with compost). Look for labels like "organic" or "peat-free."
- ● Seeds or seedlings: Beginner-friendly options: marigolds, sunflowers, basil, lettuce, or zucchini (5–10 seeds/seedlings per variety).
- ● Check seed packets for sunlight needs (full sun vs. partial shade).
- ● Containers or garden space: For pots: 5–10-gallon containers (one per plant; ensure drainage holes!).
- ● For ground planting: A 4’x4’ plot (or larger, if space allows).
- ● Watering tools: A watering can (1–2 gallons) or hose with adjustable nozzle.
- ○ Drip irrigation kit (optional but saves time; ~$15–$30).
- ● Basic tools: 1 hand trowel (for digging small holes).
- ● 1 garden fork or spade (for turning soil).
- ● 1 pruning shears (for trimming dead leaves).
- ● Compost or fertilizer: 1 bag of balanced organic fertilizer (10-10-10) or worm castings (~$10–$20).
- ● Mulch: Straw or shredded bark (~$5–$15) to retain moisture.
- ● Garden gloves: A pair of nitrile-coated gloves (~$10) to protect your hands.
- ● Plant markers: Wooden sticks or labels to track what’s what.
- ● Sunlight meter: A digital light meter (~$20) if your space has tricky lighting.
Instructions: laying out your first low-maintenance garden
Start with a simple design that grows bold, hardy blooms with minimal fuss.
🪴 Step 1: Choose and Prepare Your Planting Area
Pick a spot that gets at least 6 hours of sunlight daily—most blooming plants thrive with full sun. Clear the area of weeds, rocks, and debris, then mark your garden shape with stakes and string for clean lines. I like to sketch a rough layout first to visualize spacing before digging.
For a beginner-friendly design, focus on 4-5 plants total to avoid overwhelm. Group plants with similar water needs together—this makes maintenance a breeze. Test your soil by squeezing a handful; if it crumbles easily, it’s ready. If it sticks together, amend with 2 inches of compost to improve drainage and fertility.
🌱 Step 2: Dig and Amend the Soil
Loosen the top 6-8 inches of soil with a garden fork or trowel, breaking up any compacted layers. This helps roots spread easily. Work in a 2-inch layer of compost into the top 6 inches of soil—this feeds plants slowly and improves texture over time.
If your soil is heavy clay, mix in 1 part sand or perlite per 3 parts soil to help water drain better. Avoid tilling too deeply; most garden plants don’t need roots deeper than 12 inches. After amending, rake the surface smooth to create a level bed for planting.
☀️ Step 3: Plant Your Chosen Bloomers
Dig holes twice as wide as the root ball but only as deep as the container’s base. Gently remove plants from their pots, tease apart any circling roots, and place them in the holes so the top of the root ball sits ½ inch below soil level. This prevents stem rot from sitting too low.
Fill the hole with soil, pressing lightly around the base to remove air pockets. Water deeply right after planting to settle the soil and encourage roots to spread. Space plants 12-18 inches apart unless the tag says otherwise—crowding leads to competition for water and nutrients, which stresses plants.
💧 Step 4: Mulch and Water for Establishment
Spread a 2-inch layer of mulch over the soil surface, keeping it 2 inches away from plant stems to prevent rot. Mulch locks in moisture, suppresses weeds, and keeps roots cool. I use shredded bark or straw—both work well for beginners.
Water immediately after mulching, giving each plant 1 gallon of water to help roots settle. Check soil moisture daily for the first week by sticking your finger 1 inch deep**—if it feels dry, water again. After that, water 2-3 times per week, adjusting based on rainfall. Overwatering is the fastest way to kill new plants.
✂️ Step 5: Monitor and Maintain for First Blooms
Watch for pests like aphids or chewed leaves—early action prevents major damage. Spray off soft-bodied bugs with water or use neem oil if needed. Deadhead spent blooms by pinching off faded flowers with your fingers; this redirects energy to new growth and prolongs flowering.
Fertilize lightly every 4-6 weeks with a balanced, slow-release fertilizer. Too much nitrogen makes plants leafy but flowerless. Prune leggy stems back by ⅓ their length in early summer to encourage bushier, fuller plants. With consistent care, your first garden will burst into color within 6-8 weeks.
Tips & tricks for perfect low-maintenance gardens
Here's what I learned after planting and maintaining my first garden—these tricks will help you avoid common mistakes and create a thriving space with minimal effort.
Sunlight Secret: That 6 hours of sunlight is non-negotiable for most blooming plants. I learned this the hard way when my petunias struggled in partial shade. If your yard has limited sun, choose shade-tolerant plants like impatiens or ferns instead. For maximum blooms, position taller plants on the north side of your garden to avoid shading smaller varieties.
Soil Prep Strategy: When amending your soil with the 2 inches of compost, mix it into the top 6 inches—not just on the surface. This creates a nutrient-rich zone where roots can access food throughout the growing season. For heavy clay soil, I found that mixing in 1 part sand or perlite really makes a difference—it improves drainage without making the soil too sandy. Think of it as giving your plants a spa treatment!
Planting Depth Tip: The ½ inch below soil level rule for planting is crucial—it prevents stem rot while keeping roots anchored. I use a small stick as a marker when digging holes to ensure consistent depth. For container plants, gently squeeze the root ball to check if it's ready for planting—if it's rock-hard, it needs more water before going in the ground.
Watering Wisdom: Those first few weeks are critical! After planting, I water each plant with 1 gallon right away to help roots establish. Then I check soil moisture by sticking my finger 1 inch deep—if it feels dry, it's time to water. Overwatering is a common mistake, so I always wait until the top inch is dry before adding more water. A drip irrigation system can help automate this process if you're forgetful.
Pro Tips for My First Garden
- Here's what I learned after planting and maintaining my first garden—these tricks will help you avoid common mistakes and create a thriving space with minimal effort.
- Sunlight Secret: That 6 hours of sunlight is non-negotiable for most blooming plants.
- Soil Prep Strategy: When amending your soil with the 2 inches of compost, mix it into the top 6 inches—not just on the surface.
Frequently asked questions
Got questions about diving into your first garden? You’re not alone—every green thumb starts somewhere! Here are answers to the most common queries to help you grow with confidence.
What’s the best time of year to start my first garden?
For most regions, spring (after the last frost) is ideal—soil warms up, and plants wake from dormancy. However, cool-season crops (like lettuce or spinach) thrive in early spring or fall. Check your USDA Plant Hardiness Zone for local timing tips!
How much does a beginner garden really cost?
Start small! A basic garden costs $20–$100 for seeds, soil, pots, and tools. Reuse containers (milk jugs, old buckets) and swap seeds with friends to cut costs. Pro tip: Buy seeds over seedlings—cheaper and more variety!
Can I grow a garden in a small space or apartment?
Container gardening
is perfect for balconies or windowsills. Try herbs (basil, mint), lettuce, or cherry tomatoes in pots. Even a hanging planter works for strawberries or peppers. Sunlight is key—aim for 6+ hours/day.
What do I do if pests or weeds take over?
Don’t panic! Start with prevention: healthy soil (compost helps!) and hand-picking pests early. For weeds, pull them before they seed. Use neem oil or soapy water sprays for mild infestations. Pro tip: Ladybugs eat aphids—invite them naturally!
How often should I water my first garden?
Water deeply 1–2 times/week (check soil moisture—top inch should be dry). Early morning is best to reduce evaporation. Overwatering is worse than underwatering—yellow leaves = too much H₂O. Mulch (straw or shredded leaves) helps retain moisture.
Wrapping up and next steps
Starting your first garden is an exciting journey filled with learning, growth, and the joy of nurturing life! 🌱 You’ve now got the tools, tips, and confidence to create a thriving, low-maintenance space that brings beauty to your world.
Remember, every expert gardener began exactly where you are today—with a handful of seeds and big dreams.
Ready to take the next step? Start small, celebrate every sprouting seed, and let your garden grow with you! Whether you’re expanding your plot, experimenting with new plants, or simply soaking in the satisfaction of your hard work, the real reward is in the process. Happy gardening! 🌸