Tools
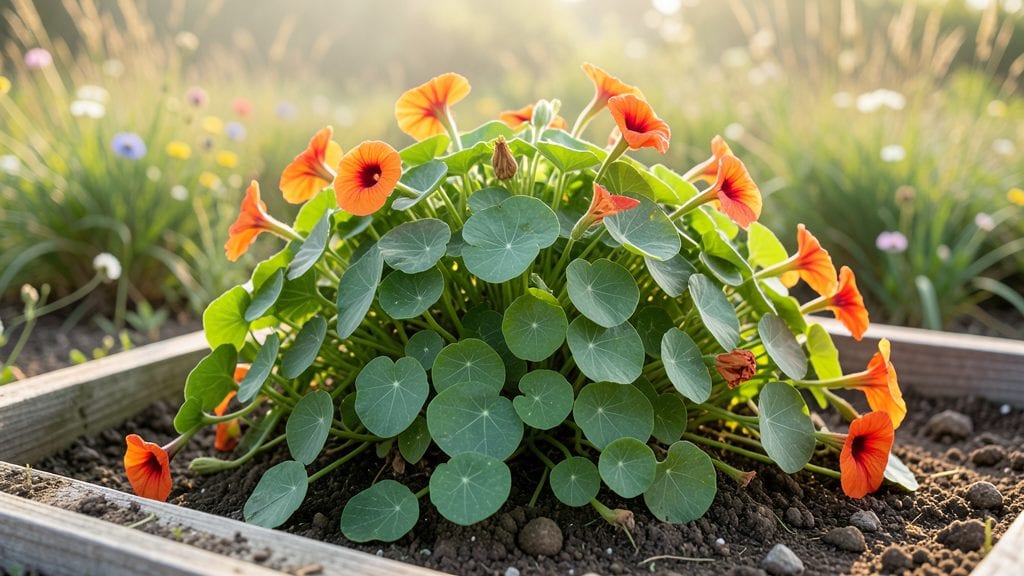
Nasturtiums in gardens are the secret weapon I wish I’d discovered sooner—edible flowers that double as pest-repelling powerhouses with a pop of color that makes every border look intentional. 🌸 The first time I scattered them near my tomatoes, I watched squash bugs scatter like they’d seen a ghost, while my salads got a peppery garnish for free.
They’re shockingly versatile: spill them over container edges for a cascading display, tuck them into vegetable rows to deter aphids, or let them climb trellises for vertical drama. The deep orange ‘Empress of India’ stands out against silver foliage, while ‘Alaska’ mixes white and yellow for a dreamy cottage look.
Even the leaves are edible—add them raw to salads for a spicy kick.
You’ll love how low-maintenance they are—they thrive in poor soil, bloom all summer, and self-seed like crazy, meaning fewer chores and more color. Plus, bees adore them, turning your garden into a pollinator paradise without extra effort. The only downside? You might get hooked on growing them everywhere.
Works in sun or partial shade, from window boxes to full sun borders, and pairs beautifully with herbs, brassicas, and climbing roses. Here’s how to weave them into your garden like a pro—without sacrificing beauty for function.
📚 In This Guide
- What you need
- Instructions
- Tips and common mistakes
- Wrapping up and next steps
What you need
- ● Nasturtium seeds: Choose between Tropaeolum majus (trailing types) or Tropaeolum minus (bush varieties). Start with 1–2 seed packets (about 50–100 seeds total) for a small garden or 3–4 packets for larger spaces.
- ● Well-draining potting soil: 5–10 gallons (or enough to fill your chosen containers). Mix in perlite or compost (10–20%) for extra drainage and nutrients.
- ● Containers or garden beds: Containers: 5–10-inch pots (1–2 per plant) with drainage holes. Opt for fabric grow bags or terracotta pots for trailing varieties.
- ● Garden beds: A sunny spot with 6+ hours of light and loose, fertile soil. Amend clay soil with sand or coconut coir if needed.
- ● Watering can or hose with a gentle spray nozzle: Nasturtiums hate soggy roots—aim for 1 inch of water per week (adjust for rain).
- ○ Fertilizer (optional but helpful): Balanced liquid fertilizer (e.g., 10-10-10) or compost tea to boost growth. Use every 4–6 weeks during the growing season.
- ● Avoid high-nitrogen fertilizers—they promote leafy growth over flowers!
- ● Trellis or obelisk: For trailing nasturtiums, add a 5–6 ft tall trellis or cage to train vines upward.
- ● Mulch: Straw or shredded leaves (2–3 inches) to retain moisture and suppress weeds.
- ● Edible flower snips: A pair of clean, sharp scissors for harvesting flowers and leaves (they’re 100% edible!).
- ● Companion plants: Pair nasturtiums with tomatoes, cucumbers, or radishes to maximize pest-repelling benefits.
- ● Decorative stones or pebbles: For a polished look in containers, add a 1-inch layer on top of soil.
Step-by-step instructions for planting and maintaining nasturtiums in your garden
Here’s how to grow these vibrant, pest-repelling edible flowers for both beauty and function.
🌱 Step 1: Choose the Right Location and Prepare the Soil
Nasturtiums thrive in full sun to partial shade, but they tolerate light shade better than many flowers. Pick a spot with at least 4-6 hours of sunlight daily—more sun means more blooms, but they’ll still grow in dappled shade. Avoid heavy, compacted soil; nasturtiums prefer loose, well-draining earth where roots can spread freely.
Before planting, loosen the top 6-8 inches of soil with a garden fork or trowel. Amend with a handful of compost if your soil is heavy clay or sandy. Nasturtiums aren’t fussy about soil pH, but they’ll reward you with better growth if the soil is slightly acidic to neutral (6.0-7.0). Work in a thin layer of compost to improve drainage and fertility without overfeeding—these plants prefer lean conditions.
🌿 Step 2: Plant Seeds or Transplants at the Right Time
Sow seeds directly in the garden after the last frost when soil temperatures reach at least 50°F. Nasturtiums germinate best in warm soil, so don’t rush planting in cool spring conditions. For a longer bloom season, make successive plantings every 2-3 weeks until early summer. You’ll see faster germination if you soak seeds overnight in lukewarm water—this softens the tough outer shell and speeds up sprouting.
Plant seeds ½ inch deep and 12-18 inches apart for trailing varieties or 8-10 inches apart for bush types. Press them lightly into the soil to ensure good contact, then cover with a thin layer of fine compost or vermiculite to retain moisture. Water gently but avoid soaking the seeds, which can wash them away or cause rot. Keep the soil consistently moist until germination, which typically takes 7-14 days.
💧 Step 3: Water and Fertilize for Healthy Growth
Nasturtiums are drought-tolerant once established, but they need consistent moisture during their first 4-6 weeks of growth. Water deeply 1-2 times per week, aiming for 1 inch of water per week. Let the top inch of soil dry out between waterings to prevent root rot—these plants hate soggy feet. Morning watering is ideal; it gives leaves time to dry before evening, reducing fungal risks.
Skip heavy fertilization—nasturtiums grow best in poor soil and can become leggy or produce fewer flowers if overfed. Instead, side-dress with a light application of compost or a balanced organic fertilizer (5-5-5 ratio) once during the growing season. Too much nitrogen leads to lush foliage but fewer blooms, which is the whole point of growing these edible beauties.
✂️ Step 4: Prune and Harvest for Continuous Blooms
Pinch back the tips of young plants when they reach 6-8 inches tall to encourage bushier growth and more flowers. This simple step prevents leggy stems and ensures a compact, productive plant. Regularly deadhead spent blooms by snipping off the flower head just above a set of leaves. This redirects the plant’s energy into producing new blooms instead of seed pods.
Harvest flowers and leaves as needed for culinary use, but never take more than 20-30% of the plant at once. Nasturtiums are edible from root to bloom, but over-harvesting weakens the plant. Pick flowers in the morning when they’re fully open and still fresh. Use sharp scissors or pruners to avoid damaging stems. You’ll love how their peppery flavor brightens salads, garnishes, and even pest-repellent homemade sprays.
☀️ Step 5: Manage Pests and Encourage Pollinators
Nasturtiums naturally repel aphids, squash bugs, and whiteflies, but they can still attract pests like spider mites in dry conditions. Keep plants well-watered to deter these critters, and blast off any mites with a strong spray of water. Their vibrant colors also attract pollinators like bees and butterflies, making them a dual-purpose plant for both pest control and garden biodiversity.
If you notice yellowing leaves or stunted growth, check for powdery mildew—a common issue in humid conditions. Improve airflow by spacing plants properly and avoid overhead watering. Nasturtiums are generally low-maintenance, but a light application of neem oil can help if fungal issues arise. With minimal care, these hardy annuals will reward you with months of color, flavor, and pest protection.
Tips & tricks for perfect nasturtium growth
Between us, these vibrant flowers are deceptively easy to grow once you know the right tricks. I've learned the hard way about soil prep and pest management—here's what nobody tells you.
The Soil Secret: Nasturtiums thrive in lean soil, but don't skip the compost entirely. Work in just a thin layer (about 1 inch) when loosening that top 6-8 inches—they'll actually produce fewer blooms if you over-fertilize. I've seen plants go from lush to leggy overnight when overfed, and that's exactly what you don't want.
Timing is Everything: That 50°F soil temperature isn't just a suggestion—it's when nasturtium seeds finally wake up from dormancy. I've tried planting too early in cool spring soil, and the seeds just sat there for weeks. Pro tip: Bury a soil thermometer 2 inches deep to track temperatures accurately, especially if your spring is unpredictable.
Germination Hack: Soaking seeds overnight in lukewarm water cuts germination time nearly in half. The secret is using water that's warm to the touch but not hot—think bathwater temperature. This softens the tough seed coat while preventing damage. I've seen germination jump from 10-14 days to just 5-7 days with this simple step.
Pest Prevention Strategy: The 4-6 hours of sunlight requirement isn't just about blooms—it's also about keeping pests at bay. Nasturtiums naturally repel aphids when they get enough sun, but I've found that adding a layer of mulch around plants creates a microclimate that deters even spider mites. Use straw or shredded leaves—just keep it 2-3 inches away from stems to prevent rot.
Pro Tips for Nasturtium In Garden
- Between us, these vibrant flowers are deceptively easy to grow once you know the right tricks.
- The Soil Secret: Nasturtiums thrive in lean soil, but don't skip the compost entirely.
- Timing is Everything: That 50°F soil temperature isn't just a suggestion—it's when nasturtium seeds finally wake up from dormancy.
Frequently asked questions
Got questions about growing and using nasturtiums in your garden?
Here are some of the most common ones—plus quick, practical answers to help you make the most of these vibrant, edible flowers!
When is the best time to plant nasturtiums?
Nasturtiums thrive in cool to mild weather, so plant them 2-4 weeks before your last frost date in spring or 6-8 weeks before your first frost in fall. They’re annuals, so they won’t survive harsh winters. For year-round blooms, stagger plantings every 2-3 weeks.
Do nasturtiums really repel pests naturally?
Nasturtiums act as a natural pest deterrent for aphids, whiteflies, squash bugs, and even rabbits. Their peppery scent confuses pests, and their bright blooms attract beneficial predators like ladybugs. Plant them near vegetables (like tomatoes, cucumbers, or brassicas) for extra protection.
How often should I water nasturtiums?
Nasturtiums are drought-tolerant once established, but young plants need consistent moisture to prevent wilting. Water deeply 1-2 times per week, letting soil dry slightly between waterings. Overwatering can lead to root rot, so well-draining soil is key!
Can I grow nasturtiums in containers or hanging baskets?
Yes! Nasturtiums are perfect for containers—they thrive in hanging baskets, window boxes, or pots with at least 6-12 inches of depth. Choose trailing varieties (like ‘Alaska’ or ‘Black Velvet’) for cascading beauty. Just ensure pots have drainage holes and use a light, well-draining potting mix.
How do I harvest nasturtium flowers and leaves for eating?
Harvest young leaves and fully open flowers for the best flavor. Pinch off leaves with clean scissors or snip flower stems just above a leaf node. Morning harvests yield the freshest, most vibrant blooms. Use them raw in salads, as garnishes, or even in pestos!
Why are my nasturtium leaves turning yellow?
Yellowing leaves usually signal overwatering, poor drainage, or nutrient deficiency. Check soil moisture—nasturtiums prefer it slightly dry. If leaves are crispy or brown, it’s likely underwatering. For yellowing between veins, it may be nitrogen deficiency; try a balanced fertilizer or compost.
Wrapping up and next steps
Incorporating nasturtiums into your garden isn’t just about adding beauty—it’s a smart, natural way to boost pest control, attract pollinators, and even spice up your meals! 🌸 These hardy, low-maintenance flowers are a win-win for both your garden and your plate.
Whether you’re a seasoned gardener or just starting out, nasturtiums prove that growing edible, functional plants can be simple and rewarding.
Ready to take the next step? Start small—plant a few seeds in containers or along your veggie beds—and watch your garden thrive naturally. Happy planting! 🌱