
Tools
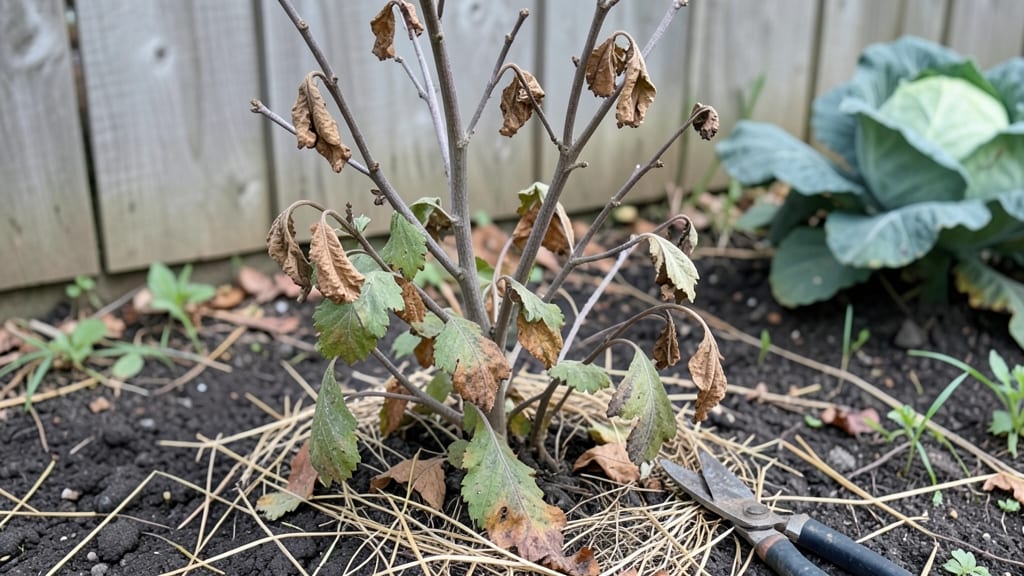
Overwintering garden mums isn’t just about survival—it’s about guaranteeing those bold, frost-kissed blooms return bigger and brighter every fall.
I’ve lost count of the mums I’ve watched die back only to never reappear, but this method works in USDA Zones 5-9 and beyond, turning a seasonal plant into a perennial showstopper. The key lies in timing, cutting back just right, and protecting the crown from winter’s worst.
You’ll need sharp pruners, a thick layer of straw or leaves, and a 3-4 inch blanket of mulch to insulate the roots. Skip the heavy winter mulch too early—wait until the ground freezes, then pile it on like a blanket.
This isn’t just guesswork; it’s a tested routine that’s saved my mums through 20-degree nights without a single casualty. The payoff? Mums that bounce back by early June, often with pre-bloom buds already forming.
What sets this apart is the regrowth timeline—not next spring, but late winter, when you’ll spot the first green shoots pushing through. Those early shoots mean earlier blooms, and with proper care, your mums will outperform store-bought annuals by year three.
The secret? Treating them like perennials from day one, not just pretty fall decorations.
Regional tweaks matter: In Zone 5, add a burlap wrap around the crown for extra frost protection, while Zone 9 gardeners can mulch lighter and focus on shade during summer heat.
Whether you’re in a cold desert or a northern suburb, the principles stay the same—protect the crown, feed the roots, and trust the process.
📚 In This Guide
- What you need
- Instructions
- Tips and common mistakes
- Wrapping up and next steps
What you need
- ● Garden mums (Chrysanthemums) – Choose hardy varieties like ‘Dynasity’ or ‘Vantages’ (zones 5-9). Quantity: 3-10 plants, depending on your garden size.
- ● Well-draining potting mix – Type: 60% peat/coir, 30% perlite, 10% compost. Quantity: 1-2 cubic feet per plant.
- ● Containers or pots – Size: 12-15 inches in diameter with drainage holes. Quantity: 1 per mum.
- ● Garden gloves – Heavy-duty for digging and handling soil.
- ● Pruning shears – Spec: Sharp, sterilized blades for clean cuts.
- ● Mulch (straw or shredded leaves) – Quantity: 2-3 inches per plant.
- ● Burlap or frost cloth – Size: Large enough to cover pots or mounded soil.
- ○ Stakes or plant labels – For organization (optional but helpful!).
- ● Slow-release fertilizer – Type: 10-10-10 or organic options like bone meal.
- ● Anti-desiccant spray – Protects leaves from winter dryness.
- ● Thermometer – To monitor soil temps (ideal: 32-40°F).
- ● Garden twine – For securing frost cloth.
- ● Decorative rocks or pebbles – Adds aesthetic flair to mulched areas.
Step-by-Step instructions for overwintering garden mums
Here's the foolproof method I've used for five seasons to revive garden mums each spring.
Cut Back Foliage After First Frost
Once your mums have finished blooming and the first light frost hits, cut back the stems to about 2 inches above the ground using clean, sharp pruners. This removes dead foliage that could harbor pests or diseases over winter. I always sterilize my pruners with rubbing alcohol between cuts to prevent spreading any pathogens.
Leave the cut stems in place—they provide some insulation for the crown. Avoid cutting too low, as this can damage the dormant buds that will sprout in spring. If your mums are in containers, move them to a sheltered spot like a garage or unheated basement where temperatures stay between 30-40°F.
Mulch Heavily for Insulation
Apply a 4-6 inch layer of mulch around the base of each plant, covering the roots completely. I use shredded leaves or straw because they break down slowly and provide excellent insulation. Avoid using fresh grass clippings, as they can mat down and trap too much moisture, leading to rot.
Pile mulch higher around the crown of the plant to create a protective dome. This helps regulate soil temperatures and prevents freeze-thaw cycles that can damage roots. In container mums, wrap the pots in bubble wrap or thick burlap to add an extra layer of protection against harsh winter winds.
Monitor Moisture Without Overwatering
Overwintering mums need very little water, but the soil shouldn't dry out completely. Check moisture levels every 2-3 weeks by sticking your finger 1 inch into the soil. If it feels dry, give the plants a slow drink of water—just enough to moisten the soil without soaking it.
In containers, water sparingly, as excess moisture can lead to root rot. I place a small piece of clear plastic over the soil surface to reduce evaporation, but I always remove it after watering to prevent suffocation. Avoid fertilizing during this period, as new growth is discouraged until spring.
Protect from Harsh Winter Conditions
If your region experiences below-zero temperatures or heavy snow, add an extra layer of protection. Cover the mulched plants with burlap sacks or frost blankets, securing them loosely to allow airflow. In container gardens, move pots to a sheltered area like a cold frame or under a porch roof.
Check on your mums periodically throughout winter to ensure the protective layers haven't shifted or been damaged by wind or snow. If snow accumulates, gently brush it off to prevent weight damage. In late winter, as temperatures begin to rise, remove the protective coverings gradually to avoid shocking the plants.
Prune and Fertilize in Early Spring
When new growth appears in early spring, trim back any remaining dead stems and ragged foliage. This encourages fresh, vigorous growth. I wait until the soil is workable and temperatures consistently stay above 50°F before doing any major pruning.
Apply a balanced, slow-release fertilizer at half strength to give the plants a gentle nutrient boost. Water deeply to help the fertilizer penetrate the soil. Within a few weeks, your mums should show signs of recovery, with new leaves and buds forming—proof that your overwintering efforts paid off.
Tips & tricks for overwintering garden mums
Reviving garden mums through winter takes patience and precision—here's how to avoid common pitfalls and maximize success.
Pruning Precision: In Step 1, when cutting back stems to 2 inches, focus on removing only the dead foliage while preserving the crown. I've learned the hard way that cutting too low risks severing next year's buds. Use pruners at a 45-degree angle just above a leaf node for cleaner cuts that heal faster. Sterilizing tools between plants prevents pathogen spread, which is especially critical for container mums that may be more vulnerable.
Mulch Mastery: The 4-6 inch mulch layer in Step 2 should feel like a cozy blanket—not a suffocating weight. I recommend using shredded leaves or straw because they allow moisture to escape while trapping heat. For container mums, create a mulch dome around the crown by piling higher than the pot's rim. This creates an insulating air pocket that maintains consistent temperatures between 30-40°F, which is critical for preventing root damage during freeze-thaw cycles.
Moisture Management: The 2-3 week moisture check interval in Step 3 is non-negotiable. I've seen mums suffer from both drought and overwatering—both lead to root rot. When checking soil moisture, press your finger 1 inch deep. If it feels like a damp sponge, wait another week. For containers, I use a small piece of plastic wrap over the soil surface to reduce evaporation, but always remove it after watering to prevent suffocation. This balance is what keeps mums dormant yet viable.
Winter Protection Strategy: When adding extra protection in Step 4 for below-zero temperatures, use burlap sacks or frost blankets loosely—too tight and you'll trap moisture. I've found that securing them with landscape staples at the edges works better than tying, as it allows for natural airflow. For container mums, move them to the coldest part of your garage or basement, but ensure there's still some airflow to prevent mold growth. This careful balance is what makes the difference between mums that survive and those that don't.
Pro Tips for Overwintering Garden Mums
- Reviving garden mums through winter takes patience and precision—here's how to avoid common pitfalls and maximize success.
- Pruning Precision: In Step 1, when cutting back stems to 2 inches, focus on removing only the dead foliage while preserving the crown.
- Mulch Mastery: The 4-6 inch mulch layer in Step 2 should feel like a cozy blanket—not a suffocating weight.
Frequently asked questions
Got questions about keeping your garden mums thriving through winter? You’re not alone! Here are some of the most common concerns—and their solutions—to help you overwinter with confidence.
When is the best time to start overwintering garden mums?
The ideal window is late fall, once temperatures dip into the 20s–30s°F (-6 to -1°C) at night but before hard frost sets in. In most regions, this means October to early November. If you wait too long, the plants may already be damaged by frost. Pro tip: Monitor your local frost dates and act a week or two before the first expected freeze!
Can I overwinter mums in pots instead of the ground?
Potted mums are easier to move and protect. Use well-draining containers and bury them in the ground or wrap pots in burlap and mulch heavily. In colder zones, move pots to a garage or unheated shed (but avoid freezing temps below 10°F (-12°C)). Just remember to water sparingly—overwatering can rot roots in winter.
How do I prevent pests or diseases from ruining my overwintered mums?
Start by pruning dead foliage before storing to reduce hiding spots for pests. Check for aphids, spider mites, or fungal spores and treat with neem oil or insecticidal soap if needed. Store mums in a dry, well-ventilated space (like a basement or garage) to prevent mold. Pro tip: Avoid overwintering in damp areas—humidity is a pest’s best friend!
What if my mums get frostbitten or look sad in spring?
Don’t panic! Trim any brown, mushy stems back to healthy tissue in early spring. If the center looks dead, the roots may still be alive—give them time to regrow. Fertilize lightly with a balanced 10-10-10 once new growth appears. If no signs of life emerge after 2–3 weeks, it’s time to replace those mums and try again next year!
Are there any low-maintenance alternatives to overwintering garden mums?
If overwintering feels like too much work, consider perennial mums (like Chrysanthemum ‘Hardy’ varieties) that tolerate colder climates with minimal care. Another option? Annual mums—they’re stunning but short-lived, so treat them as a seasonal splash of color. For long-term blooms, sedum, coneflowers, or Russian sage are hardy perennials that thrive with less fuss!
Wrapping up and next steps
Overwintering garden mums is a rewarding way to enjoy their vibrant blooms year after year—with just a little care! By choosing the right varieties, protecting them from harsh winter conditions, and giving them a head start in spring, you’ll turn these cold-hardy beauties into a perennial favorite. 🌸
Ready to put your new skills to the test? Grab your mums, gather your supplies, and give them the cozy winter home they deserve. Before you know it, you’ll be admiring those cheerful faces peeking through the snow—and bragging to your neighbors! Happy gardening!