
Tools
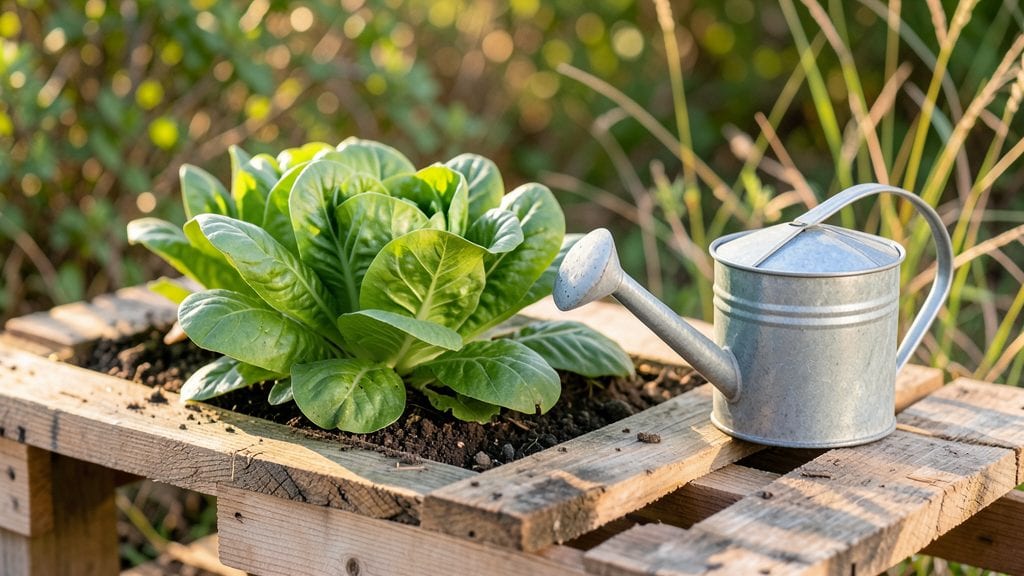
Transforming old pallets into a functional gardening bench gives your yard both style and space-saving smarts—no fancy tools or power equipment required. I built mine last spring after realizing my patio was crammed with potted plants that needed more room but had nowhere to go.
The best part? It’s sturdy enough to double as seating while keeping herbs, flowers, or veggies within arm’s reach.
You’ll need just three pallets (untreated wood only), a few screws, and some basic hardware to assemble this project in under two hours. Sanding the edges smooths out the rustic look while preventing splinters—trust me, your hands will thank you.
For extra durability, stain or seal the wood before planting, especially if you’re using it in wetter climates.
Once built, the possibilities are endless: line the top with landscape fabric to keep weeds at bay, plant trailing nasturtiums for color, or tuck in compact veggies like lettuce and radishes.
The bench’s height makes tending plants a breeze, and the vertical sides create a cozy nook for morning coffee or evening reading. Plus, it’s the perfect way to give pallets a second life instead of tossing them.
This design works for small urban patios, balcony edges, or even alongside fences—just adjust the pallet length to fit your space. If you’re worried about drainage, drill a few holes in the bottom or add a tray underneath.
The key is keeping it simple: functional, pretty, and built to last through multiple growing seasons.
📚 In This Guide
- What you need
- Instructions
- Tips and common mistakes
- Wrapping up and next steps
What you need
- ● Wooden pallets: 2–3 sturdy, clean pallets (preferably heat-treated or marked "HT" for safety). Avoid chemically treated pallets (marked "MB" or "CH").
- ● Screws: 2.5–3" deck screws or exterior-grade wood screws (50–100 pieces, depending on pallet size).
- ● Sandpaper: Medium-grit (80–120) and fine-grit (220) for smoothing rough edges.
- ○ Wood glue: Exterior-grade (optional but recommended for added stability).
- ● Staple gun & staples: For attaching landscape fabric or weed barrier (if using).
- ● Potting soil: 1–2 cubic feet (depending on bench size and plant depth needs).
- ● Plants/seeds: Choose shallow-rooted varieties like herbs, succulents, or strawberries!
- ● Power drill/driver (with screw attachment).
- ● Saw: Handsaw or circular saw (for cutting pallet wood if needed).
- ● Measuring tape & pencil (for marking cuts and measurements).
- ○ Clamps (optional): Helpful for holding pieces steady while screwing.
- ○ Paint/stain & brush (optional): For weatherproofing or customizing the look.
- ● Landscape fabric: Line the bottom to prevent soil from leaking through pallet gaps.
- ● Cushions or outdoor fabric: Add seating comfort for a cozy garden nook.
- ● LED string lights: For ambiance (battery-powered or solar!).
- ● Wood preservative: Extends the bench’s lifespan in rainy climates.
Step-by-Step instructions for building a pallet gardening bench
Transforming a simple pallet into a functional garden bench takes less than a weekend. Here's how to create a sturdy, upcycled planter that elevates your garden space.
Source and Prepare Your Pallets
Start by selecting two clean, dry wooden pallets—heat-treated ones are safest for garden use. Sand down any rough edges or splinters with 80-grit sandpaper to prevent injuries. I like to remove the top layer of boards from one pallet to create a flat planting surface, leaving the bottom intact for bench seating. Use a circular saw to cut the boards cleanly if needed, but keep the pallet structure intact for stability.
Check for loose nails or screws and remove them with a pry bar—rusty hardware can leach into your soil. If you find treated wood, test it first by soaking a small piece in water for 24 hours. If the water turns dark or has a chemical smell, avoid using it for edible gardens. Once prepped, lay both pallets side by side to visualize your bench layout.
Assemble the Bench Frame
Flip the untreated pallet upside down to create the seat. Place it horizontally between the two vertical pallets, aligning the edges evenly. Use 2-inch exterior wood screws to secure the seat pallet to the vertical supports at each corner, pre-drilling holes to prevent splitting. I add L-brackets at the base for extra reinforcement—these hidden connectors keep the structure from wobbling over time.
For added durability, reinforce the corners by attaching 2x4 wood supports diagonally between the pallets. Cut them to fit snugly and secure with screws. This step ensures your bench won’t sag under weight or shift when you sit. Test the stability by gently rocking it—if it moves more than an inch, add another support or tighten the screws.
Create the Planter Section
Line the top of the vertical pallets with landscape fabric to prevent soil from falling through the gaps. Staple it securely along the edges, leaving a 2-inch overhang on the sides. Fill the planting area with 3 cubic feet of potting mix, pressing it lightly to eliminate air pockets. Leave about 1 inch of space below the rim to accommodate watering without spillage.
Plant your chosen herbs or flowers directly in the soil, spacing them according to their mature size. I like to add slow-release fertilizer mixed into the soil for a nutrient boost. Water the plants thoroughly after planting to settle the soil and encourage root growth. The bench’s height makes it easy to tend to your garden without bending.
Add Finishing Touches for Functionality
Attach 2x4 slats along the sides of the seat pallet to create armrests, securing them with screws. This adds comfort and prevents soil from spilling onto the bench surface. For extra durability, apply a non-toxic wood sealant to protect the pallets from moisture and pests. Avoid stain or paint—it can leach into the soil and harm plants.
Place the finished bench in a location with 6+ hours of sunlight for optimal plant growth. The elevated design improves airflow around the roots, reducing the risk of fungal diseases. If you’re using it in a high-traffic area, add feet made from scrap wood to prevent the pallets from sitting directly on grass or soil, which can rot over time.
Maintain and Enjoy Your Upcycled Bench
Water the plants in the planter section deeply 2-3 times per week, checking the soil moisture by sticking your finger 1 inch below the surface. The bench’s design makes it easy to reach the back without stretching. I like to rotate the planter every few weeks to ensure even sun exposure—just lift and turn the entire section gently.
Every 3-4 months, refresh the potting mix by adding a 1-inch layer of compost to the surface. This keeps nutrients abundant without overwhelming the plants. If the pallets show signs of wear, sand and reseal them to extend their lifespan. With proper care, your upcycled bench will serve as both a functional planter and a charming garden feature for years.
Tips & tricks for building a sturdy pallet gardening bench
A few key strategies will help you avoid common pitfalls and create a bench that lasts for years. Here's what I've learned from building several of these over time.
Material Safety First: In Step 1, when testing treated wood, I've found that the 24-hour water test is crucial—don't skip it! Some pallets might look clean but still contain harmful chemicals. For edible gardens, I always opt for heat-treated pallets marked with "HT" stamps. If you're unsure about a pallet's origin, it's better to source new, untreated wood from a local lumberyard than risk contaminating your plants.
Stability is Everything: During Step 2, don't underestimate the importance of those diagonal 2x4 supports. I've seen benches wobble dramatically without them, especially when people sit on the armrests. Test the stability by gently rocking it after assembly—if it moves more than an inch, add another support or tighten the screws. This small extra step prevents accidents and extends your bench's lifespan significantly.
Planter Section Pro Tips: When creating the planter in Step 3, I recommend using a heavier landscape fabric that's rated for garden use. Cheaper fabrics can tear easily when wet, allowing soil to fall through. Also, leave that 1-inch space below the rim—it makes watering much easier and prevents spillage when you're tending to your plants. I've learned this the hard way after dealing with soggy soil and messy cleanup!
Maintenance Made Easy: For Step 5, I've found that applying a non-toxic wood sealant every 12-18 months keeps the pallets looking fresh and protects against moisture. The 3-4 month compost refresh schedule works perfectly for herbs and small flowers, but if you're planting heavier feeders like tomatoes, consider adding compost every 2 months instead. This simple adjustment prevents nutrient depletion and keeps your plants thriving.
Pro Tips for Pallet Gardening Bench
- A few key strategies will help you avoid common pitfalls and create a bench that lasts for years.
- Material Safety First: In Step 1, when testing treated wood, I've found that the 24-hour water test is crucial—don't skip it!
- Stability is Everything: During Step 2, don't underestimate the importance of those diagonal 2x4 supports.
Frequently asked questions
Got questions about building or using a pallet gardening bench?
You’re not alone! Here are some of the most common inquiries—plus quick, practical answers to help you get started (or troubleshoot) with confidence.
What’s the best wood type for a pallet gardening bench?
Opt for untreated, heat-treated, or HT (heat-treated) pallets—these are safe for gardening and free of harmful chemicals. Avoid chemically treated pallets (marked with "MB" for methyl bromide), as they can leach toxins into soil. If unsure, sand and seal the wood with food-safe paint or linseed oil for extra safety.
How long does it take to build a pallet gardening bench?
For beginners, expect 2–4 hours if you’re using pre-cut pallets and basic tools. Speed up the process by pre-drilling holes and skipping intricate designs. Pro tip: Gather all materials first—missing a screw or sandpaper mid-project adds unexpected time!
Can I use a pallet gardening bench indoors?
Yes, but with caution! Keep it away from high-moisture areas (like bathrooms) to prevent warping or mold. For indoor use, seal the wood thoroughly and avoid planting heavy, water-intensive plants. A small herb garden or succulents work beautifully on a bench near a sunny window.
What if my pallet bench starts rotting or attracts pests?
Rotting? Sand down damaged areas and reapply a food-safe sealant. Pest issues (like termites) often stem from damp wood—ensure proper drainage and avoid placing the bench directly on grass. Pro tip: Elevate the bench slightly with bricks or cinder blocks to improve airflow and deter critters.
Are there alternatives if I don’t have pallets?
Upcycle old wooden crates, fence pickets, or even cinder blocks stacked with wooden planks. For a no-waste option, repurpose broken furniture (like an old dresser) by removing drawers and adding planter boxes. Just ensure all materials are non-toxic and sturdy!
Wrapping up and next steps
Transforming a simple pallet into a functional gardening bench is more than just upcycling—it’s a creative way to blend sustainability, style, and practicality into your outdoor space.
Whether you’re a DIY enthusiast or a gardening lover, this project proves that great things come from repurposing with a little effort and imagination. 🌱
Ready to take the next step? Grab your tools, gather your materials, and start building! Your future garden oasis—and a cozy spot to enjoy it—awaits.