Tools
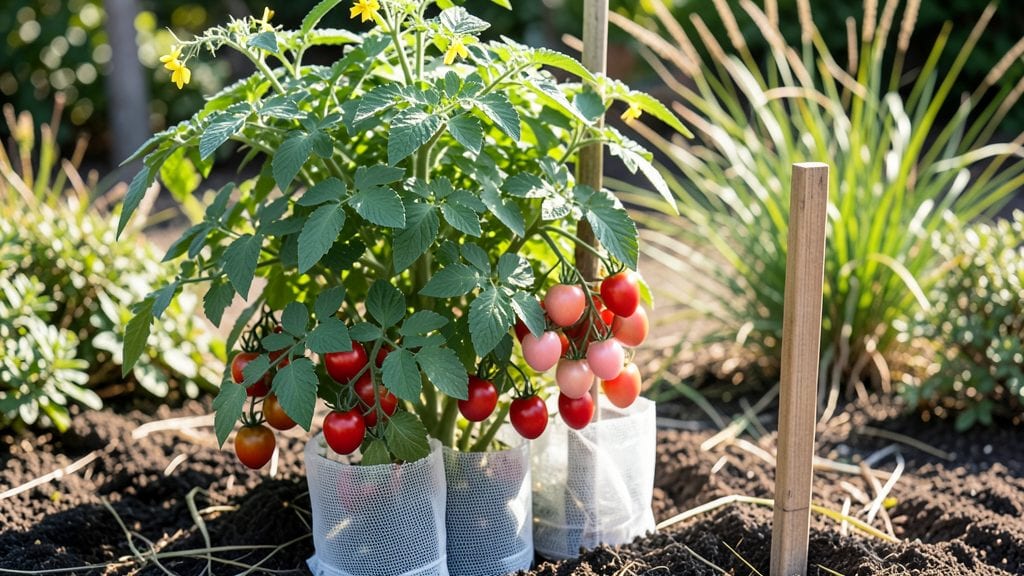
Those protective garden sleeves saved my tomato plants last October when temperatures plunged to 28°F—something I never thought possible. 🌱 These simple fabric tubes create microclimates that shield tender stems from windburn, freezing, and even hungry pests without chemicals.
The best part? You can make them yourself in under an hour with materials you already own.
They come in three main types: frost sleeves for cold protection, mesh sleeves to keep pests out while allowing sunlight in, and shade sleeves for plants that scorch in intense afternoon sun. For seedlings, a lightweight cotton sleeve works wonders, while thicker polyester handles heavier winds.
I’ve used them on everything from basil to peppers, and the results speak for themselves—plants that would’ve died keep thriving.
By late spring, you’ll notice leaves staying crisp and stems growing stronger than ever. The sleeves also extend harvests by weeks, letting you enjoy homegrown produce long after neighbors are done. Plus, they’re reusable for years, making them one of the most cost-effective tools in your gardening arsenal.
Whether you’re dealing with early frosts, late-season heat, or relentless cabbage worms, these sleeves adapt to nearly any situation. The key is choosing the right material for your climate and plants—more on that in the next section. Let’s get your garden shielded!
📚 In This Guide
- What you need
- Instructions
- Tips and common mistakes
- Wrapping up and next steps
What you need
- ● Fabric: 1–3 yards of slip-resistant material (e.g., rubberized canvas, neoprene, or heavy-duty nylon). Thickness: 10–14 oz for durability.
- ○ Optional: Waterproof fabric (PVC-coated or Gore-Tex) for extra moisture resistance.
- ● Fasteners: 1–2 yards of hook-and-loop tape (Velcro) or elastic cord for adjustable fits.
- ○ Optional: Snaps or buckles for a polished look.
- ● Tools: Scissors or a rotary cutter for precise cuts.
- ● Sewing machine + heavy-duty thread (or a fabric glue for no-sew options).
- ○ Optional: Iron + seam sealer for professional finishes.
- ● Prerequisites: Measurements of your plants’ stem diameters (use a tape measure!).
- ● Basic sewing skills (or patience for YouTube tutorials!).
- ○ Optional: A serger for reinforced edges.
Step-by-Step guide to using protective garden sleeves
Here's how to shield tender plants from pests and weather while keeping them stable.
🌱 Step 1: Choose the Right Sleeves for Your Plants
Select sleeves made from breathable, UV-resistant fabric like polyester or mesh—they should fit snugly but allow airflow. For smaller plants like seedlings or cuttings, opt for 12-18 inch sleeves, while taller varieties like tomatoes or peppers need 24-36 inch lengths. I always measure the plant's height first, then add 4-6 inches for extra coverage at the base and top.
Look for sleeves with slip-resistant grips at the bottom—these prevent shifting in wind or when you water. If your sleeves lack this feature, wrap the base with 1-2 inches of non-slip tape. This ensures the sleeve stays put without constricting the plant's growth.
🪴 Step 2: Prepare the Plant and Sleeves
Start by gently removing any loose debris or pests from the plant. Use a soft brush or your fingers to dislodge spider mites, aphids, or caterpillars—this prevents them from getting trapped inside the sleeve. For delicate stems, like those of basil or lettuce, handle them with care to avoid snapping.
Next, slide the sleeve over the plant from the top down. If the plant is bushy, like a pepper or a young tomato, gently spread the branches outward before inserting the sleeve. This ensures full coverage without crushing stems. Leave 1-2 inches of space at the top to allow for growth and easy access for pruning.
💧 Step 3: Secure the Sleeves Properly
For sleeves with elastic or drawstring closures, adjust the fit so it’s snug but not tight—you should be able to slide a finger between the sleeve and the plant stem. If your sleeves have Velcro or zipper closures, secure them firmly around the base to prevent pests from slipping in.
For extra stability, especially in windy conditions, use 1-2 inches of twist ties or rubber bands to secure the sleeve at the base. Avoid wrapping them directly around the stem, as this can leave marks or restrict growth. Instead, wrap them around the sleeve material itself. This keeps the sleeve in place while allowing the plant to grow freely.
✂️ Step 4: Monitor and Maintain the Sleeves
Check your plants daily for signs of stress, like wilting or yellowing leaves—these can indicate the sleeve is too tight or blocking airflow. If you notice condensation inside the sleeve, it’s time to remove it for 10-15 minutes daily to allow ventilation. This prevents fungal growth, which thrives in damp, enclosed spaces.
Every 3-5 days, gently lift the sleeve and inspect the plant for new pests or damage. If you spot any issues, treat the plant immediately with neem oil or insecticidal soap before reapplying the sleeve. This proactive approach keeps your plants healthy and the sleeves effective.
☀️ Step 5: Adjust for Seasonal Changes
In hot weather, remove the sleeves during the coolest part of the day—early morning or late afternoon—to prevent overheating. Watch for wilting or scorched leaves, which signal the plant needs more airflow. If your sleeves are made of lightweight fabric, they’ll still provide protection while allowing better ventilation.
During cooler months, leave the sleeves on for longer periods, especially at night, to shield plants from frost or chilly winds. If temperatures drop below 40°F, consider adding an extra layer of frost cloth over the sleeve for added insulation. This two-layer approach gives you flexibility to adapt to changing weather conditions.
Tips & tricks for perfect plant protection with garden sleeves
Mastering the art of using protective garden sleeves means paying attention to details that keep your plants thriving—not just surviving. These small adjustments make all the difference between effective pest control and plant stress.
The Fit Factor: When measuring your plant's height in Step 1, add those extra 4-6 inches for a reason—they account for both root stability and future growth. I've seen sleeves that were too short leave plants vulnerable at the base where pests often attack. For bushy plants like tomatoes, consider overlapping sleeves slightly at the base rather than forcing one sleeve to cover everything. This layered approach creates a more secure barrier against crawling insects.
Condensation Control: Those 10-15 minutes of daily ventilation in Step 4 aren't just about preventing fungal growth—they're also your chance to spot early signs of pest activity. I've caught spider mite infestations early by making this a habit. If you notice heavy condensation, it's a sign your sleeves might be too tight or you're watering too frequently. This is especially critical in humid climates where moisture lingers longer.
Seasonal Layering Strategy: The 40°F threshold mentioned for cooler months is your cue to get creative with layering. I've had great success using lightweight row covers as an additional layer over the sleeves during early spring or late fall. This two-layer system gives you the flexibility to adjust protection levels without compromising airflow. Just remember to remove both layers during the day when temperatures rise above 50°F to prevent overheating.
Wind Resistance Hack: For plants in exposed locations, I've found that adding 1-2 inches of twist ties at both the top and bottom of the sleeve creates a more stable structure. This prevents the classic "flapping in the wind" that can damage delicate stems. The key is to position these ties at least 3 inches apart vertically—this creates a more rigid framework while still allowing the plant to grow through the gaps.
Pro Tips for Protective Garden Sleeves
- Mastering the art of using protective garden sleeves means paying attention to details that keep your plants thriving—not just surviving.
- The Fit Factor: When measuring your plant's height in Step 1, add those extra 4-6 inches for a reason—they account for both root stability and future growth.
- Condensation Control: Those 10-15 minutes of daily ventilation in Step 4 aren't just about preventing fungal growth—they're also your chance to spot early signs of pest activity.
Frequently asked questions
Got questions about protective garden sleeves?
You’re not alone! Here are answers to the most common concerns—so you can keep your plants safe without the guesswork.
What are protective garden sleeves made of?
Most sleeves are crafted from breathable, water-resistant materials like polypropylene or heavy-duty fabric, reinforced with slip-resistant grips (often rubber or textured silicone). Some premium options include UV protection for long-term use. Always check the label for durability ratings—especially if you’re shielding plants from harsh sun or wind.
When should I use them—before or after planting?
For newly planted seedlings or cuttings, slip them on immediately after transplanting to shield tender roots and stems. If protecting existing plants (like roses or tomatoes), wait until late afternoon to avoid shocking the foliage. Pro tip: Remove sleeves during watering to prevent moisture buildup.
Can I reuse protective sleeves year after year?
With proper care, sleeves last multiple seasons. After use, rinse with water, let them air-dry in the sun (to kill pests), and store in a cool, dry place. Avoid bleach—it can degrade fabric over time. If sleeves become brittle or tear easily, it’s time to replace them.
What’s a good alternative if I don’t have sleeves?
No sleeves? No problem! Try these DIY fixes:
- Cardboard tubes: Cut and wrap around stems (remove before watering).
- Bubble wrap: Lightweight and protective—secure with twine.
- Toilet paper rolls: Great for tiny seedlings (remove when roots establish).
- Plastic milk jugs: Cut the bottom off and slip over plants (add holes for airflow!).
For long-term solutions, consider mesh cages or cloche domes for extra support.
Why are my plants wilting even with sleeves on?
Wilting under sleeves usually means overheating or poor airflow. Check these fixes:
- Loosen or remove sleeves during peak sun (10 AM–2 PM).
- Add ventilation holes if using DIY alternatives.
- Ensure sleeves aren’t too tight—they should fit snugly but not restrict growth.
- Water deeply before slipping sleeves on to prevent dehydration.
If wilting persists, your plant may need transplanting or pruning to reduce stress.
Wrapping up and next steps
Protective garden sleeves are your secret weapon for shielding delicate plants from harsh weather, pests, and accidental damage—without sacrificing their natural beauty. 🌱 Whether you're a seasoned gardener or just starting out, these simple yet effective tools give you peace of mind while nurturing your green babies.
Now that you’re armed with the how-tos and FAQs, it’s time to roll up your sleeves (literally!) and put your new knowledge to work.
Ready to transform your garden? Start small—test a sleeve on your most vulnerable plant today, and watch your confidence (and your plants!) thrive. Happy gardening! 🌿✨