
Tools
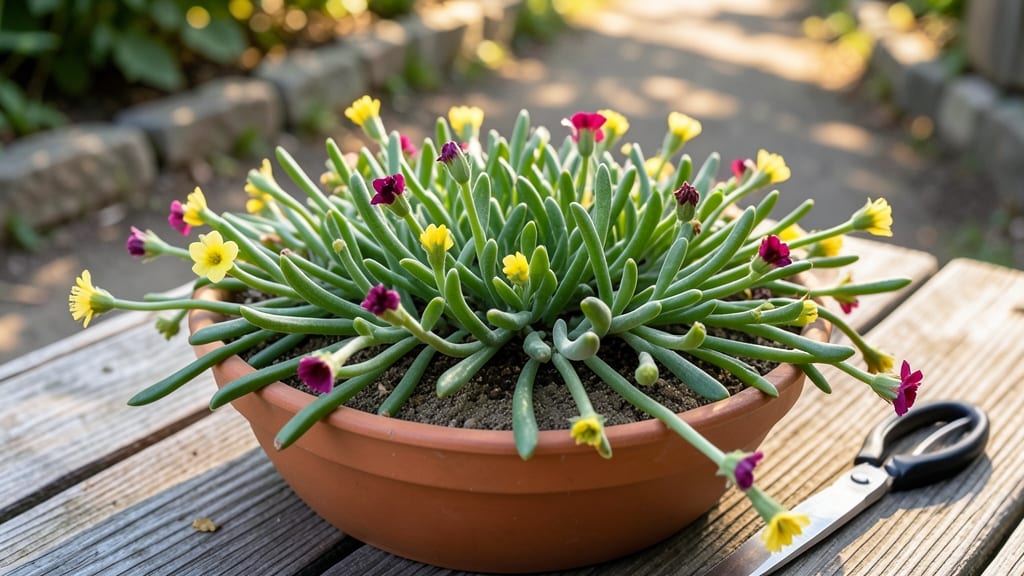
Growing purslane in your garden means year-round greens with almost no effort—this succulent thrives when others fail, turning even the driest corner into a harvestable oasis. I first spotted it creeping through my rock garden last summer, and now I’m cultivating it intentionally.
Its thick, juicy stems store water like a built-in drought insurance policy, making it the perfect low-maintenance plant for busy gardeners or water-restricted zones.
The secret to happy purslane lies in two simple rules: full sun and sandy, well-draining soil. You can start from seed (though germination takes patience) or propagate cuttings—just snap off a stem, lay it on fresh soil, and watch it root in days.
It spreads aggressively, which is great for ground cover but means you’ll need to contain it if you’re not growing it as a living mulch. My urban garden uses it to smother weeds between stepping stones while providing edible shoots.
Harvesting is where the magic happens: pinch off tender new growth for salads, or let it sprawl for ornamental borders with its bright green, slightly fleshy leaves. The flavor? A tangy, lemony crunch that’s perfect raw or lightly cooked.
Once established, it’ll reward you with harvests every 2-3 weeks with minimal watering—ideal for containers, cracks in paving, or any spot where other plants would struggle.
Here’s the kicker: purslane handles heat, neglect, and poor soil like a champ, yet it still looks lush and intentional. Whether you’re growing it as a living mulch, edible ground cover, or drought-resistant border, it’s the plant that gives back more than you put in.
Ready to try it in your space?
📚 In This Guide
- What you need
- Instructions
- Tips and common mistakes
- Wrapping up and next steps
What you need
- ● Purslane seeds or seedlings: 1–2 oz (30–60g) per 10 sq ft. Opt for organic, non-GMO seeds if possible.
- ● Well-draining soil: Mix 50% garden soil with 50% compost or coconut coir. Purslane thrives in slightly sandy or loamy soil with a pH of 6.0–7.0.
- ● Containers or garden bed: For containers: 5–7" deep pots (1–2 plants per pot) with drainage holes.
- ● For in-ground: Full sun (6+ hours/day) or partial shade (3–6 hours). Avoid waterlogged spots!
- ● Watering can or drip irrigation: Purslane loves moisture but hates soggy roots. A light misting 2–3x/week works best.
- ○ Garden gloves: Protect your hands from prickly stems (optional but highly recommended!).
- ● Hand trowel or small shovel: For transplanting seedlings or mixing soil.
- ● Pruning shears: Snip leggy stems to encourage bushier growth.
- ○ pH test kit: Ensure your soil is in the ideal range (optional but helpful for troubleshooting).
- ● Mulch (straw or shredded leaves): Retains moisture and keeps weeds at bay.
- ● Fish emulsion or compost tea: A light fertilizer (10-10-10) every 4–6 weeks for extra vigor.
- ● Row covers or shade cloth: Protects seedlings from harsh sun or pests in early stages.
- ● Harvesting basket or scissors: For easy, clean cuts when it’s time to pick!
Step-by-Step instructions for growing purslane in small gardens
This fast-growing succulent thrives in tight spaces and delivers crisp, tangy greens with minimal effort.
Choose the Right Location for Maximum Growth
Purslane loves full sun—at least 6 hours daily—but tolerates partial shade in hot climates. I plant mine in a south-facing corner where it gets morning sun and afternoon shade during summer. The soil should drain well, so avoid low spots where water pools. If your garden has heavy clay, mix in 1-2 inches of coarse sand to improve drainage.
This plant spreads easily, so I use containers or raised beds to contain it. A 4-inch-deep pot works for one plant, while a 12-inch square raised bed can handle 4-6 plants comfortably. The key is keeping roots from competing with other plants—purslane grows best when it’s not crowded.
Plant Seeds or Transplants at the Right Time
Sow seeds ¼ inch deep in warm soil—purslane germinates best when temperatures stay above 50°F. I start seeds indoors 4-6 weeks before the last frost in my climate, then transplant seedlings after danger of frost has passed. If you’re planting directly outdoors, wait until soil warms to at least 60°F—cold soil slows germination.
Space seeds 6-8 inches apart in rows 12 inches apart for easy harvesting. If using transplants, dig holes twice as wide as the root ball and place plants at the same depth they were growing before. Press soil gently around the roots to eliminate air pockets, then water deeply to settle everything in.
Water and Maintain for Continuous Harvests
Purslane stores water in its leaves, so it’s drought-tolerant once established. Water 1-2 inches per week, but let the top 1 inch of soil dry out between waterings to prevent rot. Overwatering is the fastest way to kill this plant—it thrives on neglect more than attention.
Fertilize lightly once a month with a balanced organic fertilizer (like 5-5-5) to encourage leafy growth. Too much nitrogen makes stems woody and bitter. I pinch off flower buds as they appear—this redirects energy to leaf production, keeping the plant tender and flavorful.
Harvest Strategically for Year-Round Success
Start harvesting 4-6 weeks after planting when stems reach 4-6 inches tall. Snip leaves just above a set of leaves to encourage bushier growth. I harvest every 2-3 days in summer to keep plants compact and prevent bolting. In cooler months, reduce harvesting to once a week—purslane grows slower when temperatures dip below 55°F.
To extend the season, protect plants with frost cloth in fall and row covers in early spring. Purslane is perennial in warm climates but often dies back in cold winters. In zone 8 and above, it may regrow from the roots the following year—just trim back dead growth in early spring.
Tips & tricks for growing purslane in small gardens
A few simple strategies will help you maximize your purslane harvest while keeping maintenance to a minimum.
Soil Preparation Tip: Before planting, mix in a 1-inch layer of compost into your containers or raised beds. This improves drainage and provides essential nutrients without overwhelming the plant. Purslane prefers lean soil—too much fertilizer can cause the stems to become tough and bitter. I spread a thin layer of compost around the base of established plants every few months instead of using heavy doses of fertilizer.
Planting Depth and Spacing: The ¼-inch depth for seeds in Step 2 is crucial—planting too deep can delay germination. Use a small stick or your finger to make precise furrows. When spacing seeds 6-8 inches apart, consider staggering your rows to create a more compact growth pattern, which works especially well in small containers. This mimics natural growth patterns and prevents gaps in your harvest area.
Watering Strategy: The 1-2 inches of water per week recommendation works best when applied directly to the soil, not the leaves. I use a soaker hose or water at the base of plants in the morning to prevent fungal issues. During summer heat, you might need to water every 2-3 days, but always let that top inch of soil dry out between waterings to prevent rot. The key is consistency—purslane's drought tolerance kicks in after the first few weeks.
Season Extension Hack: For plants in zones below 8, try growing purslane as an annual but start seeds indoors 8-10 weeks before your last frost date. This gives you a jump on the season and allows for earlier harvests. In containers, you can even bring pots indoors during winter months and place them near a sunny window—just reduce watering significantly as growth slows dramatically below 55°F.
Pro Tips for Purslane In Garden
- A few simple strategies will help you maximize your purslane harvest while keeping maintenance to a minimum.
- Soil Preparation Tip: Before planting, mix in a 1-inch layer of compost into your containers or raised beds.
- Planting Depth and Spacing: The ¼-inch depth for seeds in Step 2 is crucial—planting too deep can delay germination.
Frequently asked questions
Got questions about growing purslane in your garden?
You’re not alone! This versatile, drought-tolerant succulent is a favorite among urban gardeners, but it can raise a few curiosities. Here are answers to the most common queries to help you cultivate purslane like a pro.
How do I tell if my purslane is healthy or diseased?
Healthy purslane has plump, vibrant green stems and a slightly fleshy texture. Watch for yellowing leaves (overwatering or fungal issues) or black spots (powdery mildew). If leaves look shriveled or mushy, it’s likely rotting from excess moisture. Solution: Trim affected parts, improve drainage, and avoid overhead watering.
When is the best time to harvest purslane for maximum flavor?
Harvest young leaves and stems when they’re tender and 2–4 inches long for the best flavor—older purslane gets slightly bitter. Morning harvests yield the freshest taste, and you can snip leaves as needed without harming the plant. Pro tip: Regular harvesting encourages bushier growth!
Can I grow purslane indoors or in containers?
Purslane thrives in containers 6+ inches deep with well-draining soil. Place pots in sunny windowsills (6+ hours of light) or under grow lights. Use a mix of potting soil and perlite to prevent root rot. Bonus: It’s perfect for balconies or kitchens—just keep it lightly watered!
What can I plant alongside purslane to boost my garden?
Purslane is a great companion plant! Pair it with:
- Herbs like basil or cilantro (they love similar conditions).
- Root veggies (carrots, beets) to deter pests.
- Tomatoes—purslane’s shallow roots won’t compete.
Avoid planting near potatoes or peppers, as purslane may stunt their growth.
Why are bugs eating my purslane, and how do I stop them?
Common pests include aphids, spider mites, and slugs. Solution:
- Spray leaves with neem oil or soapy water for soft-bodied bugs.
- Set up beer traps for slugs (bury a shallow dish filled with beer).
- Encourage ladybugs or predatory wasps by planting dill or marigolds nearby.
Note: Purslane’s succulent texture deters many pests naturally!
Wrapping up and next steps
Growing purslane in your garden is a game-changer—whether you’re working with limited space or craving a low-maintenance, nutrient-packed green! 🌱 This versatile succulent thrives in heat, repels pests, and delivers a tangy, omega-3-rich harvest with minimal effort.
With the right materials and a few clever hacks, you’ll enjoy fresh greens all year long.
Ready to dive in? Start by clearing a small patch of soil (even a container works!) and plant those seeds or cuttings this weekend. Before you know it, you’ll be feasting on homegrown goodness—no green thumb required. Happy gardening! 🌿