
Tools
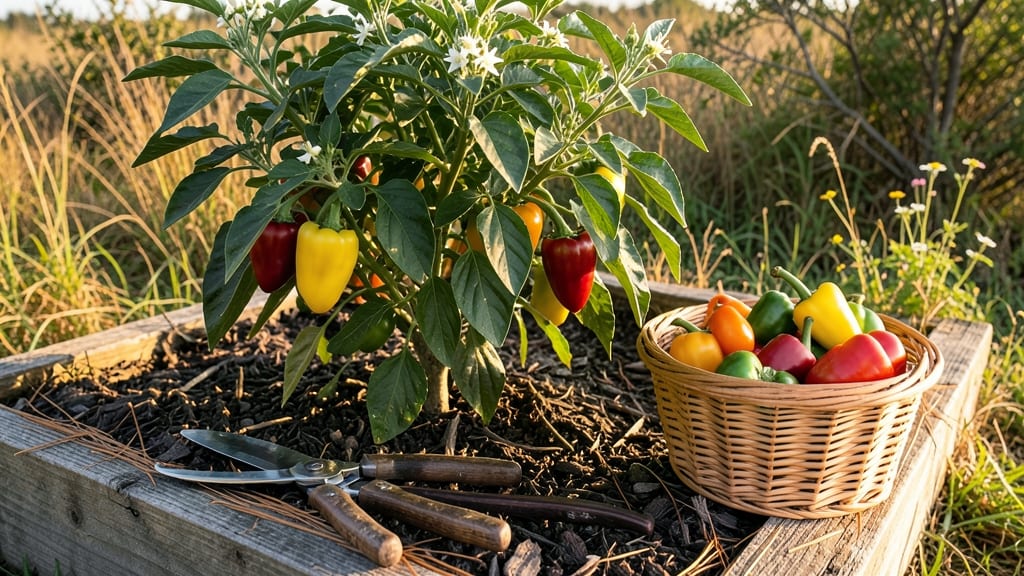
Growing salsa garden peppers from seed to jar starts with the right heat varieties—jalapeños, serranos, or habaneros—because their bold flavors transform homemade salsa from good to unforgettable. 🌶 I learned this the hard way when my first batch of store-bought peppers yielded bland, watery salsa that couldn’t compete with restaurant versions.
The difference? Homegrown peppers packed with concentrated capsaicin, grown under your watchful eye from seed to harvest.
You’ll need well-draining soil, full sun (at least 6–8 hours daily), and patience—these peppers thrive in warm climates but can be coaxed along in cooler zones with proper timing.
Start seeds indoors 8–10 weeks before your last frost, then transplant seedlings after soil temperatures hit 60°F. Spacing matters too: give plants 18–24 inches apart to prevent disease and encourage airflow, which keeps those fiery fruits healthy and productive.
By mid-summer, you’ll be harvesting peppers at their peak heat and flavor—jalapeños when they’re 3–5 inches long, habaneros when they turn bright orange or red. The key is consistency: water deeply once a week (more in extreme heat) and harvest regularly to prompt more fruit.
Store-bought salsa can’t match the depth of flavor from peppers grown in your own soil, where every drop of sunlight and sip of water contributes to the final punch.
This method works for gardeners in zones 5–10, though container growing extends options to patios and balconies. Whether you’re making classic red salsa or experimenting with green habanero blends, the secret lies in the soil—and the satisfaction of knowing every pepper came from your own hands. Ready to grow heat?
📚 In This Guide
- What you need
- Instructions
- Tips and common mistakes
- Wrapping up and next steps
What you need
- ● Salsa garden pepper seeds or seedlings: 3–5 plants (varieties like Jalapeño, Serrano, or Habanero for heat and flavor).
- ● Well-draining potting mix: 5–10 gallons (look for a blend labeled for vegetables or peppers).
- ● Containers or garden bed: For containers: 5-gallon pots or larger (1 plant per pot).
- ● For in-ground: Full sun (6+ hours/day) and loose, fertile soil (pH 6.0–7.0).
- ● Organic fertilizer: Balanced (10-10-10) or pepper-specific (e.g., fish emulsion or compost).
- ● Watering can or hose with gentle spray nozzle: Avoid wetting leaves to prevent disease.
- ● Gloves: Protect your hands from thorns (especially with Habaneros!).
- ● Pruning shears: For trimming excess foliage or harvesting.
- ○ Trellis or stakes (optional): Supports taller varieties like Serrano peppers.
- ○ Row covers or shade cloth (optional): Protects seedlings from pests or extreme heat.
- ○ pH test kit (optional): Ensures soil is in the ideal range for pepper growth.
Step-by-Step guide to growing salsa garden peppers
Here’s how to cultivate fiery, flavorful peppers perfect for homemade salsa—no green thumb required.
🌱 Step 1: Select and Start Seeds Indoors
Choose heat-loving varieties like jalapeño, serrano, or habanero—these pack the punch for salsa. Start seeds indoors 8-10 weeks before your last frost date in biodegradable seedling pots (they’ll transplant easily). Fill each pot with 2-3 inches of seed-starting mix, then plant 2 seeds per pot just ¼ inch deep. Press lightly so the soil covers them without burying too deep.
Keep the mix moist but not soggy—water gently until it’s damp to the touch. Place pots in a warm spot (70-80°F) like a sunny windowsill or under a grow light for 12-14 hours daily. Germination takes 7-14 days, so patience is key. Once sprouts appear, thin to the strongest seedling per pot to avoid crowding.
☀️ Step 2: Harden Off and Transplant Outdoors
After 4-6 weeks, your seedlings should have 3-4 true leaves and be ready to move outside. Start by placing them in a sheltered spot for 1-2 hours the first day, then gradually increase outdoor time over 7-10 days. This hardening-off process toughens them up for the garden.
Transplant after all danger of frost has passed, spacing plants 12-18 inches apart in full sun (6+ hours daily). Dig a hole slightly larger than the root ball, place the seedling in, and firm soil around it. Water deeply right after planting to settle the roots. Mulch with 2-3 inches of organic mulch to retain moisture and keep weeds down.
💧 Step 3: Water and Fertilize for Maximum Heat
Peppers hate soggy roots, so water deeply 1-2 times per week, letting the top inch of soil dry out between waterings. Too much moisture dilutes flavor and encourages disease. Use 1 tablespoon of balanced fertilizer (10-10-10) every 4-6 weeks to keep plants vigorous. You’ll see dark green, glossy leaves—that’s your sign they’re thriving.
Watch for yellowing leaves or stunted growth—these mean overwatering or nutrient deficiency. Prune any yellow or damaged leaves with clean scissors to redirect energy to fruit production. Peppers are heavy feeders, so don’t skimp on fertilizer if you want bold, spicy harvests.
✂️ Step 4: Harvest at Peak Heat
Jalapeños and serranos are ready to pick when they’re 3-4 inches long and firm. Habaneros turn bright orange or red—wait until they’re fully colored for maximum heat. Use clean pruners or scissors to cut stems, leaving a ¼ inch of stem attached to encourage more fruit.
Harvest frequently—every 2-3 days—to keep plants producing. Store peppers in the fridge for up to 2 weeks or freeze them for later salsa-making. The hotter the pepper, the more capsaicin it contains, so let them ripen fully for maximum kick. You’ll know they’re perfect when the flavor burns bright—just like your salsa should!
Tips & tricks for perfect salsa garden peppers
Growing fiery salsa peppers at home is easier than you think—once you know these game-changing tricks.
Seedling Heat Secret: That 70-80°F range for your seedlings isn't just about warmth—it's about mimicking their tropical origins. I use a small greenhouse tray with a heat mat underneath during cooler months. The extra warmth speeds germination from 7-14 days down to 5-7 days, and you'll see those first little leaves emerge faster.
Harden Off Gradually: Don't rush the 7-10 day hardening process in Step 2. I start with just 30 minutes on day one, then add 30 minutes each subsequent day. This slow adaptation prevents shock—your seedlings will thank you with stronger stems and better root systems when transplant time comes.
Watering Wisdom: The "water deeply 1-2 times per week" rule works best with a moisture meter. Aim to keep the top inch dry between waterings, but check deeper—peppers hate soggy roots. I water in the morning so any excess evaporates by evening, preventing fungal issues that can ruin your harvest.
Fertilizer Timing: That 1 tablespoon of 10-10-10 every 4-6 weeks is perfect, but here's the trick: split that dose into two applications—half when you transplant and half 3 weeks later. This prevents fertilizer burn while keeping your plants vigorous. I also mix in a handful of compost with each feeding for extra nutrients.
Pro Tips for Salsa Garden Peppers
- Growing fiery salsa peppers at home is easier than you think—once you know these game-changing tricks.
- Seedling Heat Secret: That 70-80°F range for your seedlings isn't just about warmth—it's about mimicking their tropical origins.
- Harden Off Gradually: Don't rush the 7-10 day hardening process in Step 2.
Frequently asked questions
Got questions about growing your own salsa garden peppers?
You’re in the right place! Below, we’ve answered the most common queries to help you cultivate fiery flavors with confidence.
What are the best salsa garden pepper varieties for beginners?
Start with jalapeños, serranos, or habaneros—they’re easy to grow and perfect for salsa. Jalapeños offer a balanced heat (2,500–8,000 SHU), while serranos pack a punch (10,000–23,000 SHU). For adventurous chefs, habaneros (100,000–350,000 SHU) deliver tropical fruitiness with extreme spice. Check our guide for heat-level breakdowns!
How long does it take for salsa peppers to mature and be harvest-ready?
Most salsa peppers take 60–90 days to mature after transplanting, but timing varies by variety. Jalapeños and serranos typically ripen in 70–80 days, while habaneros can take up to 120 days. Harvest when peppers reach full color (green, red, or orange) and firmness—don’t wait for them to overripe!
Can I grow salsa peppers in containers, and what size pot do I need?
Salsa peppers thrive in containers as long as the pot is at least 12–18 inches deep and has drainage holes. A 5-gallon bucket works well for one plant. Use a well-draining potting mix and place the container in full sun (6–8 hours/day). Just ensure it’s stable—peppers can get top-heavy!
Why are my salsa peppers turning yellow or black before ripening?
Yellowing or blackening peppers often signal underwatering, overwatering, or disease. Check soil moisture—peppers need 1–1.5 inches of water weekly but hate soggy roots. Yellow spots may also indicate bacterial spot or fungus. Remove affected peppers, improve airflow, and apply neem oil or copper fungicide if needed.
What’s the difference between green and red salsa peppers for cooking?
Green peppers are harvested early and taste milder, with a grassier bite. Red peppers are fully ripe, sweeter, and more complex—ideal for salsa! For heat, green jalapeños are spicier than red. Pro tip: Let some peppers ripen on the vine for deeper flavor, but harvest greens when firm for tangy freshness.
Can I save seeds from store-bought salsa peppers for next year?
It’s hit or miss—many commercial peppers are hybrid (F1) and won’t produce true-to-type plants. For reliable seeds, buy from heirloom or open-pollinated varieties. If you try it, ferment seeds in water for 3–5 days to clean them, then dry and store in a cool, dark place. Patience pays off!
Wrapping up and next steps
Growing your own salsa garden peppers is a rewarding way to elevate your homemade salsa with unmatched heat and flavor!
Whether you’re a seasoned gardener or just starting out, these fiery varieties—like jalapeños, serranos, or habaneros—bring boldness to your kitchen. Now’s the perfect time to plant: grab your seeds, prep your soil, and let your garden become a spicy playground. 🌱
Ready to harvest the heat? Start by gathering your supplies and reviewing the FAQs to crush common growing challenges. Then, roll up your sleeves—your next batch of homemade salsa is just a few weeks (and a little sweat) away! 🔥