Tools
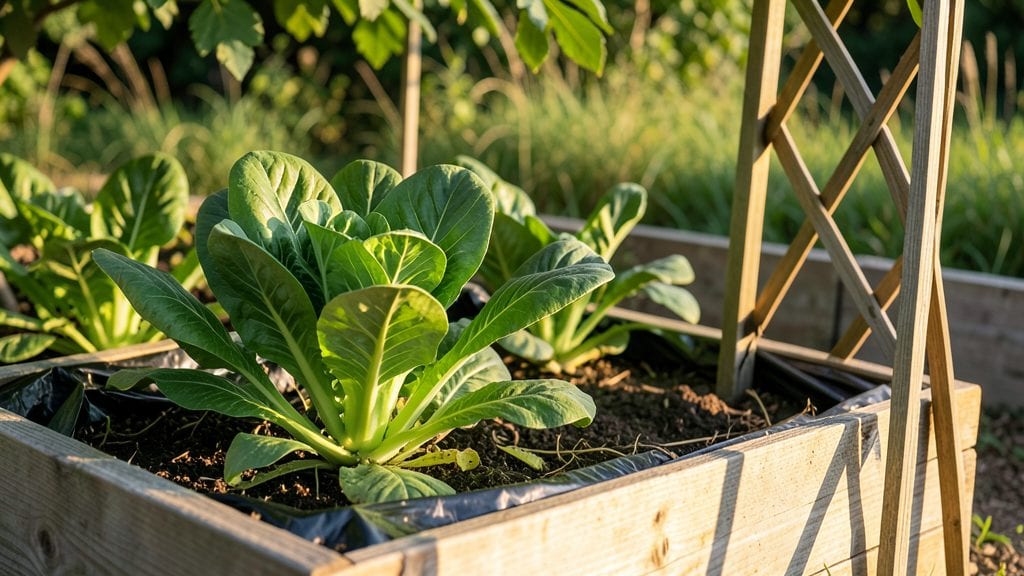
A screened raised garden turned my pest-ridden backyard into a thriving sanctuary where tomatoes stay tomato-sized and herbs grow without aphid attacks. The mesh sides keep out rabbits, squirrels, and even the neighborhood cats that used to dig through my soil like it was a buffet.
I built mine last spring using cedar planks and hardware cloth—simple materials that lasted through two growing seasons without rotting or sagging.
The best part? No more losing entire rows to slugs or watching cucumbers turn into chew toys. My zucchini plants now produce three times more than they did in the ground, and the screened sides actually make weeding easier—no more bending over to pluck pests from hidden corners.
Plus, the elevated design means better drainage, so my soil stays loose and my plants never drown during heavy rains.
You’ll end up with a garden that looks as good as it performs—neat, contained, and full of vibrant green growth you can reach without kneeling. The mesh even filters out flying pests like cabbage moths, so your brassicas stay intact until harvest.
And because it’s raised, you can place it anywhere: on patios, near decks, or even against a fence where sunlight hits just right.
Perfect for urban gardeners, small spaces, or anyone tired of losing battles to wildlife. The setup takes a weekend, and the payoff is a garden that works for you—not against you. Let’s get those plans drawn up and those pests out of your plants for good.
📚 In This Guide
- What you need
- Instructions
- Tips and common mistakes
- Wrapping up and next steps
What you need
- ● Lumber or composite wood: 4x8 ft or 4x4 ft boards (cedar or redwood recommended for durability). Quantity: 4-6 pieces (depending on bed size—e.g., 4x4 ft or 4x8 ft). Thickness: 2x6 or 2x8 for sides, 2x4 for framing.
- ● Hardware cloth or fine mesh: 1/4-inch or 1/2-inch mesh (to keep out pests like rabbits, rodents, and insects). Size: Enough to cover the entire bed (e.g., 4x4 ft = 16 sq ft).
- ● Screws or nails: Deck screws (2.5-3 inches) or galvanized nails for securing wood. Quantity: ~50-100 screws (depends on bed size).
- ● Hinges and latch: 2-4 hinges and a sturdy latch (for a removable or hinged screen top).
- ○ Landscape fabric: Optional but helpful for weed suppression. Size: Slightly larger than your bed’s base.
- ● Soil and compost: High-quality potting mix or a blend of topsoil, compost, and perlite (for drainage). Quantity: Enough to fill your bed to 6-12 inches deep.
- ● Drill or hammer (for assembling wood and attaching hardware cloth).
- ● Measuring tape and pencil (for precise cuts and markings).
- ● Saw (hand saw, circular saw, or miter saw for cutting lumber).
- ● Staple gun (to secure hardware cloth to the wood frame).
- ● Level (to ensure your bed is even and stable).
- ● Work gloves and safety glasses (for protection).
- ● Corner brackets: For extra reinforcement at joints.
- ● Paint or stain: To protect wood from weather (choose non-toxic options).
- ● Drip irrigation kit: For easy watering (especially useful for raised beds).
- ● Thermometer/hygrometer: To monitor soil conditions year-round.
Step-by-step instructions for building a screened raised garden bed
Here’s how to create a sturdy, pest-proof growing space that keeps critters out while maximizing your harvest.
Choose and Prepare the Location
Pick a flat, level spot with at least 6 hours of sunlight daily. Avoid low areas where water pools—raised beds need good drainage. I like to place mine near a water source to make maintenance easier. Clear any weeds or grass within a 2-foot radius of the bed’s footprint to prevent competition for nutrients.
Check for underground utility lines before digging. Call your local utility locator service if you’re unsure. The bed should sit on undisturbed soil to prevent sinking over time. If your yard slopes, build the bed on the higher side to avoid erosion and water runoff.
Build the Frame and Install Screening
Construct the frame using untreated lumber (2x6s or 2x8s) cut to your desired dimensions—typically 4 feet wide by 8 feet long for easy reach from both sides. Assemble the frame with galvanized screws or corner brackets to ensure durability. For screening, cut hardware cloth (1/4-inch mesh) to fit the bottom and sides of the frame, leaving a 2-inch overhang for securing.
Staple the hardware cloth tightly to the frame’s underside and sides, ensuring no gaps where pests could sneak in. I reinforce the corners with extra staples to prevent tearing. If using pre-made screened frames, follow the manufacturer’s instructions for assembly—just double-check that all seams are sealed tightly.
Fill with the Right Soil Mix
Fill the bed with a 3-inch layer of coarse gravel or landscape fabric at the bottom for drainage, then add 12 inches of high-quality raised bed mix. I blend equal parts compost, coconut coir, and peat moss for a lightweight, nutrient-rich base. Avoid garden soil—it compacts easily and can introduce weeds or pests.
Mix in a slow-release organic fertilizer (like 10-10-10) at planting time to feed roots for the season. Water the soil thoroughly after filling to settle it and remove air pockets. The bed should feel evenly moist but not soggy—like a wrung-out sponge.
Plant and Maintain Pest-Free Growth
Start with disease-resistant varieties of your favorite vegetables, herbs, or flowers. Space plants according to their mature size—crowding invites pests even through screens. I plant fast-growing crops like radishes or lettuce first to break up the soil and attract beneficial insects.
Check the screening regularly for tears, especially after heavy rain or wind. A quick repair with wire and staples keeps critters out. Mulch the surface with straw or shredded leaves to retain moisture and suppress weeds. Water deeply once a week (or more in hot weather) and always in the morning to prevent fungal issues.
Extend the Season with Seasonal Adjustments
For year-round growing, add row covers or cold frames in early spring or fall. These protect tender plants from frost while still allowing light and air circulation. In summer, shade cloth (30-50% coverage) prevents overheating for heat-sensitive crops like lettuce.
Rotate crops annually to prevent soil depletion and pest buildup. Keep a planting calendar to track what you’ve grown where. With proper care, a screened raised bed can produce 2-3 times more food than in-ground gardening—without the pests or weeds.
Tips & tricks for perfect screened raised garden beds
Building a screened raised garden bed is all about the details—these small adjustments make a huge difference in durability, pest protection, and plant success.
Location is Everything: That 6 hours of sunlight requirement is non-negotiable for most vegetables, but don't stop there. I always check sunlight patterns throughout the day—morning sun is gentler, while afternoon sun can be intense. If your yard has afternoon shade, position the bed to catch morning light instead. Also, consider future growth—leave at least 18 inches of clearance around the bed for easy access and airflow, which helps prevent fungal issues.
Screening Secrets: When installing the 1/4-inch hardware cloth, pay special attention to the corners. I've found that using galvanized staples every 6 inches along all edges creates a nearly impenetrable barrier. For extra security, overlap the screening pieces by at least 2 inches at seams, then staple through both layers. This prevents even the smallest pests from finding entry points. Don't forget to cover the bottom completely—many pests can dig underneath if given the chance.
Soil Science: The 12-inch soil depth is perfect, but how you layer it matters. Start with that 3-inch gravel layer for drainage, but don't skip the landscape fabric underneath if your soil is particularly clay-heavy. When mixing your equal parts compost, coconut coir, and peat moss, I recommend adding a handful of perlite to improve aeration. This creates ideal root conditions while preventing compaction. Water thoroughly after filling—this helps settle the soil and removes air pockets that can stunt root growth.
Maintenance Made Easy: Those weekly waterings work best when done consistently. I've found that using a soaker hose along the edges of the bed delivers water directly to roots without disturbing the soil surface. For the mulch layer, straw works beautifully, but I often mix in a thin layer of wood chips on top for added weed suppression. Check your screening monthly—repairs are quick with a roll of wire and heavy-duty staples, and catching tears early prevents bigger problems later.
Pro Tips for Screened Raised Garden
- Building a screened raised garden bed is all about the details—these small adjustments make a huge difference in durability, pest protection, and plant success.
- Location is Everything: That 6 hours of sunlight requirement is non-negotiable for most vegetables, but don't stop there.
- Screening Secrets: When installing the 1/4-inch hardware cloth, pay special attention to the corners.
Frequently asked questions
Got questions about screened raised garden beds?
You’re not alone! Here are answers to the most common concerns to help you get started with confidence.
What’s the best time of year to install a screened raised garden bed?
Spring or early fall are ideal—when soil is workable but not freezing or scorching. Avoid extreme heat or cold, as it can stress plants during the early stages. If you’re in a mild climate, you can install year-round, but prioritize planting seasons for best results.
How do I keep pests out if I already have a raised bed without screens?
No worries! Retrofit your bed with fine mesh hardware cloth (1/4-inch or smaller) or landscape fabric along the sides and bottom. For existing beds, dig a trench around the base and secure the screen before filling with soil. Alternatively, use row covers or companion planting to deter pests naturally.
Are screened raised beds more expensive than regular raised beds?
Yes, but the investment pays off. Screens (hardware cloth or mesh) add $20–$50 to materials, but they eliminate costly pest damage, reduce chemical needs, and extend growing seasons. Think of it as insurance for a thriving, low-maintenance garden!
Will a screened raised bed stay warmer or cooler than ground soil?
It depends! Screens insulate slightly, trapping heat in summer and retaining warmth in winter—great for early springs or late falls. For extra control, add mulch or black landscape fabric on top. In hot climates, elevate beds for airflow or use shade cloth during peak sun.
What’s the easiest way to troubleshoot drainage issues in a screened bed?
If water pools, check for clogged drainage holes (clean them with a wire or drill wider holes if needed). Ensure the screen isn’t blocking soil airflow—leave gaps at the bottom. For heavy clay soil, add gravel or perlite to the base. A slight slope (1–2 inches) toward one side also helps.
Can I use screened beds for vegetables and flowers?
Screened beds work for any plants—veggies, herbs, flowers, or even small fruits. Just match the screen size: 1/4-inch mesh for veggies (keeps out rabbits/squirrels) and 1/8-inch for delicate flowers (blocks aphids/whiteflies). Mix and match for a pollinator-friendly haven!
Wrapping up and next steps
A screened raised garden bed is your ultimate solution for a thriving, pest-free garden—no matter the season! 🌱 By combining elevated growing space with protective screening, you’ve got a low-maintenance haven for veggies, herbs, and flowers.
The best part? You’re just one step away from reaping the rewards of fresh, homegrown goodness.
Ready to transform your outdoor space? Start small—build your first bed, experiment with plants, and watch your confidence (and harvest!) grow. Happy gardening!