Tools
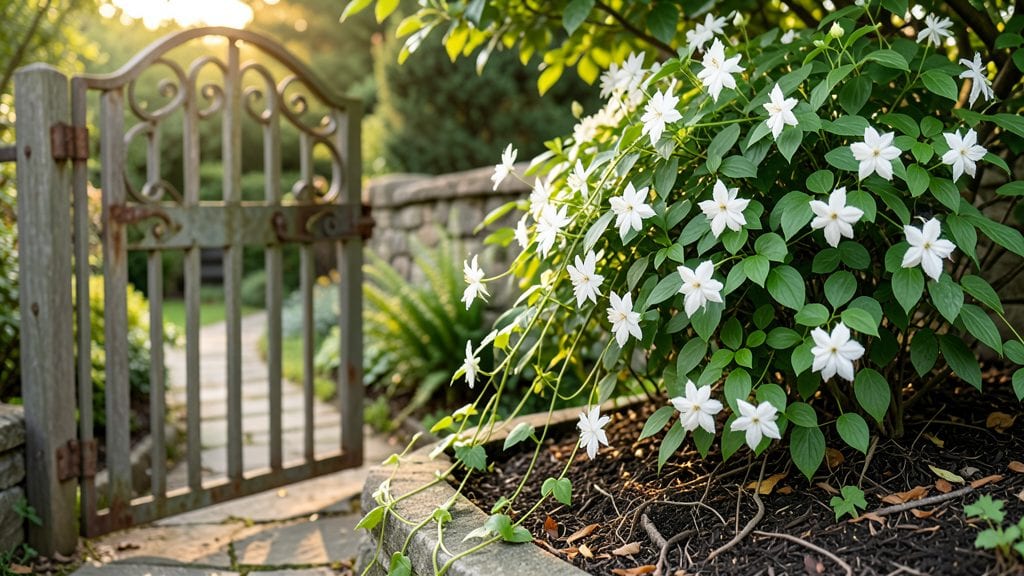
A secret garden gate transforms any backyard into a hidden sanctuary where magic feels just a step away. 🌿 I stumbled upon this idea after longing for a space that felt both private and enchanted—something that would make me pause every time I walked through it.
The right gate doesn’t just block views; it frames a story, whether rustic with climbing roses or sleek with modern metalwork. Every material choice whispers a different mood, from weathered wood to blackened steel, while the plants you weave around it keep the charm alive through every season.
The best part? You don’t need a grand design to start. A simple frame, sturdy hinges, and a few hours of assembly can create the bones of your gateway.
Pair it with low-maintenance climbers like clematis or honeysuckle for instant greenery, or add fragrant herbs like lavender for a sensory surprise. The key is balancing structure with softness—think moss-covered stones, twinkling solar lights, or even a hand-painted sign with a whimsical quote.
It’s the little touches that turn a functional screen into a welcoming portal.
By summer, your gate will be draped in blossoms, and by winter, it’ll stand as a quiet sentinel with frost-kissed vines clinging to its frame. Neighbors will pause to admire it, and you’ll finally have that secluded corner where morning coffee feels like a secret.
The best secret garden gates aren’t just pretty—they’re alive, evolving with the seasons and the stories you bring to them.
Whether you’re starting small with a single archway or dreaming of a full enclosure, the possibilities are endless. The only rule? Make it feel like yours. That’s where the real magic begins.
📚 In This Guide
- What you need
- Instructions
- Tips and common mistakes
- Wrapping up and next steps
What you need
- ● Gate frame: Pre-built wooden gate (48"–72" wide, adjustable height) or pressure-treated lumber (2x4s, 2x6s) to build your own.
- ● Lattice panels: 2–4 pieces of cedar or redwood lattice (4' x 8' sheets, cut to fit gate dimensions).
- ● Fasteners: Galvanized deck screws (2.5"–3", 100+ pieces).
- ○ Exterior-grade wood glue (optional, for extra reinforcement).
- ○ Hinges & hardware: 2 heavy-duty hinges, latch, and decorative knocker (optional but charming!).
- ● Stain or paint: Exterior-grade wood finish (e.g., semi-transparent stain in sage green, slate gray, or natural tones).
- ● Miscellaneous: Sandpaper (80- and 120-grit).
- ● Wood filler (for gaps).
- ● Measuring tape, pencil, and speed square.
- ● Vine trellis kit (for climbing plants like jasmine or ivy).
- ● Stencils or stenciling supplies (for custom designs).
- ● Solar-powered fairy lights or lanterns (for magical evening vibes).
- ● Weather vane or wind chime (functional + decorative!).
How to build a whimsical secret garden gate
Transform your yard into a storybook escape with this simple yet enchanting privacy screen.
🪴 Step 1: Choose Your Base Materials
Start by selecting a sturdy wooden frame—either a pre-made gate panel or a DIY lattice structure. I like using 4-foot tall by 3-foot wide cedar slats because they resist rot and add natural charm. If you're crafting your own frame, assemble it with 2x4s to create a rectangular opening that matches your gate's size.
For a truly magical look, add decorative elements like wrought-iron scrolls or wooden trellis pieces to the frame's edges. These details will give your gate that classic storybook feel. Measure twice before cutting—this is the foundation, and precision here saves headaches later.
🌿 Step 2: Select and Prepare Climbing Plants
Choose 4-6 climbing plants that thrive in your climate. For year-round charm, I recommend a mix of clematis (for vertical drama), honeysuckle (for fragrance), and ivy (for dense coverage). These plants will weave through your frame and create a living curtain.
Start by pruning your plants to encourage bushier growth. Trim back any leggy stems to just 2-3 inches above a leaf node. This forces the plant to branch out, creating a fuller, more lush appearance. Water each plant thoroughly before installing to reduce transplant shock.
✂️ Step 3: Attach the Frame and Install Plants
Secure your wooden frame to the existing gate structure using stainless steel screws or galvanized brackets. The frame should be positioned so the climbing plants will grow outward, creating a natural privacy screen. If you're adding a new gate, attach the frame first, then mount the gate hardware.
Plant your climbers by tying each stem to the frame with soft garden twine or jute twine. Space plants 12-18 inches apart to allow room for growth. For a whimsical touch, weave the twine in a simple pattern—like a crisscross or spiral—around the frame. This adds texture and guides the plants as they grow.
☀️ Step 4: Maintain for Year-Round Magic
Water your climbers deeply 2-3 times per week during the first growing season to establish strong roots. Once established, most climbers only need 1 inch of water per week. Mulch the base with 2-3 inches of shredded bark to retain moisture and suppress weeds—just keep it 6 inches away from plant stems to prevent rot.
Prune your plants twice a year: once in early spring to shape new growth, and again in late fall to clean up any dead or overgrown stems. This keeps your secret garden gate looking neat and encourages healthy blooms. In winter, a light dusting of snow on the ivy adds extra charm—just avoid heavy snow buildup that could weigh down the plants.
🌱 Step 5: Add Finishing Touches
For extra enchantment, hang small solar-powered fairy lights or wind chimes from the top of the gate. These details create movement and soft lighting that transforms your gate into a magical entrance. Choose lights with warm white bulbs for a cozy, inviting glow.
Finally, add a small plaque or sign with a whimsical name like "Whispering Willows" or "Secret Garden." This personal touch makes your gate feel like a true portal to another world. Place the sign near the base so it’s visible but not obstructed by the growing plants.
Tips & tricks for perfect secret garden gate
Between us, creating a storybook garden gate isn't just about following steps—it's about the little details that turn good into magical. Here's what nobody tells you about building this enchanting privacy screen.
Material Selection Tip: Cedar slats are my go-to because they resist rot and insects naturally, but if you're on a budget, pressure-treated pine works too. Just be sure to seal it with outdoor-grade paint or stain—this prevents weather damage and keeps your gate looking fresh for years. I always apply two coats for extra protection, especially if you live in a rainy climate.
Plant Placement Strategy: When installing your 4-6 climbing plants, position them so the fastest growers (like ivy) are on the outer edges of the frame. This creates a natural curtain effect where the center remains slightly more open, letting light filter through. Space those 12-18 inches apart—any closer and they'll compete for nutrients, any farther and you'll see gaps as they grow.
Twine Technique: Don't just tie your plants randomly—create a pattern! I like weaving the twine in a simple crisscross or spiral around the frame. This not only guides the plants but adds visual interest to your gate. Use soft jute twine that won't cut into the stems as they thicken. Pro tip: Soak the twine in water for 10 minutes before using—it becomes more pliable and easier to work with.
Maintenance Hack: That 2-3 inches of mulch you're supposed to add? Don't pile it directly against the stems—keep it 6 inches away. This prevents rot while still retaining moisture. I also recommend adding a layer of landscape fabric under the mulch if you have weed problems—it blocks weeds without suffocating your plants. In winter, a light dusting of snow is charming, but shake off heavy accumulations to prevent branch breakage.
Pro Tips for Secret Garden Gate
- Between us, creating a storybook garden gate isn't just about following steps—it's about the little details that turn good into magical.
- Material Selection Tip: Cedar slats are my go-to because they resist rot and insects naturally, but if you're on a budget, pressure-treated pine works too.
- Plant Placement Strategy: When installing your 4-6 climbing plants, position them so the fastest growers (like ivy) are on the outer edges of the frame.
Frequently asked questions
What’s the best material for a durable secret garden gate?
For longevity, wrought iron or cedar are top choices. Iron resists rust (if powder-coated) and adds an elegant touch, while cedar is naturally rot-resistant and blends seamlessly with gardens. For budget-friendly options, vinyl or PVC gates are low-maintenance but may lack rustic charm.
How long does installation typically take?
DIY installation for a 6-foot gate usually takes 4–8 hours, depending on your skill level. If you’re setting posts in concrete, add drying time (24+ hours). For complex designs (like arched gates), budget an extra 2–4 hours. Pro tip: Measure twice, mark post holes carefully, and pre-assemble sections to save time!
Can I add a secret garden gate to an existing fence?
Most gates are designed to replace a section of fence (typically 3–4 feet wide). If your fence is wood or vinyl, simply remove the panel and attach the gate frame. For chain-link, you may need to reinforce the posts. Check local codes first—some areas require permits for structural changes.
How do I style a secret garden gate to match my yard?
Start with color and texture: Paint iron gates in matte black, sage green, or weathered gray for a cohesive look. For a cottage feel, add ivy or climbing roses to soften edges. Pro tip: Mimic your fence’s material—e.g., a cedar gate with a wood fence or a metal gate with a stone border.
What’s the quickest fix if my gate won’t latch properly?
First, check for misaligned hinges or warped wood. Tighten screws and adjust the latch height with washers. If the issue persists, sand down rough edges or lubricate hinges with WD-40 or silicone spray. For stubborn gates, replace the latch mechanism—many hardware stores sell universal kits!
Do secret garden gates need winter prep?
Yes! Clean and dry gates before cold weather to prevent rust (especially metal). Apply a weatherproof sealant (like linseed oil for wood or rust inhibitor for iron). Remove snow buildup to avoid strain on hinges. Bonus: Add LED path lights for a magical winter entrance!
Wrapping up and next steps
The Secret Garden Gate isn’t just a privacy screen—it’s a magical escape that blends beauty with function, offering year-round charm and a touch of whimsy to your outdoor space.
Whether you’re crafting it yourself or dreaming of where to place it, this project proves that privacy can be delightful too. 🌿✨
Ready to transform your garden? Start small—sketch your design, gather your materials, and take that first step toward creating your own hidden retreat. The secret garden awaits!