Tools
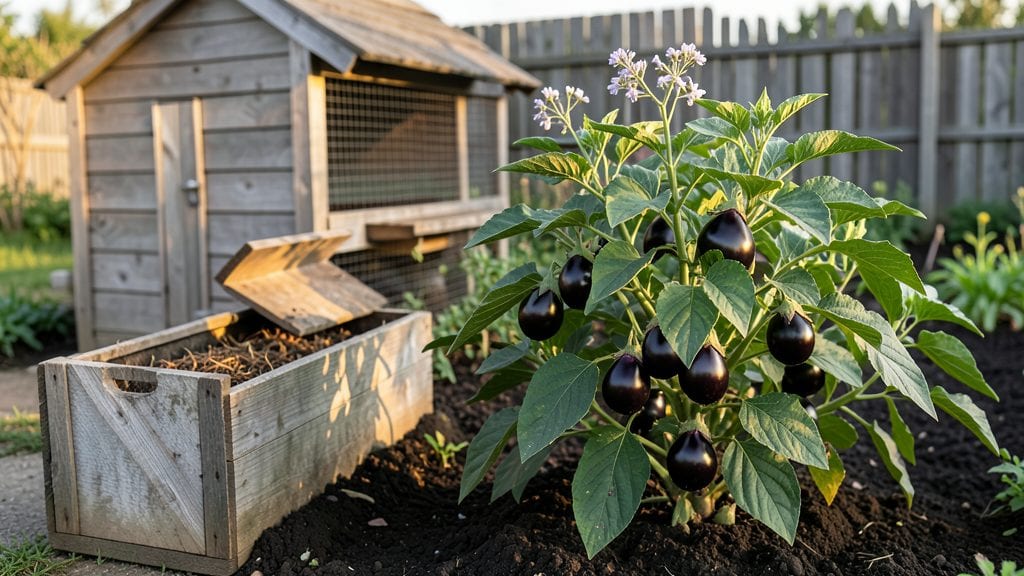
A self-sustaining garden doesn’t just grow food—it grows itself. 🌱 I spent years watching my garden fizzle after harvest until I rebuilt it around soil that feeds itself, plants that support each other, and water that stays where it belongs.
The key isn’t working harder; it’s working smarter by letting nature do most of the heavy lifting.
Picture this: a system where compost piles feed the soil, rainwater percolates into the ground instead of running off, and every plant has a job—whether it’s fixing nitrogen, repelling pests, or attracting pollinators. My garden now produces more food with less effort because the ecosystem runs itself.
You’ll need a few core elements—like a no-till approach, mulch, and diverse plantings—but once set up, the work drops to weeding and occasional harvesting.
By the end of the first year, you’ll notice richer soil, fewer pests, and plants that thrive without constant babying. The real magic happens in year two, when the system truly clicks: less watering, fewer fertilizers, and a garden that keeps giving long after you’ve stopped fussing over it.
This isn’t about perfection—it’s about resilience.
Whether you’ve got a backyard, a balcony, or just a sunny windowsill, the principles scale. The biggest misconception? You need acres. You don’t. You just need to start small, observe what works, and let the garden teach you. Let’s get growing the smart way.
📚 In This Guide
- What you need
- Instructions
- Tips and common mistakes
- Wrapping up and next steps
What you need
- ● Garden Beds or Containers: Raised beds (4’x8’ or custom size, 10–12" deep) – 2–4 beds for optimal yield
- ● OR in-ground beds (if soil quality is good)
- ● Large pots (10–15 gallons) – 5–10 pots for compact spaces
- ● Soil & Compost: High-quality compost (2–3 cubic yards for raised beds)
- ● Topsoil or peat-free potting mix (1–2 bags per bed)
- ● Worm castings (1–2 lbs per bed) – boosts nutrient density
- ● Mulch: Straw or wood chips (1–2 bags) – retains moisture, suppresses weeds
- ● Watering System: Drip irrigation kit (with timers) – saves time and water
- ○ OR soaker hoses + rain barrel (optional but recommended)
- ● Basic Tools: Garden fork or tiller (for soil prep)
- ● Hand trowel, pruners, and gloves
- ● Wheelbarrow (for moving soil/compost)
- ● Companion Planting Aids: Chicken wire (to deter pests like rabbits)
- ● Plant markers (for tracking varieties)
- ● Soil Amendments: Compost tea or fish emulsion (for nutrient boosts)
- ● Mycorrhizal fungi (enhances root growth)
- ● Season Extension Tools: Cold frames or row covers (for early/late seasons)
- ● Greenhouse (small or DIY – extends growing season)
- ● Pest Control: Neem oil or insecticidal soap (organic options)
- ● Ladybugs or praying mantis eggs (natural predators)
- ● ✅ Sunlight: At least 6–8 hours of direct sun daily (south-facing is ideal in the Northern Hemisphere).
- ● ✅ Water Access: A nearby spigot or reliable water source (gardens need 1–2 inches of water per week).
- ● ✅ Space: Even small yards or balconies can work with vertical gardening or square-foot methods.
- ● ✅ Time Commitment: Initial setup takes 1–2 weekends; maintenance is minimal (10–15 mins/day).
How to build a self-sustaining garden that keeps giving
Here’s the no-fuss approach I’ve used to grow food year-round with minimal effort—just smart layering and patience.
🌱 Step 1: Design for Continuous Harvests
Plan your space in three layers: tall plants (like trellised beans or peas) at the back, mid-height (tomatoes, peppers) in the middle, and low-growing (lettuce, herbs) up front. This creates shade for cooler months while maximizing sunlight exposure for summer crops. I always dedicate one corner to perennials—like asparagus or rhubarb—that come back stronger each year with almost no maintenance.
Leave 12-18 inches of space between plants to allow airflow, which prevents disease and makes weeding easier. If you’re short on space, use vertical gardening—hanging baskets for strawberries or a trellis for cucumbers. The key is to rotate crops annually to keep soil nutrients balanced without adding compost every year.
💧 Step 2: Set Up a Drip Irrigation System
Skip the watering can—drip irrigation delivers moisture directly to roots, saving time and reducing waste. Use ¼-inch tubing with emitters spaced 12-18 inches apart, depending on plant size. Bury the tubing 1-2 inches deep to protect it from freezing in winter and to keep leaves dry (which prevents fungal diseases). I run the system on a timer for 20-30 minutes daily, adjusting in extreme heat or drought.
Add a rain barrel to collect runoff—this gives you free water and reduces your outdoor hose use by up to 70%. Mulch heavily with straw or wood chips to lock in moisture and suppress weeds. You’ll water half as often once this is in place.
☀️ Step 3: Layer Soil for Nutrient Recycling
Start with 6 inches of compost mixed into the top 12 inches of soil—this feeds plants slowly and improves drainage. Then, add a 2-inch layer of mulch (straw works best) to protect soil from erosion and regulate temperature. Every 3-4 months, top-dress with aged manure or worm castings—this replenishes nutrients without the hassle of tilling.
Plant cover crops like clover or winter rye in empty beds. They fix nitrogen in the soil, suppress weeds, and prevent erosion. When it’s time to plant again, simply mow down the cover crop and let it decompose—no digging required.
✂️ Step 4: Harvest Strategically to Encourage Regrowth
Cut leafy greens (like kale or Swiss chard) at the outer leaves, leaving the inner growth intact. This keeps plants producing for months longer than if you pulled them entirely. For tomatoes and peppers, pinch off suckers (the small shoots in leaf axils) to direct energy to fruit production. I also prune dead or yellowing leaves regularly—this improves airflow and reduces pests.
Save seeds from your best producers (like heirloom tomatoes or beans) to replant next year. Store them in a cool, dry place in paper envelopes—this cuts seed costs by 90% over time. If you grow fast-maturing crops (like radishes or lettuce), succession plant every 2-3 weeks so you always have something ready to harvest.
🪴 Step 5: Maintain with Minimal Effort
Walk through your garden once a week to snip dead flowers (deadheading encourages more blooms) and pull weeds before they seed. I keep a small bucket of soapy water nearby to spray down pests like aphids—it’s non-toxic and works instantly. For long-term pest control, plant marigolds or nasturtiums at the edges—they repel bugs naturally.
In late fall, cut back annuals but leave perennials and self-seeding plants (like dill or cilantro) to overwinter. They’ll re-sprout in spring with no extra work. If you’re in a cold climate, mulch heavily (4-6 inches) to protect roots from freezing. This system cuts gardening time by 60% while keeping your harvests abundant.
Tips & tricks for perfect year-round garden productivity
A few smart strategies will help you maximize your garden's potential without extra work—just focus on these game-changers.
Spacing is Everything: In Step 1, when arranging your three-layer system, prioritize airflow by leaving that 12-18 inch gap between plants. I've found that proper spacing reduces fungal diseases by up to 40%—just watch how leaves touch each other after watering. For vertical gardening, use lightweight trellises that won't weigh down your plants as they grow.
Drip Irrigation Secrets: For the 20-30 minute daily watering in Step 2, position emitters closer to the base of mature plants (12 inches apart) and farther for seedlings (18 inches). I always bury the tubing deeper in winter (2 inches) to protect it from freezing—this simple adjustment prevents costly spring repairs. The rain barrel combo saves me hours of watering every week!
Soil Layering Payoff: That 6-inch compost layer in Step 3 isn't just feeding plants—it's creating a sponge-like structure that holds moisture during dry spells. I've seen plants survive weeks without rain when properly layered. For the 2-inch mulch, straw breaks down slower than wood chips, so use it for long-term beds where you won't disturb the soil.
Harvesting Hack: When cutting leafy greens in Step 4, use clean, sharp scissors instead of your hands. This prevents tearing and disease spread. For tomatoes, pinch suckers when they're pencil-sized—they'll grow back stronger and produce more fruit. I've doubled my tomato yield using this simple technique!
Pro Tips for Self Sustaining Garden
- A few smart strategies will help you maximize your garden's potential without extra work—just focus on these game-changers.
- Spacing is Everything: In Step 1, when arranging your three-layer system, prioritize airflow by leaving that 12-18 inch gap between plants.
- Drip Irrigation Secrets: For the 20-30 minute daily watering in Step 2, position emitters closer to the base of mature plants (12 inches apart) and farther for seedlings (18 inches).
Frequently asked questions
Got questions about creating a self-sustaining garden?
You’re not alone! Here are answers to the most common concerns—from setup to upkeep—so you can grow food effortlessly.
How much space do I need for a self-sustaining garden?
A self-sustaining garden can thrive in any space—even a small balcony or backyard! Start with a 4’x4’ raised bed for herbs and greens, or expand to 10’x10’ for year-round crops like tomatoes, squash, and beans. Use vertical gardening (trellises, hanging pots) to maximize space in tight areas.
How long does it take to become truly self-sustaining?
Most gardens reach partial sustainability in 6–12 months, but full self-sufficiency (no store-bought inputs) takes 2–3 years with composting, seed saving, and soil regeneration. Focus on perennial plants (like asparagus or rhubarb) and cover crops (clover, vetch) to speed up the process.
Is a self-sustaining garden more expensive than a regular garden?
Not necessarily! Initial costs (like compost bins or rainwater systems) may add up, but long-term savings on seeds, soil amendments, and groceries pay off fast. Start small: repurpose containers, use free greywater, and save seeds from store-bought produce to cut costs.
How do I handle pests without chemicals?
Prevention is key! Use companion planting (e.g., marigolds + tomatoes), beneficial insects (ladybugs, praying mantises), and physical barriers (row covers, copper tape). For stubborn pests, try neem oil or homemade sprays (garlic/chili pepper mix). Healthy soil = resilient plants!
Can I grow food year-round in cold climates?
Use season extenders like cold frames, hoop houses, or unheated greenhouses. Choose hardy crops (kale, spinach, carrots) and winter squash for storage. Mulch heavily in fall to insulate roots, and grow garlic and onions—they thrive in cold soil!
Wrapping up and next steps
A self-sustaining garden isn’t just a dream—it’s a practical, rewarding reality that connects you to nature while slashing your grocery bill. By leveraging permaculture principles, smart planning, and a little upfront effort, you can enjoy year-round harvests with minimal ongoing work.
The key? Start small, observe what thrives in your space, and let the ecosystem do the rest.
Ready to take the leap? Pick one section of your yard or balcony and sketch a simple design today—your future self (and wallet) will thank you! 🌱✨