Landscaping
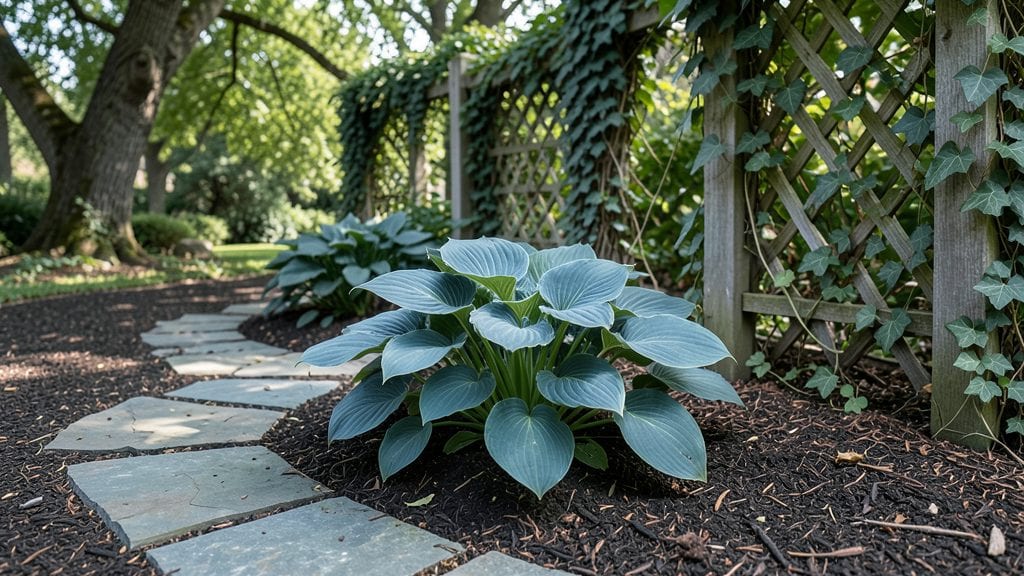
The side garden design that blocks nosy neighbors and stays lush year-round starts with a privacy-focused layout that works with your space. I turned my narrow, sun-baked strip into a fragrant green wall—no more peeking eyes or summer heat exposure.
The key is layering: tall plants at the back, mid-height shrubs in the middle, and spillers at the front to soften edges.
You’ll need three structural elements—a trellis for climbing plants, a narrow raised bed for herbs or veggies, and a mix of evergreens with seasonal bloomers. I used bamboo screens for instant privacy and filled gaps with drought-tolerant perennials that thrive in tight spots.
Even in 6-inch-wide strips, you can fit a thriving garden if you choose the right plants.
By midsummer, you’ll have a living room extension: morning shade from wisteria, afternoon scent from lavender, and winter structure from holly bushes. The best part? It’s low-maintenance once established—just trim back leggy growth and add mulch in spring. Let’s sketch out your perfect side yard retreat.
Works for urban alleys, suburban backyards, or rental yards—just adjust plant heights to your fence or wall. Here’s how to make it happen without breaking the bank or your back.
📚 In This Guide
- What you need
- Instructions
- Tips and common mistakes
- Wrapping up and next steps
What you need
- ● Plants: Tall evergreens (e.g., Thuja occidentalis or Ilex crenata) – 3–5 plants (6–8 ft tall).
- ● Medium shrubs (e.g., Hydrangea or Abelia) – 4–6 plants (3–5 ft tall).
- ● Low-growing ground cover (e.g., Ajuga or Creeping Thyme) – 10–15 sq ft.
- ● Seasonal flowers (e.g., Hosta, Ferns, or Heuchera) – 6–8 plants.
- ○ Structural Elements: Trellis or lattice panel (6–8 ft tall) – 1–2 units (optional for climbing plants).
- ● Arbor or pergola (if adding vertical interest) – 1 unit.
- ● Mulch: 2–3 bags (shredded bark or pine straw).
- ● Soil Amendments: Compost (1–2 cubic yards).
- ● Slow-release fertilizer (e.g., Osmocote).
- ● Shovel & spade (1 each).
- ● Garden trowel (1).
- ● Wheelbarrow (1).
- ● Pruners (1 pair).
- ● Measuring tape (1).
- ● Level (1).
- ● Gloves & knee pads (1 set each).
- ○ Optional: String line & stakes (for layout).
- ● Measure your side garden space (width × depth).
- ● Check soil type (amend if clay-heavy or sandy).
- ● Plan sunlight exposure (full sun, partial shade, or full shade).
- ● Check local regulations (e.g., HOA rules or native plant restrictions).
Instructions for crafting a privacy-focused side garden
Here’s how to build a layered side garden that blocks views year-round while keeping maintenance simple.
Plan Your Vertical Layers for Maximum Privacy
Start by sketching a simple cross-section of your side garden space, marking the height of your fence or wall at the back. Your goal is to create three distinct layers: a tall back row (6–8 feet), a mid-height middle row (3–5 feet), and a low front row (1–2 feet). This tiered approach ensures no gaps for peeking eyes, even when plants shift with seasons.
For the tallest layer, choose evergreens like Arborvitae or Emerald Green Thuja—they provide dense foliage from winter through summer. In the middle row, mix deciduous shrubs such as Weigela or Dwarf Fothergilla with ornamental grasses like Miscanthus for movement and texture. The front row should feature spreading ground covers like Creeping Juniper or Liriope to soften the base and prevent soil erosion.
Prepare the Soil for Long-Term Health
Before planting, loosen the soil to a depth of 12–18 inches using a broadfork or garden fork. This aeration encourages deep root growth, which is critical for plants in a side garden where they’ll face wind and seasonal temperature swings. Amend the soil with 3 inches of compost and 1 inch of aged bark mulch, working them into the top 6 inches. Avoid fresh mulch—it can compact and suffocate roots.
Test the soil pH if possible; most privacy plants thrive in slightly acidic to neutral soil (pH 6.0–7.0). If your soil is heavy clay, mix in 1 part perlite for every 3 parts soil to improve drainage. Water the amended soil deeply before planting to help it settle and eliminate air pockets.
Plant in Staggered Rows for Year-Round Coverage
Begin with the tallest plants at the back, spacing them 3–4 feet apart to allow for mature growth without overcrowding. Dig holes twice as wide as the root ball but no deeper, then place each plant so the top of the root ball sits 1 inch above ground level. This prevents soil from washing into the hole and causing rot.
Fill the hole with native soil, pressing gently around the edges to remove air gaps. Water each newly planted shrub with 1 gallon of water to encourage root expansion. For the middle and front rows, stagger plants so their canopies overlap slightly, creating a seamless privacy screen. Mulch each planting area with 2–3 inches of shredded bark, keeping it 3 inches away from stems to prevent moisture buildup.
Integrate Seasonal Interest for Continuous Privacy
While evergreens form the backbone of your side garden, add seasonal accents to keep the space dynamic. Plant spring-blooming bulbs like Daffodils or Tulips at the front, then layer in summer perennials such as Black-Eyed Susans or Coneflowers for color and pollinator support. In fall, incorporate ornamental grasses like Little Bluestem for movement and winter interest.
Prune back dead foliage in early spring before new growth emerges, and trim evergreens lightly in late summer to maintain their shape. Avoid heavy pruning—it weakens plants and reduces their ability to block views. Instead, focus on selective thinning to improve airflow and light penetration to the lower layers.
Maintain with Minimal Effort for Long-Term Success
Water deeply once a week during the first growing season to establish roots, then taper to every 10–14 days once plants are established, adjusting for rainfall. Apply a slow-release fertilizer in early spring to support new growth, and top-dress with 1 inch of compost annually in fall. This feeding schedule ensures plants grow steadily without the high maintenance of frequent amendments.
Monitor for pests like spider mites or scale insects, which thrive in dense shrubbery. Treat infestations early with neem oil or horticultural soap, and remove heavily damaged foliage promptly. With proper care, your side garden will mature into a lush, private retreat within 2–3 years, requiring only occasional pruning and mulching to stay vibrant.
Tips & tricks for perfect side garden design
A few strategic choices can transform your side garden from functional to breathtaking. Here's what I've learned after helping clients create private, year-round retreats.
The Plant Placement Strategy: In Step 1, when spacing your tall back row plants 3-4 feet apart, consider their mature width—not just their current size. I've seen clients crowd plants too closely, which leads to competition for sunlight and stunted growth. For Arborvitae, imagine each plant occupying a 4-foot diameter circle at maturity. This spacing creates that seamless privacy screen you're aiming for without leaving gaps.
Soil Preparation Secret: The 12-18 inch soil loosening in Step 2 isn't just about roots—it's about drainage. I recommend adding a 1-inch layer of coarse sand mixed with your perlite amendment if you're working with heavy clay soil. This creates tiny air pockets that prevent waterlogging, which is especially critical for evergreens that need consistent moisture but hate soggy roots. The deep watering after amending helps settle the soil without compacting it.
Seasonal Layering Technique: When adding your seasonal accents in Step 4, think vertically as well as horizontally. Plant taller spring bulbs like Tulips behind shorter Daffodils to create visual depth. For summer perennials, place Coneflowers behind Black-Eyed Susans—their vertical growth will complement each other beautifully. This layered approach ensures you get color interest at all heights, not just at eye level.
Maintenance Shortcut: The once-weekly watering schedule in Step 5 works beautifully, but here's a pro tip: install a simple drip irrigation system on a timer. Set it for 30 minutes once weekly during the first season, then adjust to every 10-14 days. This hands-off approach ensures consistent moisture without the guesswork, and you'll notice your plants establish roots more quickly with this reliable watering pattern.
Pro Tips for Side Garden Design
- A few strategic choices can transform your side garden from functional to breathtaking.
- The Plant Placement Strategy: In Step 1, when spacing your tall back row plants 3-4 feet apart, consider their mature width—not just their current size.
- Soil Preparation Secret: The 12-18 inch soil loosening in Step 2 isn't just about roots—it's about drainage.
Frequently asked questions
Got questions about transforming your side garden into a lush, private retreat? Here are answers to the most common concerns—so you can plan with confidence!
What’s the best time of year to start a side garden design project?
Spring and early fall are ideal! Planting in spring lets you establish roots before summer heat, while fall offers cooler temps and fewer pests. If your area has mild winters, late winter (before bud break) is also a great time. Always check your local frost dates to avoid planting too early.
Do I need a permit for a side garden with privacy screens or fences?
It depends on your location! Many municipalities have height restrictions (e.g., 6–8 feet for fences) or require permits for permanent structures like trellises or lattice. Check with your local building department or HOA (if applicable) before installing anything. A quick call saves headaches later!
What’s the most budget-friendly way to add privacy without breaking the bank?
Start with fast-growing, low-cost plants like bamboo (clumping types), privet hedges, or evergreen shrubs such as boxwood or holly. Repurpose materials like wooden pallets for vertical gardens or use affordable lattice panels. Mulch and recycled gravel can also stretch your dollar while suppressing weeds.
How do I keep my side garden looking green all year round?
Layer evergreens (e.g., arborvitae, juniper) with seasonal plants like camellias (winter blooms) or ornamental grasses (year-round texture). Add broadleaf evergreens for color contrast. Mulch heavily to retain moisture, and prune regularly to encourage dense growth. A mix of sun-loving and shade-tolerant plants ensures year-round coverage.
What’s the best way to deter pests (like deer or rabbits) from my side garden?
Use deer-resistant plants like lavender, Russian sage, or ninebark, and surround them with a physical barrier (e.g., chicken wire or fencing) during planting. For rabbits, opt for thorny shrubs (e.g., barberry) or apply pet-safe repellents like garlic spray. Motion-activated sprinklers can also scare off critters without harming them!
Wrapping up and next steps
Designing a side garden with privacy-focused layers and season-long greenery is a rewarding project that enhances both beauty and functionality.
Whether you’re working with vertical plants, shrubs, or trellises, the key is to blend practicality with aesthetic appeal—creating a serene, lush space that feels like an extension of your home. 🌿
Now that you’re armed with ideas, take the first step—sketch a rough layout, gather your materials, and start small! Even a single plant or a well-placed trellis can make a difference. Your future side garden awaits—go make it happen! ✨