Tools
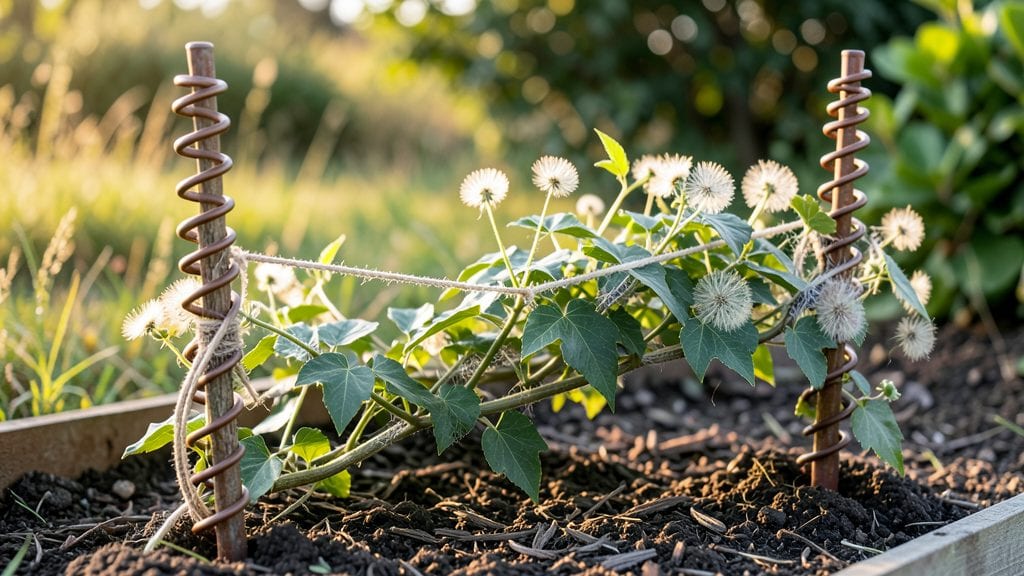
Transforming bare walls into lush vertical gardens starts with spiral garden stakes—my go-to solution for training vines, saving space, and adding architectural interest. These simple yet versatile supports turn climbing plants like morning glories, clematis, or even cucumbers into stunning living tapestries that draw the eye upward.
The best part? They’re easy to install, blend seamlessly into any design, and work in everything from formal flower beds to cozy cottage gardens.
You’ll need just a few basics: sturdy spiral stakes (metal lasts longest, wood adds rustic charm, and plastic suits budget-friendly projects), a mallet or hammer for securing them, and plants with tendrils or vines ready to climb.
For small spaces, group three stakes together to create a triangular trellis—ideal for corner gardens or balcony setups. In larger beds, space them 3 to 4 feet apart to give vines room to sprawl without tangling.
The key is positioning them where plants will naturally reach, like near fences or along pathways.
What you’ll achieve is a garden that feels three-dimensional, with fragrant blooms and cascading foliage framing your outdoor space.
Imagine morning glories spilling over a metal spiral in July, their blue trumpets contrasting against the cool metal, or sweet peas twining up wooden stakes in spring, their delicate blooms adding a touch of whimsy.
These stakes aren’t just functional—they’re the unsung heroes of vertical gardening, turning empty vertical space into a thriving, eye-catching feature.
Whether you’re working with a modern urban patio or a traditional herb garden, spiral stakes adapt effortlessly. For a polished look, pair them with clean-lined plants like roses or honeysuckle; for a wild, organic feel, let ivy or jasmine take over.
The possibilities are endless, and the best part is that once installed, they require minimal maintenance—just occasional pruning to keep vines in check. Ready to elevate your garden’s vertical game?
📚 In This Guide
- What you need
- Instructions
- Tips and common mistakes
- Wrapping up and next steps
What you need
- ● 1–2 wooden stakes (4–6 ft long, 1.5–2 inches in diameter—cedar or redwood lasts longest!)
- ● 1 roll of outdoor-rated twine or jute string (100–200 ft, ¼-inch thickness)
- ● 1–2 metal or wooden screws (1.5–2 inches long, for securing the top)
- ○ Optional: Non-toxic wood stain (to protect against weathering)
- ○ Optional: Decorative paint or natural dyes (for a personalized touch!)
- ● Hacksaw or handsaw (for cutting stakes to size)
- ● Drill or screwdriver (with a bit for pre-drilling screw holes)
- ● Measuring tape (to mark spiral spacing)
- ● Pencil (for marking cuts and screw placement)
- ● Sandpaper (80–120 grit, to smooth rough edges)
- ○ Optional: Clamps (to hold stakes steady while working)
- ● A flat, stable workspace (like a table or clean ground)
- ● Outdoor space (your garden or patio—sunlight helps the wood dry faster!)
- ○ Gloves (optional, but helpful for handling rough wood)
- ● Patience & creativity! (Spirals take time, but the results are worth it 🌿✨)
Step-by-Step guide to crafting spiral garden stakes
Transform flat spaces into vertical gardens with these simple, sturdy stakes perfect for climbing plants.
Gather Materials for Sturdy Construction
You'll need 4 wooden dowels (1/2-inch diameter, 36-inch length), a hand drill with a 1/8-inch bit, wood glue, and sandpaper (120-grit). I always pre-cut the dowels to 30 inches—this leaves room for securing them into the ground while keeping the spiral tall enough for most vines. Sand the ends smooth to prevent splinters, which is especially important if you're working with delicate plants like morning glories.
Lay out the dowels in a square formation, spacing them 3 inches apart at the top. This creates a stable base for your spiral. I mark the 12-inch point on each dowel with a pencil—this will be your first connection point. The reason for this spacing? Too close, and the structure becomes rigid; too far, and the spiral won't hold shape when weighted with growing plants.
Drill and Assemble the Spiral Structure
Using the 1/8-inch bit, drill holes at your marked 12-inch points on all four dowels. The holes should be deep enough to accommodate the dowel's thickness when inserted—about 1/2-inch deep. Apply a small dab of wood glue to each hole before inserting the dowels. This ensures a snug fit and prevents the structure from wobbling as plants climb.
Now, connect the dowels in a square spiral pattern. Start by inserting one dowel into the holes of the adjacent dowels, forming a 12-inch square frame. Rotate the assembly 90 degrees and repeat the process, creating a second square frame at the 24-inch mark. The glue will give you 10-15 minutes to adjust the alignment before it sets—use this time to ensure the structure remains plumb (straight up and down).
Reinforce and Secure the Base
Once the glue is dry, reinforce the structure by wrapping 1-inch wide strips of burlap around each connection point. Secure them with a few staples or additional glue. This step is critical—it prevents the dowels from splitting as vines grow heavier. Bury the bottom 6 inches of the stake 45 degrees into the ground, tamping the soil firmly around it to lock it in place.
For extra stability, especially in windy areas, drive a 6-inch wooden stake into the ground next to your spiral. Use twine or garden wire to loosely tie the spiral stake to it. This won't look pretty, but it’ll keep your trellis standing firm through storms. Water the base thoroughly after planting to help the soil settle and support the structure.
Attach Climbing Plants to the Spiral
Wait until your climbing plants—like pole beans, cucumbers, or jasmine—have 3-4 sets of true leaves before training them onto the spiral. Gently coil the vines around the dowels, securing them with soft plant ties or twine. Avoid wrapping anything too tight—you want the vines to grow, not strangle. I like to start at the bottom of the spiral and work my way up, guiding the plants in a clockwise direction for consistency.
As the plants grow, they’ll naturally spiral upward. You’ll notice the vines climb more aggressively once they reach the top of the stake—this is their way of seeking sunlight. Prune any side shoots that aren’t growing upward to encourage vertical growth. By mid-summer, your spiral stake will be a lush, vertical garden, saving space and making harvesting a breeze.
Tips & tricks for perfect spiral garden stakes
These simple strategies will help you build sturdy, long-lasting trellises that support climbing plants beautifully.
Precision in Step 1: When marking the 12-inch points on your dowels, use a pencil with a fine tip to make clean, accurate lines. This ensures your holes align perfectly when drilling, creating a tight spiral structure. I also recommend using a ruler to verify the 3-inch spacing at the top—this spacing is crucial for stability. Too tight, and your structure will feel rigid; too loose, and it may wobble under the weight of growing vines.
Drilling Technique in Step 2: The 10-15 minutes you have to adjust the alignment after inserting dowels is your golden opportunity. Use this time to check that the structure remains plumb (straight up and down) by holding a level against one side. If you notice any wobble, gently tap the dowels into place until everything feels secure. A small dab of wood glue in the holes before inserting the dowels creates a stronger bond and prevents the structure from loosening over time.
Reinforcement in Step 3: Don't skip wrapping the connection points with burlap strips—this is what keeps your spiral stakes from splitting as plants grow heavier. I like to use a staple gun for this step, but if you don't have one, a few drops of extra wood glue will work in a pinch. For extra stability in windy areas, consider using two 6-inch stakes instead of one—position them on opposite sides of your spiral for balanced support.
Plant Training in Step 4: When attaching climbing plants, start at the bottom and work your way up in a clockwise direction. This creates a consistent spiral pattern that guides the vines naturally. I've found that using soft plant ties or twine is gentler on young plants than plastic clips, which can leave marks as the vines grow. Remember to prune any side shoots that aren't growing upward—this encourages the plant to focus its energy on climbing rather than spreading horizontally.
Pro Tips for Spiral Garden Stakes
- These simple strategies will help you build sturdy, long-lasting trellises that support climbing plants beautifully.
- Precision in Step 1: When marking the 12-inch points on your dowels, use a pencil with a fine tip to make clean, accurate lines.
- Drilling Technique in Step 2: The 10-15 minutes you have to adjust the alignment after inserting dowels is your golden opportunity.
Frequently asked questions
Got questions about spiral garden stakes? You’re not alone! Here are some of the most common queries—and their easy answers—to help you master vertical gardening like a pro.
What are spiral garden stakes made of?
Most spiral garden stakes are crafted from durable, rust-resistant materials like galvanized steel, aluminum, or heavy-duty plastic. Look for stakes with a thick, tightly coiled spiral (at least 1/8" wire gauge) to ensure stability. Avoid flimsy or thin models—they won’t hold up to vigorous climbers like cucumbers or beans!
When is the best time to install spiral garden stakes?
Install stakes before planting for best results! Drive them into the soil as soon as you prepare the bed, or at least 1–2 weeks before transplanting seedlings. This gives roots time to establish near the stake, reducing stress on young plants. For perennials or woody vines, add stakes in early spring before new growth begins.
Can I reuse spiral garden stakes?
With proper care, spiral stakes can last years. After the growing season, clean them with a wire brush to remove dirt and debris, then store them in a dry place. If rust appears, scrub it off with vinegar or a metal polish. Just avoid bending or over-tightening—they’re designed for gentle support, not brute force!
What if my plants aren’t climbing the stake?
No worries—this is common with slower starters! Gently tie vines to the stake with soft twine or fabric strips as they grow. For stubborn climbers (like morning glories), try weaving the tendrils into the spiral grooves. Avoid tight knots—they can damage stems. If all else fails, a light spray of water might encourage upward growth!
Are there alternatives to spiral stakes?
Yes! If spiral stakes aren’t your style, consider:
- T-posts or bamboo poles: Budget-friendly but less flexible for tight spaces.
- Cattle panels or wire mesh: Great for heavy vines but bulkier to set up.
- DIY wooden trellises: Customizable but require more effort to build.
- Floating row covers with built-in stakes: Ideal for small gardens or early-season support.
Wrapping up and next steps
Transforming your garden into a lush vertical paradise with spiral garden stakes is easier—and more rewarding—than you think! These simple yet ingenious tools not only save space but also create stunning focal points for climbing plants like beans, peas, and roses.
Whether you're a seasoned gardener or just starting out, these stakes open up a world of creativity and growth potential.
Ready to elevate your garden game? Grab your materials, follow the steps, and let your plants climb to new heights—literally! Happy gardening! 🌱✨