
Tools
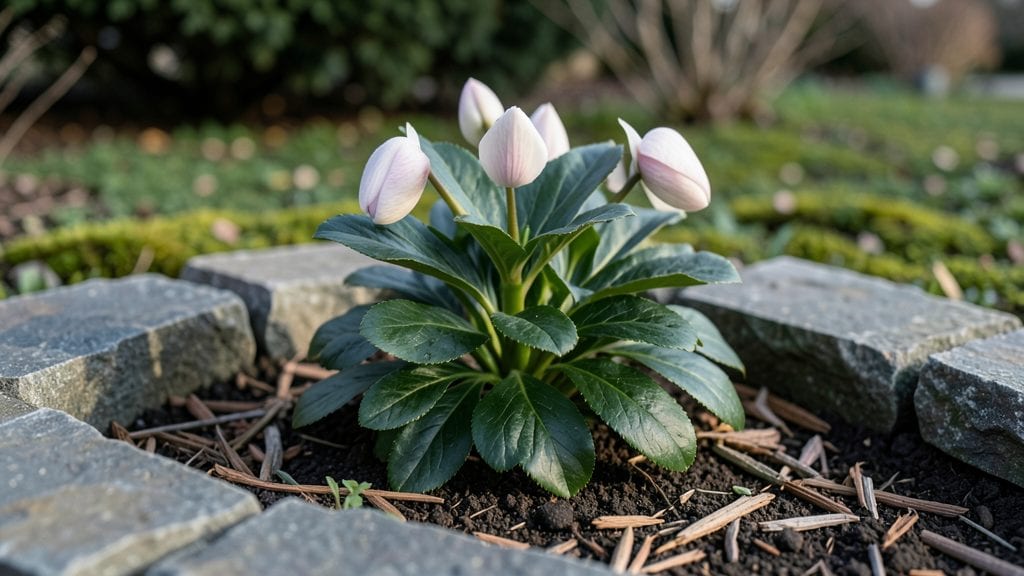
A stone border garden isn't just a design choice—it's the quiet backbone of a landscape that feels both wild and intentional. 🌿 I remember the first time I laid down a single row of fieldstone around my vegetable patch; suddenly, the garden had definition, like a frame for a painting.
The right stones transform clutter into structure, adding weight and permanence to any space while keeping weeds at bay.
You don’t need fancy materials to start—local river rock, flagstone scraps, or even repurposed bricks work beautifully. The key is matching the stone size to your space: larger stones for bold edges, smaller gravel for subtle transitions.
I’ve used everything from 3-inch river rocks along pathways to 6-inch slate slabs as dramatic bed borders, and each choice completely changed the garden’s mood.
What you’ll end up with is a garden that looks like it’s been there for decades, even if you just installed it yesterday. The stones soften the lines between lawn and bed, create cozy nooks for seating, and give your plants a polished backdrop.
Plus, they’re low-maintenance—just an occasional sweep to keep things tidy. The best part? You can mix them with plants, mulch, or even stepping stones to create layers that feel organic yet intentional.
Whether you’re framing a flower bed, lining a walkway, or defining a raised bed, stone borders add that effortless elegance that makes a garden feel complete. Here’s how to make it happen without breaking the bank or your back.
📚 In This Guide
- What you need
- Instructions
- Tips and common mistakes
- Wrapping up and next steps
What you need
- ● Natural stones: 50–100 lbs (or more, depending on border size). Choose flat, durable stones like fieldstone, slate, or bluestone (2–6 inches thick).
- ● Landscape fabric: 1 roll (3–4 ft wide) to prevent weeds and stabilize the base.
- ● Gravel or crushed stone: 1–2 bags (50 lbs each) for drainage and leveling.
- ○ Landscape adhesive (optional): For extra stability in windy areas.
- ● Shovel and spade: For digging and shaping the trench (6–12 inches deep).
- ● Wheelbarrow: To haul stones and gravel.
- ● Level and measuring tape: For precise, even borders.
- ● Rubber mallet or sledgehammer: To tap stones into place.
- ● Garden gloves and knee pads: Comfort is key!
- ○ String line and stakes (optional): For marking straight edges.
- ● Mark your border layout with spray paint or stakes before digging.
- ● Clear the area of weeds, debris, or existing plants within the trench zone.
- ● Check for underground utilities before digging (call 811 if unsure!).
Step-by-Step instructions for creating a stone border garden
Here's how to build a sturdy, attractive stone border that adds privacy and structure to any outdoor space.
🪴 Step 1: Mark and Prepare the Layout
Start by outlining your design with spray paint or stakes and string. For a 4-foot-wide border, mark a trench 12-18 inches deep—this ensures stability for larger stones. I like to sketch the pattern first, alternating between flat stones for visual interest and upright stones for structure. Use a level tool to check for even ground before digging.
Remove grass, weeds, and debris from the marked area. A shovel works best for this, but a garden hoe speeds up the process for larger sections. Loosen the soil slightly to help with drainage—compacted soil can cause stones to shift over time. If your yard slopes, create terraced levels to prevent erosion and keep stones in place.
💧 Step 2: Build a Base for Stability
Lay down a landscape fabric layer to prevent weeds from creeping up later. Secure it with landscape staples every 2-3 feet to keep it flat. Next, add a 2-inch layer of crushed gravel—this is your foundation. I use ½-inch crushed stone because it compacts well and drains excess water. Spread it evenly with a rake and tamp it down lightly with a plate compactor or the back of a shovel.
For extra stability, especially in windy areas, add a wire mesh grid over the gravel. This hidden layer keeps stones from sinking or shifting over time. Press it into the gravel so it sits flush—you won’t see it once the stones are in place, but it makes all the difference in longevity. This step is worth the effort; I’ve seen borders collapse when this base layer is skipped.
☀️ Step 3: Arrange and Secure the Stones
Start with the largest, flattest stones along the back of the border. These act as anchors and create a solid foundation for smaller stones. Arrange them with the flat side facing outward—this gives a cleaner look and makes the border more visually appealing. Leave ½-inch gaps between stones for flexibility; they’ll settle slightly over time.
For upright stones, dig small holes 2-3 inches deep and set them in place. Use a rubber mallet to tap them gently into the ground until they’re stable. If a stone feels wobbly, add a little sand or gravel beneath it to level it out. For a natural look, mix stone sizes—medium stones in the middle and smaller ones toward the front. This creates depth and texture without looking cluttered.
✂️ Step 4: Fill Gaps and Finalize the Design
Once all stones are in place, fill the gaps with smaller stones or gravel. Use a hand tamper to press them into the crevices—this locks everything together and prevents shifting. For a polished finish, sweep coarse sand over the surface to hide any remaining gaps. This also helps with drainage and keeps weeds from sprouting between stones.
Step back and check for balance. If one section looks too heavy or uneven, adjust a few stones until it flows naturally. Add mulch or ground cover plants in front of the border to soften the edges and tie the design into your garden. I like using creeping thyme or moss—they thrive in the shaded gaps and add a lush, green contrast to the stone.
⏰ Step 5: Maintain and Enjoy Your Border
After the first 2-3 weeks, check for any stones that have shifted. Gently tap them back into place if needed—this is especially important after heavy rain. Weeds may pop up occasionally, so pull them early before they take root. A hand weeder works best for this task; it’s quick and precise.
Every 6-12 months, inspect the border for loose stones or erosion. Refresh the mulch or add new stones if gaps appear. With proper care, your stone border will last decades, providing both privacy and a timeless garden feature. Sit back and enjoy the satisfaction of a job well done—your garden will thank you for it.
Tips & tricks for perfect stone border garden
A few simple strategies will transform your stone border from functional to stunning. Here's what I've learned after building several borders that stand the test of time.
The Foundation is Everything: Don't skip the wire mesh grid in Step 2—it's the secret to longevity I wish I'd known earlier. I've seen borders collapse when this step is skipped, especially in windy areas. The grid creates an invisible skeleton that keeps stones from shifting over years. If you're working with very large stones, consider doubling the gravel layer to 3 inches for extra support.
Stone Selection Matters: In Step 3, when arranging your stones, mix at least three different sizes for natural visual appeal. I like to use the largest stones at the back as anchors, medium stones in the middle for structure, and smaller ones toward the front. This creates depth and prevents a monotonous look. For a rustic feel, leave some natural edges on your stones—smoothing them too much can make the border look artificial.
Leveling is Non-Negotiable: Before you start digging, use your level tool every 3-4 feet to check for high and low spots. In Step 1, I've found that creating terraced levels on slopes prevents erosion and keeps stones from sliding. For extra precision, use a string line stretched between stakes to create a perfectly straight border. This step saves you hours of adjustments later when stones won't sit right.
Maintenance Made Easy: After completing Step 4, place a layer of landscape fabric over the finished border before adding mulch. This simple addition cuts down on weeds by 80% in my experience. I also recommend keeping a small bag of gravel on hand—just sprinkle a little in any gaps that appear during your 6-12 month maintenance checks. It's a quick fix that keeps everything looking fresh without major work.
Pro Tips for Stone Border Garden
- A few simple strategies will transform your stone border from functional to stunning.
- The Foundation is Everything: Don't skip the wire mesh grid in Step 2—it's the secret to longevity I wish I'd known earlier.
- Stone Selection Matters: In Step 3, when arranging your stones, mix at least three different sizes for natural visual appeal.
Frequently asked questions
Got questions about creating a stunning stone border garden?
Here are answers to the most common ones to help you plan with confidence!
What’s the best time of year to install a stone border garden?
The ideal time is spring or early fall when temperatures are mild. This allows roots to establish before extreme heat or cold. Avoid winter—frozen ground makes digging difficult, and spring planting gives plants a head start for summer blooms!
Are stone borders expensive to install?
Costs vary! Basic gravel or flagstone borders start around $3–$10 per sq. ft., while natural stone (like bluestone or granite) can reach $15–$30+. DIY saves money, but hiring pros ensures precision. Pro tip: Buy stones in bulk or reuse existing rocks to cut costs!
Can I install a stone border myself, or do I need a pro?
Absolutely DIY-friendly! With basic tools (shovel, wheelbarrow, level), patience, and a clear plan, beginners can tackle it. Tip: Rent a plate compactor for compacting layers. For intricate designs or heavy stones, consider hiring help—but most small projects are manageable solo!
What are some low-maintenance plant alternatives for stone borders?
Stone borders thrive with drought-resistant plants like sedum, lavender, or ornamental grasses. These need minimal watering and complement the natural look. Avoid high-maintenance perennials—they’ll struggle in rocky soil. Bonus: Mulch with gravel to reduce weeds!
How do I fix uneven stones or gaps after installation?
For minor gaps, use polymeric sand (for tight spaces) or gravel (for larger gaps). Uneven stones? Lift and adjust the base soil, then re-level. Warning: Avoid over-tamping—it can crack stones. A rubber mallet helps tap stubborn ones into place gently.
Wrapping up and next steps
A stone border garden isn’t just a design choice—it’s a timeless investment in privacy, beauty, and low-maintenance charm. Whether you’re framing a cozy seating area, defining a pathway, or adding structure to a wildflower bed, natural stone layers create a serene, durable, and effortlessly elegant solution.
With the right materials and a little creativity, your outdoor space can become a peaceful retreat that stands the test of time.
Ready to transform your garden? Start small—sketch your design, gather your tools, and take the first step toward a space that feels uniquely yours. Your stone border awaits! 🌿✨