
Tools
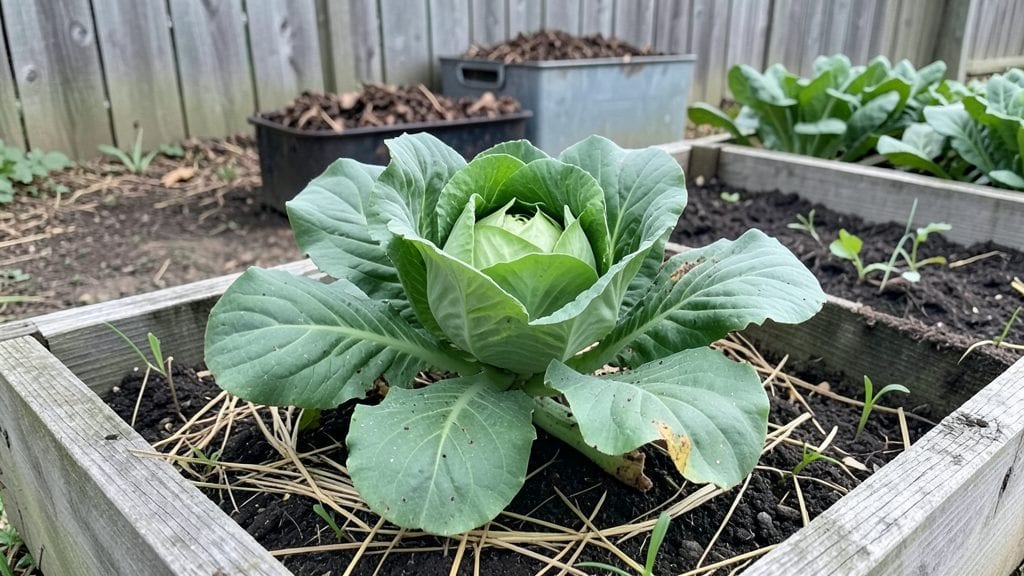
A student organic garden doesn’t need a backyard—just creativity and a few square feet. I designed mine in a college courtyard using repurposed pallets and old buckets, and now we harvest greens year-round. The key is vertical space and cold-hardy crops that thrive even when classes keep us busy.
Start with three simple supplies: a sturdy container (or stacked shelves), organic potting mix, and seeds for fast-growing crops like lettuce, radishes, or microgreens. Add a $10 drip irrigation kit to save time, and you’re set. Most student gardens run on $50 or less—no fancy tools needed.
By summer, you’ll be sharing fresh salads with neighbors while learning soil science the hands-on way. The best part? Every harvest teaches sustainability—whether you’re composting scraps or swapping extras with classmates. This isn’t just gardening; it’s a community growing together.
Works in dorms, rooftops, or shared courtyards—just adjust for shade or sun. The first harvest comes in as little as 3 weeks with the right plants. Let’s turn that concrete into green, one seed at a time.
📚 In This Guide
- What you need
- Instructions
- Tips and common mistakes
- Wrapping up and next steps
What you need
- ● Growing Containers: 1–3 self-watering planters (10–15" deep, 12–18" diameter) for herbs/leafy greens
- ● 1–2 raised beds or fabric grow bags (12" deep, 4'x2' or smaller) for root crops
- ● Vertical planters (wall-mounted or hanging) for space-saving climbers (e.g., beans, cucumbers)
- ● Soil & Amendments: 2–3 bags organic potting mix (sterilized, peat-free preferred)
- ● 1 bag compost or worm castings (for nutrient-rich soil)
- ● 1 lb organic fertilizer (e.g., fish emulsion or bone meal)
- ● Seeds & Seedlings: Seeds: 5–10 packets of fast-growing varieties (e.g., lettuce, radishes, microgreens)
- ○ Seedlings (optional): 3–5 starter plants (e.g., tomatoes, peppers, basil)
- ● Basic Tools: 1 hand trowel (for planting/transplanting)
- ● 1 pruners (for harvesting/herb trimming)
- ● 1 watering can (1–2 gallons, with a rose nozzle)
- ● 1 spray bottle (for seedling care)
- ● Drip irrigation kit or self-watering system (for low-maintenance setups)
- ● Grow lights (LED, full-spectrum) for indoor/winter growing
- ● Trellises or stakes (for vertical support—think beans, peas, or cucumbers!)
- ● Organic pest control (neem oil, diatomaceous earth, or companion plants like marigolds)
- ● Journal/notebook (to track plant progress and harvest dates!)
- ● ✅ Sunlight access: At least 4–6 hours of direct sun daily (south-facing windows or balconies work great!)
- ● ✅ Water source: Easy access to water (hose, sink, or rainwater collection)
- ● ✅ Time commitment: 10–15 minutes daily for watering/weeding (or 1 hour weekly if using self-watering systems!)
- ● ✅ Space: As little as 1 sq. ft. (for microgreens) or up to 100 sq. ft. (for a full raised bed)
Instructions for designing a functional student organic garden
Let's create a thriving organic garden that maximizes small spaces and delivers harvests year-round.
Plan Your Space and Layout
Start by measuring your available area and sketching a simple grid. For a 4-person student garden, I recommend a 4' x 8' raised bed or container system—this gives everyone enough space while keeping maintenance manageable. Divide the area into 12-inch wide planting strips (also called "beds") separated by 6-inch pathways for easy access. This narrow-width prevents soil compaction and makes weeding more efficient.
Consider vertical space too. Trellises along fences or walls double your growing area for vining plants like beans or cucumbers. Place taller plants on the north side of the garden to avoid shading shorter crops. Use your sketch to map out sun exposure—most vegetables need 6+ hours of direct sunlight daily, while leafy greens tolerate 4-5 hours. Mark these zones clearly before planting.
Prepare Soil and Planting Mediums
For organic gardening, focus on loose, fertile soil that drains well but retains moisture. Mix 2 parts topsoil with 1 part compost and 1 part perlite or coarse sand to improve aeration. If working with containers, use a sterile potting mix combined with worm castings for nutrients. Spread a 2-inch layer of mulch (like straw or shredded leaves) over the soil surface to suppress weeds and retain moisture.
Test your soil's pH using a simple kit—most vegetables thrive in a neutral range of 6.0-7.0. If your soil is too acidic, amend it with crushed limestone; for alkaline soil, add sulfur or peat moss. Avoid chemical fertilizers; instead, incorporate compost tea or fish emulsion every 4-6 weeks for organic nutrition. This preparation ensures your plants grow strong and resist pests naturally.
Select and Arrange Plants for Year-Round Growth
Choose a mix of cool-season crops (like lettuce, spinach, and kale) and warm-season crops (such as tomatoes, peppers, and basil) to stagger harvests. In early spring and fall, focus on fast-growing greens that tolerate cooler temperatures. During summer, prioritize heat-loving plants and use shade cloth to protect delicate crops from intense sun.
Arrange plants by their maturity dates—place quick-growing crops (like radishes or bush beans) near the front of the bed so they don’t shade slower growers (like carrots or cabbage). Succession planting is key: Sow new seeds every 2-3 weeks for continuous harvests. For example, plant lettuce every 10 days in spring and fall to ensure a steady supply. This method keeps your garden productive even in limited space.
Implement Watering and Maintenance Systems
Install a drip irrigation system or soaker hoses to deliver water directly to the roots, reducing waste and preventing fungal diseases. Water early in the morning to allow foliage to dry before evening, which minimizes pest issues. Aim for 1 inch of water per week, adjusting for rainfall. Use a rain gauge to track moisture levels—overwatering is just as harmful as underwatering.
Weed regularly to prevent competition for nutrients; pull weeds when they’re small to avoid disturbing roots. Rotate crops annually to prevent soil depletion and pest buildup. For example, if you planted tomatoes in one section this year, grow beans or peas there next year—they fix nitrogen in the soil. Keep a gardening journal to track plant performance, watering schedules, and pest issues. This record helps refine your approach for future seasons.
Extend the Growing Season with Protective Structures
Use row covers, cold frames, or low tunnels to shield plants from frost and extend the growing season. In early spring or late fall, drape floating row covers over crops like lettuce or spinach to protect them from light frosts (down to 25°F). For a longer season, build simple cold frames from clear plastic or glass panels propped over wooden frames—these trap heat during the day and insulate at night.
In winter, focus on hardy greens like kale, Swiss chard, or winter radishes, which thrive in cooler temperatures. If space allows, grow microgreens indoors under grow lights for fresh harvests year-round. Even a small windowsill setup with a seed tray and LED light can produce enough greens for salads. This layered approach ensures your garden stays productive no matter the season.
Tips & tricks for perfect student organic garden layouts
Creating a functional student garden requires thoughtful planning—here are the game-changing details that separate a good layout from a truly productive one.
Space Optimization: In Step 1, when dividing your 4' x 8' bed into 12-inch planting strips, consider adding removable dividers between sections. This allows you to adjust bed widths seasonally—widening for bushy plants like squash in summer and narrowing for leafy greens in spring. I've found that 10-inch strips work better for root crops like carrots, while 14-inch strips accommodate larger plants like tomatoes. The key is flexibility without sacrificing the 6-inch pathways you need for access.
Soil Preparation Strategy: For Step 2's soil mix, I recommend pre-mixing your 2 parts topsoil, 1 part compost, and 1 part perlite in a wheelbarrow before filling your raised beds. This ensures even distribution and prevents "hot spots" of pure compost that can burn plant roots. When testing pH, aim for the upper end of the 6.0-7.0 range (around 6.8) for most vegetables—this gives a slight buffer against minor fluctuations. The 4-6 week compost tea schedule is perfect, but I've had best results with a biweekly application during peak growing months.
Seasonal Plant Rotation: Building on Step 3's succession planting, create a simple color-coded planting calendar using the 10-day lettuce schedule as your baseline. Mark cool-season crops in blue and warm-season in red, then overlay your 2-3 week succession intervals. This visual system helps prevent overcrowding and makes it easy to spot gaps where you can add quick-growing fillers like radishes. The north-south placement of taller plants is critical—just remember that even a 2-foot difference in height can reduce sunlight by 50% for shorter plants.
Cold Protection Hacks: When using row covers to protect down to 25°F in Step 5, secure them tightly at the edges using bricks or landscape staples—even small gaps can let in damaging cold air. For cold frames, add a thermometer inside to monitor temperatures. I've found that adding a 1-inch layer of straw mulch inside the cold frame creates an additional insulating layer that can extend protection down to 20°F for hardy greens. This simple modification makes a noticeable difference in early spring and late fall harvests.
Pro Tips for Student Organic Garden
- Creating a functional student garden requires thoughtful planning—here are the game-changing details that separate a good layout from a truly productive one.
- Space Optimization: In Step 1, when dividing your 4' x 8' bed into 12-inch planting strips, consider adding removable dividers between sections.
- Soil Preparation Strategy: For Step 2's soil mix, I recommend pre-mixing your 2 parts topsoil, 1 part compost, and 1 part perlite in a wheelbarrow before filling your raised beds.
Frequently asked questions
Got questions about starting or maintaining a student organic garden? You’re not alone! Here are some common concerns—and practical solutions—to help you grow with confidence.
How much space do I really need for a student organic garden?
A small balcony, windowsill, or even a repurposed bookshelf can work! Focus on vertical gardening (like wall planters or hanging pots) and container gardening (5–10 gallon pots for herbs/leafy greens). Leafy veggies (spinach, lettuce) thrive in shallow spaces, while root crops (carrots, radishes) need deeper containers (12+ inches). Start small—even a 3’x3’ plot can yield 20+ lbs of produce!
When is the best time to plant in a student garden?
Timing depends on your climate, but cool-season crops (kale, peas, spinach) can often be planted in early spring or fall, while warm-season crops (tomatoes, peppers, basil) need after the last frost (check your local USDA zone). For year-round harvests, use succession planting (e.g., sow lettuce every 2 weeks) and season extenders like cold frames or row covers.
What’s the most budget-friendly way to start a student organic garden?
Skip expensive setups! Use free/cheap materials like:
- Recycled containers (yogurt cups, plastic bins, old boots for vertical gardens).
- Compost from kitchen scraps or free local sources (check community boards).
- Seed swaps or discount seed packets (try Seed Savers Exchange or local libraries).
- DIY trellises from bamboo stakes or old ladders.
How do I keep pests away without chemicals in a small garden?
Prevention is key! Try these organic, student-friendly tricks:
- Physical barriers: Row covers, copper tape (for slugs), or collars around seedlings.
- Companion planting: Pair basil with tomatoes or marigolds with veggies to repel pests.
- Handpick pests early (like aphids) and drop them in soapy water.
- Encourage predators: Ladybugs (buy eggs online) or build a bee hotel for pollinators.
Can I grow tomatoes, peppers, or other heavy feeders in a small space?
Use determinate varieties (bush types like ‘Tiny Tim’ tomatoes or ‘Jalapeño M’) for compact growth. Train vining plants (like indeterminate tomatoes) with cages or trellises to save space. Feed them organic fertilizer (compost tea, worm castings, or diluted fish emulsion) every 2–3 weeks. Pro tip: Prune suckers (side shoots) to focus energy on fruit production!
Wrapping up and next steps
Starting a student organic garden is more than just a hobby—it’s a hands-on way to grow confidence, sustainability, and fresh produce, even in tight spaces! 🌱 Whether you’re a dorm dweller with a windowsill or a campus group with a shared plot, these space-saving layouts prove that big harvests don’t need big yards.
From vertical towers to container setups, you now have the tools to turn sunlight into snacks year-round.
Ready to dig in? Your next step: Sketch a tiny plot (or balcony!) and pick one layout to test. Need inspiration? Revisit the FAQs for troubleshooting tips—or share your green thumb wins with fellow student gardeners! 🌿