
Tools
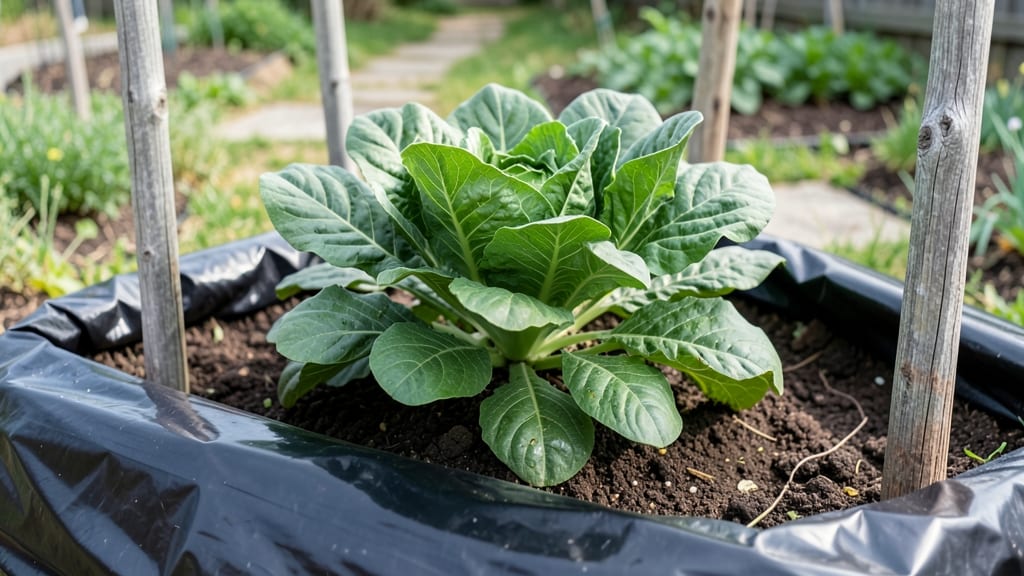
Tarping your garden transforms it from a battleground against weeds and erosion into a protected, fertile zone year-round. 🌱 I learned the hard way—last summer, my freshly tilled beds became a weed jungle in weeks until I tried this simple technique.
The right tarp blocks sunlight, smothers weeds, and keeps soil from washing away in heavy rains.
You’ll need a heavy-duty landscape fabric or black plastic tarp (at least 4-6 mil thick), stakes or bricks to weigh it down, and a sunny day to lay it. The key is securing edges tightly so wind doesn’t lift it—think of it like tucking in a blanket.
For compost piles, use a breathable tarp to prevent overheating while still blocking weeds.
Within weeks, you’ll see fewer weeds, better moisture retention, and soil that stays loose and workable. The best part? It works in spring to prep beds, in summer to suppress weeds, and even in winter to protect against erosion.
Just avoid leaving it too long in hot weather—soil can overheat under thick plastic.
Perfect for vegetable gardens, flower beds, or even bare soil between seasons. Once you try it, you’ll wonder how you ever gardened without this game-changer. Let’s get your soil shielded!
📚 In This Guide
- What you need
- Instructions
- Tips and common mistakes
- Wrapping up and next steps
What you need
- ● Tarps (Heavy-Duty Plastic or Landscape Fabric): Minimum 4–6 mil thickness for durability (6 mil is ideal for year-round use).
- ● Size: At least 10–20% larger than your garden bed to allow for secure anchoring (e.g., a 10’x12’ bed needs a 12’x14’ tarp).
- ● Material options: Black plastic (absorbs heat, great for solarization).
- ● Clear plastic (allows light but blocks weeds).
- ● Landscape fabric (breathable, allows moisture through).
- ● Stakes or U-Clips: Metal or heavy-duty plastic stakes (6–12 inches long, spaced 3–4 feet apart).
- ● U-clips or tarp clips (to secure edges without puncturing the tarp).
- ○ Burlap or Landscape Fabric (Optional for Edges): Use to protect soil where stakes or clips press into the ground.
- ● Rocks or Bricks (for Weight): Heavy objects to anchor tarp edges in windy areas (e.g., 2–4 bricks per corner).
- ● Utility Knife or Scissors: For cutting tarp to size or trimming edges.
- ● Measuring Tape: To ensure your tarp covers the entire bed without gaps.
- ● Insulation Layer: Straw, leaves, or cardboard under the tarp in winter to insulate soil.
- ● Corner Weights: Specialized tarp corner weights (e.g., 2–4 lbs each) for extra stability.
- ● Irrigation System (Drip Tape): If watering under the tarp, use drip irrigation to avoid disturbing the tarp.
- ● Soil Thermometer: To monitor soil temperature under clear tarps (especially for spring planting).
Step-by-step guide to tarping your garden for weed control and soil health
Here's the straightforward method I use to smother weeds, protect soil, and build fertility without breaking a sweat.
🌱 Step 1: Clear the Area and Choose Your Tarping Materials
Start by removing any existing weeds or debris from the garden bed. I like to pull weeds when the soil is moist—it makes them easier to extract. Once cleared, choose between black plastic tarp (best for weed suppression) or cardboard + thick landscape fabric (more eco-friendly and allows some moisture through).
If using cardboard, make sure it's unbleached and free of tape or staples—these can leach chemicals into the soil. For plastic, opt for 4-6 mil thickness to handle seasonal weight from rain or snow. Measure your garden bed and cut the material 6-12 inches larger than the area to ensure full coverage with overhang.
💧 Step 2: Prepare the Soil Surface for Maximum Effectiveness
Before laying down the tarp, give the soil a light watering—this helps settle any loose debris and creates a smoother surface for the material to lie flat. A flat tarp works best because uneven spots can trap moisture and create gaps where weeds might still grow.
If your soil is rocky or uneven, smooth it out with a rake or board. This step is crucial because even small air pockets under the tarp can reduce its effectiveness. I like to walk over the area to press down any remaining high spots—this ensures the tarp will stay snug and block sunlight completely.
☀️ Step 3: Secure the Tarp and Weight Down the Edges
Lay the tarp over the bed and tuck the edges under any surrounding mulch, rocks, or garden borders to prevent wind from lifting it. For extra security, especially in windy areas, use bricks, logs, or heavy garden stones to weigh down the corners and edges. I place a stone every 3-4 feet around the perimeter.
If you're tarping for an extended period (like winter), check the edges every few weeks to ensure they haven’t shifted. A lifted tarp loses its effectiveness—weeds need just 1-2 inches of sunlight to grow, so even small gaps can become problem spots.
⏰ Step 4: Monitor and Adjust for Seasonal Conditions
For spring and summer, leave the tarp in place for 4-8 weeks to fully suppress weeds. Check periodically for condensation underneath—if you see water droplets, lift a corner to let excess moisture escape and prevent mold or rot. This is especially important in humid climates.
In fall and winter, tarping helps protect soil from erosion and retains warmth. If heavy rain or snow accumulates, gently brush it off the tarp to prevent excessive weight from tearing it. I also like to leave small sections uncovered near plants I’m overwintering—this lets them peek through while still protecting the bulk of the soil.
🌿 Step 5: Remove the Tarp and Reintroduce Plants or Soil Amendments
When you’re ready to replant, remove the tarp on a dry, sunny day to let the soil warm up quickly. Use a fork or rake to break up any compacted soil underneath—tarping can make the top layer dense over time. If you notice any remaining weed seeds, pull them out before planting.
This is also the perfect time to add compost or organic matter to the soil. Tarping enriches the soil by breaking down organic material and improving structure, so it’s ready for new plants. I like to mix in a 1-2 inch layer of compost before replanting to give my garden a nutrient boost.
Tips & tricks for perfect garden tarping
A few simple tricks that'll make your garden tarping effortlessly effective and save you from common pitfalls.
Material Selection: Black plastic tarp is the gold standard for weed suppression because it blocks nearly all sunlight, but cardboard offers a more eco-friendly option that still works well for short-term use. If you choose cardboard, layer it with landscape fabric to prevent weeds from pushing through. I've found that 4-6 mil thickness plastic handles seasonal weight best—thinner materials may tear under snow or heavy rain. For large areas, consider joining multiple tarps with duct tape along the edges to avoid seams that could let weeds through.
Soil Prep Secret: The light watering in Step 2 isn't just about settling debris—it's about creating the perfect foundation. Wet soil helps compact the top layer slightly, which prevents air pockets that could allow weeds to grow. After smoothing, walk over the area with your boots (wearing socks!) to press down any remaining high spots. This might seem silly, but it makes a huge difference in how snug your tarp will lay. I've had tarps lift in windy conditions because I skipped this step—don't make my mistake!
Seasonal Timing: The 4-8 week range for spring/summer tarping might seem broad, but it depends on your climate and weed pressure. In hot, dry areas, 4 weeks is often enough, while humid regions may need the full 8 weeks. For winter tarping, I've learned to check edges every 2-3 weeks during thaws—even a small gap can let weeds sneak through. Pro tip: Mark your tarp with a permanent marker before placing it so you can easily identify which garden bed it covers when you're ready to remove it later.
Removal Strategy: Removing the tarp on a dry, sunny day is crucial because damp soil can turn into mud when you try to break it up. I like to roll up the tarp first to contain any remaining weed seeds, then shake it out over a compost pile or burn pile (if local regulations allow). For stubborn weed seeds that remain, sprinkle a thin layer of mulch after removing the tarp—this creates another barrier while letting rain penetrate to your plants.
Pro Tips for Tarping A Garden
- A few simple tricks that'll make your garden tarping effortlessly effective and save you from common pitfalls.
- Material Selection: Black plastic tarp is the gold standard for weed suppression because it blocks nearly all sunlight, but cardboard offers a more eco-friendly option that still works well for short-term use.
- Soil Prep Secret: The light watering in Step 2 isn't just about settling debris—it's about creating the perfect foundation.
Frequently asked questions
Got questions about tarping your garden? You’re not alone—this method is game-changing but can feel tricky at first. Below, we’ve rounded up the most common concerns and straightforward answers to help you tarpe your garden like a pro.
When is the best time to tarp my garden?
The ideal time to tarp depends on your goal:
- Weed suppression: Apply in early spring (before weeds sprout) or late summer (after summer weeds fade).
- Soil warming: Use in late winter to kickstart spring planting.
- Winter protection: Cover in fall after the first frost to prevent erosion and freeze-thaw cycles.
For year-round use, overlap seasons slightly (e.g., remove in early spring for planting).
How long should I leave the tarp on?
Duration varies by climate and purpose:
- Weed control: 4–8 weeks in warm weather (longer in cooler climates).
- Soil improvement: 2–3 months to break down organic matter (remove before planting).
- Winter cover: Leave until spring thaw, then remove and aerate soil before planting.
Check soil moisture—if it’s soggy, reduce tarp time to avoid compaction.
Can I just use plastic sheeting instead of a breathable tarp?
Plastic sheeting can work, but it’s riskier:
- Pros: Cheaper, blocks all light (faster weed kill).
- Cons: Traps heat/moisture, leading to anaerobic soil (bad for microbes). Can suffocate plants if left too long.
Better choice: Use black landscape fabric or breathable tarps (like those with UV protection) for safer long-term use.
What if my soil gets too hot under the tarp?
Overheating is common in sunny climates. Prevent it with:
- Use a light-colored tarp (reflects heat better than black).
- Leave 1–2 inch gaps at edges for airflow.
- Water soil before tarping to buffer heat.
- Remove tarp if temps exceed 100°F (38°C) for more than a few days.
Pro tip: Bury edges slightly to keep tarp in place without trapping heat.
How do I remove weeds stuck to the tarp?
Weeds clinging to your tarp are a pain, but here’s how to handle it:
- Let the tarp sit in the sun for 10–15 minutes to dry weeds out.
- Use a putty knife or stiff brush to scrape off debris.
- For stubborn weeds, soak the tarp in vinegar or soapy water (rinse well before reuse).
- Store tarp in a dry, shaded area to prevent mold.
Bonus: This is a great time to sterilize your tarp for next season!
Wrapping up and next steps
Tarping your garden is a game-changer for soil health, weed control, and erosion prevention—no matter the season! 🌱 Whether you’re a seasoned gardener or just starting out, this simple technique saves time, reduces waste, and keeps your soil thriving.
The best part? You don’t need fancy tools—just a little planning and the right materials.
Now that you’re armed with the how-tos and pro tips, it’s time to roll up your sleeves and give your garden the protection it deserves. Start small—try a single bed this season—and watch how much easier (and more rewarding!) gardening becomes. Happy tarping! 🚀