
Tools
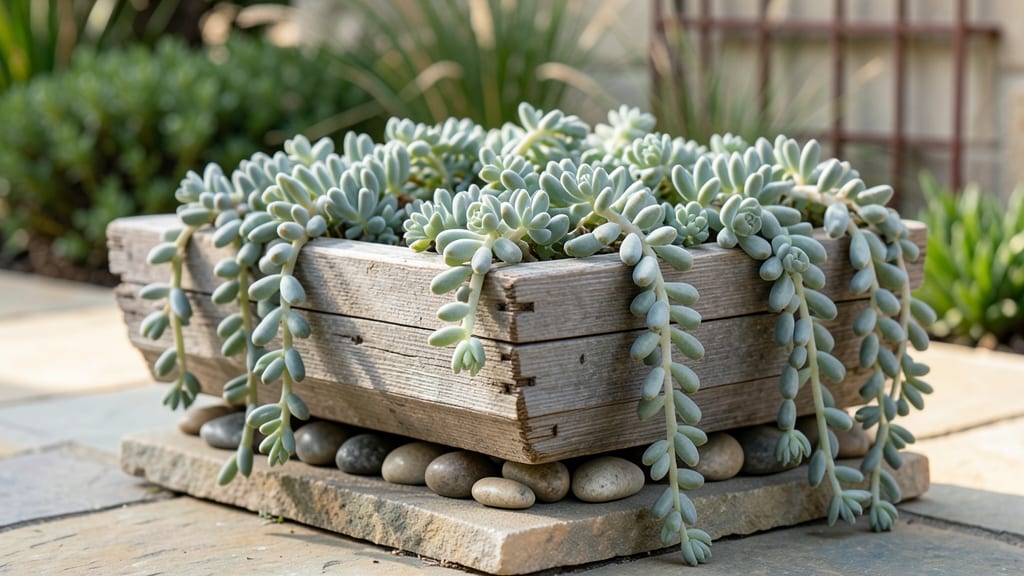
A trough garden bed turns old wooden troughs into stylish, space-saving planters that bring greenery to even the smallest yards. I first spotted these at a farm sale—rustic, weathered, and perfect for growing herbs or trailing flowers without taking up ground space.
The sloped sides make watering easy, and you can mount them vertically or place them on stands for instant visual interest.
These planters shine in tight spots where traditional beds won’t fit, like balconies, patios, or narrow side yards. Cedar or redwood troughs resist rot, while metal or plastic options add modern flair.
Fill them with moisture-loving plants like ferns, lettuce, or strawberries, or go bold with succulents and ornamental grasses for a drought-friendly look.
By summer, your trough will overflow with lush foliage or fragrant blooms, all while solving drainage issues that plague raised beds. The best part? You can customize the arrangement—stack them, hang them, or tuck them into corners—for a garden that’s as functional as it is eye-catching.
Whether you’re revamping a small urban space or adding rustic charm to a rural yard, troughs deliver big results with minimal effort. Start with one, and you’ll wonder why you didn’t try them sooner.
📚 In This Guide
- What you need
- Instructions
- Tips and common mistakes
- Wrapping up and next steps
What you need
- ● Trough or half-barrel: 1–2 units (choose cedar, redwood, or plastic; dimensions depend on space—common sizes: 3–5 feet long, 12–18 inches wide/deep).
- ● Drill & drill bits: 1 (for drainage holes and assembly).
- ● Screws or brackets: 8–12 (stainless steel or galvanized, 2–3 inches long).
- ● Saw (if cutting lumber): 1 (hand saw or power saw).
- ● Sandpaper (80–120 grit): 1 sheet (to smooth rough edges).
- ○ Outdoor-rated paint/stain (optional but recommended): 1 can (weather-resistant).
- ● Potting soil: 2–3 bags (lightweight, well-draining mix for containers).
- ● Drainage material: 1 bag (gravel, pebbles, or landscape fabric).
- ● Plants: 3–5 (choose compact varieties like herbs, succulents, or shallow-rooted veggies).
- ● Waterproof liner: 1 (to extend lifespan or prevent leaks).
- ● Self-watering kit: 1 (for low-maintenance hydration).
- ● Decorative trim or paint: 1 (to match your garden aesthetic).
- ● Wheel kit (for mobility): 1 (if you want a movable planter).
Step-by-step instructions for building a trough garden bed
Here's how to create a stylish, functional elevated planter that brings greenery to any space.
Gather and Prepare the Materials
Start by selecting a wooden trough that's at least 12 inches wide and 6 inches deep—this ensures enough root space for most plants. Sand any rough edges or splinters thoroughly to prevent injury when handling. I like to stain or paint the outside of the trough to match my outdoor decor, but you can leave it natural if you prefer a rustic look. Make sure the trough has drainage holes at the bottom—if not, drill ¼-inch holes every 6 inches along the length to prevent waterlogging.
Line the bottom of the trough with landscape fabric to block weeds and keep soil from washing out through the drainage holes. Cut the fabric to fit snugly, leaving a 2-inch overhang on all sides before tucking it in. This step is crucial for long-term maintenance—without it, weeds will invade and soil will erode quickly.
Fill the Trough with Soil and Planting Mix
Add a 2-inch layer of gravel at the bottom of the trough to improve drainage further. This layer prevents soil from clogging the drainage holes and keeps roots from sitting in water. Next, fill the trough ¾ full with a high-quality potting mix—avoid garden soil, as it compacts too easily in containers. I like to mix in a slow-release fertilizer to give plants a nutrient boost right from the start.
Fluff the soil with your hands or a small rake to create an airy, loose texture that encourages root growth. Press down lightly to remove air pockets but don’t compact it too much—roots need space to spread. Leave about 2 inches of space at the top of the trough for watering and future plant growth. This extra room prevents soil from spilling out when you water.
Select and Plant Your Greenery
Choose plants that thrive in containers and have similar watering needs. For a year-round greenery look, I recommend a mix of evergreen shrubs like boxwood or dwarf yew, paired with perennial herbs like rosemary or thyme. Space plants 6-12 inches apart, depending on their mature size—smaller plants go at the front, taller ones toward the back. Dig a hole for each plant that’s twice as wide as the root ball but only as deep as the container it came in.
Gently remove the plant from its container and place it in the hole, ensuring the top of the root ball sits ½ inch below the trough’s rim. Fill the hole with soil and press lightly around the base to eliminate air gaps. Water each plant thoroughly after planting to help settle the soil and encourage root contact. If you’re planting succulents or drought-tolerant plants, hold off on watering for a few days to let roots establish.
Position and Water the Trough
Place your trough in a location that gets at least 6 hours of sunlight daily, unless you’re growing shade-loving plants like ferns or hostas. A south- or west-facing spot works best for most greenery. If your trough is on wheels or casters, roll it into place—otherwise, use a dolly or ask for help to move it carefully. Avoid placing it directly on grass or mulch, as this can lead to rot or pests.
Water the trough deeply right after planting to ensure the soil is evenly moist. Check the soil every 2-3 days—stick your finger 1 inch into the soil. If it feels dry, water until it runs out the drainage holes. Over time, you’ll learn your plants’ water needs, but consistency is key. Mulch the surface with ½ inch of organic mulch to retain moisture and suppress weeds. Avoid piling mulch against plant stems, as this can cause rot.
Maintain and Enjoy Your Trough Garden
Fertilize your trough garden every 4-6 weeks during the growing season using a balanced, water-soluble fertilizer. Follow the package instructions for dilution and application rates—over-fertilizing can harm plants, especially in containers where nutrients don’t leach away. Prune plants as needed to encourage bushier growth and remove any dead or diseased foliage promptly to keep your trough looking its best.
In late fall, reduce watering but keep the soil slightly moist—most evergreens and perennials need less water in winter. If you live in a cold climate, move the trough to a sheltered location or wrap it in burlap to protect it from freezing temperatures. With proper care, your trough garden will stay lush and vibrant for years, adding greenery and charm to any space.
Tips & tricks for perfect trough garden beds
A few key strategies will help you create a thriving elevated planter that stays beautiful season after season.
The Drainage Layer: Don't skip the 2-inch gravel layer at the bottom—this is your secret weapon against root rot. I've seen many trough gardens fail because people skipped this step, thinking it was optional. The gravel creates essential air pockets while keeping soil from clogging those critical drainage holes you drilled. If you're using a trough without pre-drilled holes, make sure to space them every 6 inches along the length to prevent water buildup.
Soil Texture Matters: When filling your trough ¾ full with potting mix, resist the urge to pack it down tightly. Instead, fluff the soil with your hands or a small rake to create an airy texture that encourages root growth. The 2 inches of space you leave at the top isn't just for aesthetics—it prevents soil from spilling out when you water and gives roots room to expand. I've found that pressing down too firmly can actually suffocate plant roots over time.
Plant Placement Strategy: For a balanced look, place your tallest plants toward the back of the trough and smaller plants toward the front. When spacing evergreens like boxwood or dwarf yew, give them 8-10 inches apart—they'll fill in nicely over time. Herbs like rosemary and thyme can go closer together at 6 inches apart. Remember, the hole you dig for each plant should be twice as wide as the root ball but only as deep as the container it came in to prevent burying the stems too deeply.
Sunlight Considerations: While the instructions mention at least 6 hours of sunlight, I've noticed that some plants like boxwood actually thrive with morning sun and afternoon shade in hot climates. If your trough gets intense afternoon sun, consider adding a lightweight shade cloth during peak summer hours. For shade-loving plants like ferns, you can position your trough under trees or on the north side of your home.
Pro Tips for Trough Garden Bed
- A few key strategies will help you create a thriving elevated planter that stays beautiful season after season.
- The Drainage Layer: Don't skip the 2-inch gravel layer at the bottom—this is your secret weapon against root rot.
- Soil Texture Matters: When filling your trough ¾ full with potting mix, resist the urge to pack it down tightly.
Frequently asked questions
Got questions about trough garden beds?
You’re not alone! Here are answers to the most common queries to help you get started with confidence.
What’s the best time of year to install a trough garden bed?
Spring or early fall are ideal for installing trough garden beds—soil is workable, and plants have time to establish roots before extreme temperatures. In warmer climates, you can plant year-round, but avoid freezing conditions if using non-insulated materials.
How often should I water a trough garden bed?
Watering frequency depends on your climate and plants, but troughs dry out faster than ground beds. Aim for deep watering 2–3 times per week in hot weather, ensuring water reaches the roots. Drip irrigation or self-watering troughs can simplify maintenance.
Can I grow vegetables in a trough garden bed?
Troughs are great for shallow-rooted veggies like lettuce, herbs, strawberries, and radishes. Avoid deep-rooted crops (e.g., carrots, potatoes) unless your trough is at least 12–18 inches deep. Mix in compost for nutrient-rich soil.
How do I keep pests out of my trough garden bed?
Prevent pests with physical barriers like fine mesh (for insects) or copper tape (for slugs). Companion planting—like basil with tomatoes—can deter pests naturally. Monitor regularly and remove affected leaves promptly to avoid infestations.
What’s an alternative if I don’t want to use wood for my trough?
No problem! Try plastic troughs (lightweight and durable), stone or concrete (long-lasting but heavier), or galvanized steel (rust-resistant). Each has pros—just ensure proper drainage and material compatibility with your plants.
Wrapping up and next steps
A trough garden bed is your ticket to lush, year-round greenery with minimal fuss! Whether you're a seasoned gardener or just starting, these elevated planters bring versatility, drainage, and style to your outdoor space.
With the right materials and a little creativity, you can transform any corner into a thriving garden oasis.
Ready to dive in? Start small—pick a trough, gather your plants, and let nature do the rest! 🌱✨ Your green thumb (or lack thereof) won’t hold you back—just roll up your sleeves and enjoy the process!