
Landscaping
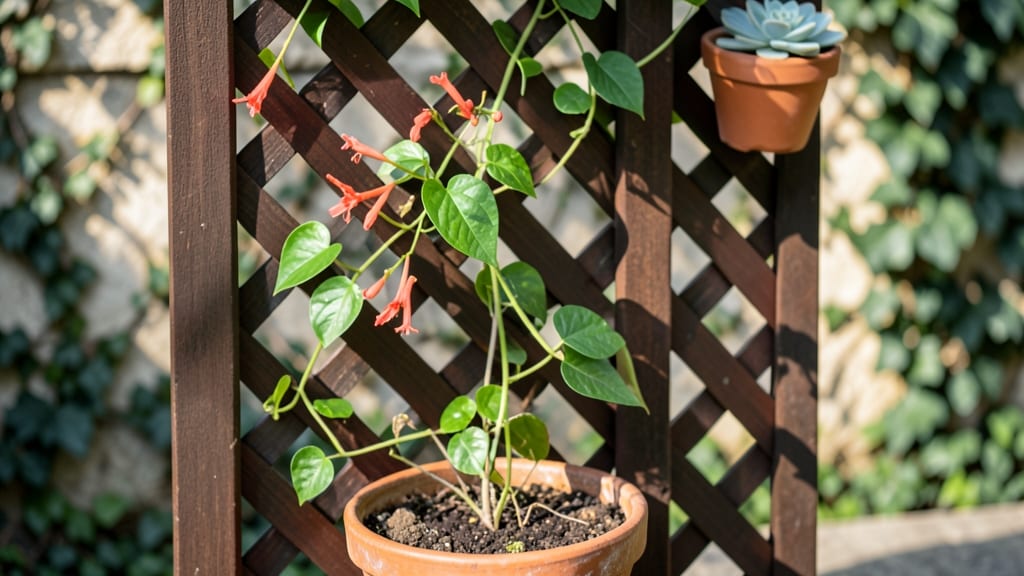
A vertical garden fence turns dead space into a lush, living screen that gives you privacy and beauty without stealing square footage from your yard.
I installed mine last spring after realizing my tiny backyard needed both a view blocker and a pop of green—now it’s the envy of the neighborhood. The fence itself is just a simple wooden lattice panel, but the plants climbing it make all the difference.
You’ll need basic materials: a sturdy fence frame (wood, metal, or even repurposed materials), climbing plants like morning glories, clematis, or jasmine, and a few hours to attach it. The best part?
It works for any style—modern urban yards, cottage gardens, or even a rustic backyard. Plus, the plants provide shade in summer and keep things looking fresh all year.
By summer’s end, you’ll have a thriving green wall that cuts down on noise, cools the air, and adds value to your home. The maintenance is minimal—just occasional pruning and watering—and the results are stunning. Imagine stepping into a secluded garden oasis without sacrificing space.
Whether you’re hiding an unsightly view, creating a cozy outdoor room, or just adding vertical interest, this project is foolproof and adaptable. Let’s get you started with the right plants and setup for your space.
📚 In This Guide
- What you need
- Instructions
- Tips and common mistakes
- Wrapping up and next steps
What you need
- ● Fence panels or trellis frame: 8–12 ft tall (adjust based on height goals), made of wood, metal, or PVC. Pro tip: Choose cedar or redwood for natural rot resistance! 🌡️
- ● Garden fabric or landscape fabric: 1 roll (10 ft wide x 50 ft long) to block weeds and retain moisture.
- ● Climbing plants: Fast-growing vines: Ivy, jasmine, or morning glories (10–20 plants, depending on spacing).
- ● Ornamental grasses: Pampas grass or fountain grass (5–10 plants).
- ● Succulents/sedums: 20–30 small plants (for drought-resistant options).
- ● Soil or growing medium: 2–3 bags of lightweight potting mix or coco coir (avoid heavy garden soil).
- ● Drainage solution: 1 bag of perlite or gravel (for aeration).
- ○ Optional: Pebbles or decorative stones (for a polished look).
- ● Solar-powered lights (for evening ambiance).
- ● Watering system (drip irrigation or self-watering planters).
- ● Measuring tape and level.
- ● Drill/driver + screws or brackets (for assembly).
- ● Staple gun (for securing fabric).
- ● Garden shears or pruners.
- ● Trowel or shovel (for planting pockets or bags).
- ○ Optional: Staple remover, paintbrush (for touch-ups), or a ladder (for high sections).
- ● Sunlight assessment: Confirm your fence gets 4–6+ hours of sunlight daily (adjust plants accordingly).
- ● Sturdy base: Ensure your fence is anchored to a wall, post, or freestanding frame (check local building codes if freestanding).
- ● Water access: A hose or watering can within reach.
- ● Weather prep: Plan for rain/sun protection if plants are delicate (e.g., shade cloth for seedlings).
Step-by-Step instructions for building a vertical garden fence
Here's how to transform a simple fence into a lush, living privacy screen that thrives year-round.
Prepare Your Fence Surface
Start by thoroughly cleaning your fence with a stiff brush and mild soap solution to remove dirt, mildew, or peeling paint. Let it dry completely before proceeding. If your fence has rough spots or splinters, sand them down lightly for a smooth surface. I like to use a wire brush for stubborn areas—it gets into crevices better than a regular brush.
Next, inspect the fence for any loose boards or nails. Secure any wobbly sections with exterior-grade screws or nails. This ensures your vertical garden will have a stable foundation. If your fence is made of metal, consider adding a rust-proof coating to prevent corrosion where plants will attach.
Install the Trellis or Plant Support System
Attach a trellis or plant support system to the fence using heavy-duty staples, screws, or brackets designed for outdoor use. For a 4-foot tall fence, I recommend installing horizontal slats every 12 inches vertically to provide climbing support. Space them evenly to create uniform planting pockets.
If you're using a pre-made trellis panel, measure and mark the center of each section before attaching. For DIY slats, cut 1x2-inch pine boards to the width of your fence and space them 6 inches apart horizontally. This spacing gives roots room to grow while still supporting climbing plants.
Add a Moisture-Retaining Medium
Line the back of the trellis with landscape fabric to prevent weeds from sneaking through. Then, fill the spaces between the slats with a 2-inch layer of moisture-retentive growing medium. I prefer a mix of coco coir and perlite (50/50 ratio) because it holds water well but drains excess to prevent root rot.
Press the medium gently into place, ensuring it stays tucked behind the trellis without spilling over the edges. For extra moisture retention, add a 1-inch layer of hydro-mulch on top. This helps keep the roots consistently hydrated, especially in hotter months.
Plant Your Climbing Beauties
Choose plants suited for vertical growth, such as clematis, ivy, or morning glories, and dig small holes in the growing medium. For a 4-foot fence, I recommend planting 3-4 vines per square foot to ensure full coverage. Water each plant thoroughly after placing it in the hole to settle the roots.
Train the vines to climb immediately by gently weaving them through the trellis slats. If using annuals, like morning glories, plant them in early spring for a quick summer display. For perennials, like clematis, give them time to establish roots before expecting full coverage.
Maintain Your Living Privacy Screen
Water your vertical garden 2-3 times per week during the first growing season, allowing the soil to dry slightly between waterings. Once established, most climbing plants will need watering only when the growing medium feels dry to the touch. I like to use a soaker hose to deliver water directly to the roots without disturbing the plants.
Fertilize lightly every 4-6 weeks during the growing season with a balanced, slow-release fertilizer. Prune vines in late winter or early spring to encourage bushier growth. Remove any dead or diseased foliage promptly to keep your fence looking its best year-round.
Tips & tricks for perfect vertical garden fence installation
Building a vertical garden fence isn't just about attaching plants—it's about creating a thriving ecosystem that will transform your space. Here are my go-to strategies to ensure your living privacy screen grows strong and beautiful.
Surface Preparation is Key: Don't skip the thorough cleaning in Step 1—this isn't just about looks. A clean, dry surface prevents mold growth behind your trellis and ensures better adhesion for any plant supports. For metal fences, I've found that adding a rust-proof coating before attaching anything creates a longer-lasting foundation. This small step can save you from dealing with corrosion down the road.
Trellis Spacing Matters: When installing those 12-inch vertical slats in Step 2, think about your plant choices. For fast-growing vines like morning glories, the 6-inch horizontal spacing works perfectly. But if you're planting slower-growing clematis, you might want to space the horizontal slats slightly closer—around 5 inches—to give each vine more support as it matures. The goal is to balance airflow and structural support.
Moisture Management is Critical: The 2-inch layer of coco coir and perlite mix in Step 3 is your secret weapon for consistent moisture. I've learned the hard way that adding that extra 1-inch layer of hydro-mulch makes all the difference in hot climates. It's like creating a little reservoir that keeps roots hydrated between waterings. Just be careful not to overpack the medium—it should feel like a damp sponge, not a soggy mess.
Plant Placement Strategy: When planting those 3-4 vines per square foot in Step 4, consider staggering your plants rather than planting them in neat rows. This creates a more natural, fuller look and prevents gaps from developing as some plants grow faster than others. Also, place taller vines toward the back and shorter ones toward the front for that lush, layered effect we all want.
Pro Tips for Vertical Garden Fence
- Building a vertical garden fence isn't just about attaching plants—it's about creating a thriving ecosystem that will transform your space.
- Surface Preparation is Key: Don't skip the thorough cleaning in Step 1—this isn't just about looks.
- Trellis Spacing Matters: When installing those 12-inch vertical slats in Step 2, think about your plant choices.
Frequently asked questions
Got questions about vertical garden fences?
You’re not alone! Here are answers to the most common concerns—whether you’re a DIY enthusiast or a homeowner looking for a lush, private solution.
How long does it take for a vertical garden fence to grow and provide privacy?
A vertical garden fence typically takes 1–3 years to fully mature, depending on the plants. Fast-growing climbers like morning glories or ivy can offer partial coverage in 1–2 seasons, while slower varieties (e.g., clematis) may need more time. Plan ahead—layering plants with varying growth rates speeds up the process!
Are vertical garden fences expensive compared to traditional fences?
Not necessarily! While initial costs for materials (like trellises, soil pockets, or fabric) may be $10–$50 per square foot, they’re often cheaper than wood or vinyl fences long-term. Plus, they reduce maintenance (no painting/staining) and boost curb appeal—win-win! Pro tip: Repurpose pallets or use recycled materials to cut costs.
Will a vertical garden fence attract pests like insects or rodents?
Most plants in vertical gardens repel pests naturally (e.g., basil deters flies, lavender keeps mosquitoes away). However, stagnant water or decaying organic matter can attract bugs. Solution: Use well-draining soil, prune regularly, and avoid overwatering. Rodents are rare unless you’re growing edibles like grapes—opt for thorny plants (e.g., roses) if needed.
Can a vertical garden fence survive harsh weather (wind, rain, frost)?
Yes, but choose weather-resistant materials! Use rot-proof wood, galvanized metal trellises, or plastic fabric for wind/rain. For frost: Select cold-hardy plants (e.g., climbing hydrangeas) and insulate soil pockets with mulch. Secure heavy plants with soft ties to prevent wind damage. Pro tip: Elevate the base to improve drainage.
What’s a good alternative if I don’t want to wait years for plants to grow?
For instant privacy, combine your vertical garden with:
- Fabric screens (e.g., bamboo or woven cedar) for quick coverage.
- Fast-growing vines like morning glories (seed in spring for summer blooms).
- Artificial greenery (e.g., faux ivy panels) for a low-maintenance look.
How do I fix a vertical garden fence that’s leaning or looking uneven?
Start by checking the base—ensure it’s level and anchored securely (use stakes or screws for trellises). For soil pockets, redistribute weight or add support brackets. If plants are overgrown, prune aggressively and train vines along guides. Prevention tip: Install a drip irrigation system to avoid uneven watering, which can warp materials.
Wrapping up and next steps
A vertical garden fence is more than just a stylish upgrade—it’s a game-changer for small spaces, offering privacy, beauty, and sustainability year-round. 🌿 With the right materials and a little creativity, you can transform your outdoor area into a lush, functional oasis without sacrificing square footage.
Whether you’re a green thumb or a beginner, this project is totally doable!
Ready to dive in? Start by sketching your design, gathering supplies, and picking your favorite plants. Your future garden fence is just a few steps away—what will you grow first? 🌱