
Tools
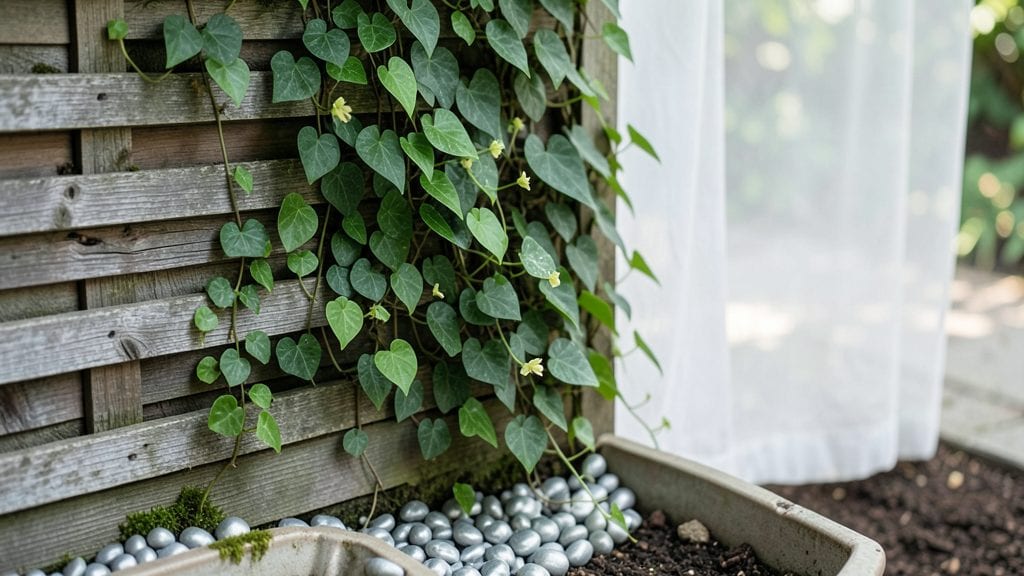
A vertical wood garden turns your wall into a lush green canvas without stealing square footage. 🌿 I built mine from reclaimed pallets last spring, and now my herbs, strawberries, and trailing flowers grow where sidewalk used to be.
The best part? No special tools or gardening degree required—just a few hours, some basic materials, and plants that thrive in shallow pockets.
You’ll need untreated wood (cedar lasts longest), screws or brackets, landscape fabric to line pockets, and plants that love vertical spaces—think creeping thyme, cherry tomatoes, or ferns. The whole setup costs about $50-$100 depending on whether you DIY or buy pre-made frames.
My first attempt had uneven pockets, but after adjusting the spacing to 6-8 inches deep, everything grows like it’s in a full garden bed.
By summer’s end, you’ll have a living wall that’s both productive and pretty—herbs within arm’s reach, flowers that attract pollinators, and veggies that ripen faster than in-ground plants. The wood ages beautifully with a weathered patina, and the whole thing stays disease-free because excess water drains away from the roots.
Works for balconies, patios, or even indoors near bright windows. The same principles apply whether you’re growing edibles or just adding greenery to a bare wall. Ready to turn blank space into a thriving ecosystem?
📚 In This Guide
- What you need
- Instructions
- Tips and common mistakes
- Wrapping up and next steps
What you need
- ● Wooden planks or pallets: 2–4 pieces (1x6 or 2x4 inches, pressure-treated or cedar for durability; 4–6 ft long).
- ● Screws or nails: 1–2 lbs of deck screws (2–3 inches long) or galvanized nails.
- ● Drill/driver: Cordless or electric, with drill bits.
- ● Measuring tape & pencil: For precision cuts and markings.
- ● Saw: Handsaw or circular saw for cutting wood.
- ● Waterproof liner: Pond liner or heavy-duty plastic (6–12 ft, depending on size).
- ● Gravel or landscape fabric: 1–2 bags (for drainage).
- ● Potting soil: Lightweight, well-draining mix (2–5 bags, ~1–2 cubic feet per shelf).
- ● Plants: Herbs, flowers, or veggies (succulents, lettuce, strawberries, or trailing plants work best!).
- ● Paint or stain: Weather-resistant for a polished look.
- ● Drip irrigation kit: Automates watering for low-maintenance growth.
- ● LED grow lights: For indoor setups or low-light areas.
- ● Hanging pockets or mesh bags: For modular planting.
- ● Wheelbarrow or dolly: For moving heavy materials.
Step-by-Step instructions for building a vertical wood garden
Here's my go-to method for creating a sturdy, stylish vertical garden that thrives with minimal space.
🪴 Step 1: Gather Materials and Prep the Wood
Start with untreated cedar or redwood boards (these resist rot naturally). Cut 4 vertical boards to your desired height—4 feet tall works perfectly for herbs and small veggies. Sand all edges and surfaces smooth to prevent splinters. I like to round the corners slightly with a sanding block for a cleaner look.
Next, cut horizontal slats (about 3-4 inches wide) to create pockets. Space them 6-8 inches apart vertically—this gives roots room to spread while keeping plants accessible. Pre-drill holes at the top and bottom of each slat for screws, then attach them to the vertical boards with stainless steel screws. Use a level to ensure everything stays perfectly straight.
🌱 Step 2: Assemble the Frame and Add Drainage
Construct a backing board (same width as your vertical boards) to attach to the back of the frame. This adds stability and prevents the wood from bowing over time. Secure it with screws along the top and bottom edges. For drainage, drill ¼-inch holes in the bottom of each pocket—this keeps roots healthy by preventing waterlogging.
Line the back of each pocket with landscape fabric to hold soil while allowing excess water to drain. Cut the fabric to fit snugly, then fold the edges over the lip of the slat. This step is key—without it, soil spills everywhere when you water.
💧 Step 3: Fill Pockets and Plant Strategically
Use a lightweight potting mix (I blend 50% coco coir and 50% perlite for extra drainage). Fill each pocket ¾ full, leaving room for roots to grow downward. Press the soil gently but don’t compact it too tightly—roots need air to breathe.
Plant small starts or seeds in the center of each pocket. For herbs like basil or thyme, place 2-3 plants per pocket—they grow bushy and fill space well. For veggies like lettuce or radishes, stick to 1 plant per pocket to avoid crowding. Water immediately after planting to settle the soil around roots.
☀️ Step 4: Position for Light and Water Consistently
Place your vertical garden in a spot with at least 6 hours of sunlight daily. A south-facing wall or balcony gets the most light, but east or west works too. If indoors, position near a south-facing window or use a grow light for 12-14 hours per day. You’ll know it’s getting enough light when plants grow upright and leaves stay vibrant.
Water every 2-3 days, checking when the top inch of soil feels dry. Avoid overhead watering—it washes soil out of pockets. Instead, use a watering can with a narrow spout or a drip irrigation line at the top. Let excess water drain completely before adding more.
🌿 Step 5: Maintain and Expand as Needed
Fertilize every 4-6 weeks with a balanced liquid fertilizer (like 10-10-10) to keep plants thriving. I mix it with water and apply it directly to the soil in each pocket. Prune herbs regularly to encourage bushier growth—snip leaves from the top to prevent legginess.
If you notice soil eroding or plants outgrowing their space, refresh the pockets by adding 1-2 inches of fresh potting mix around the base. This keeps roots happy and gives you room to plant new varieties. Rotate plants seasonally—swap out cool-season crops like kale for warm-season ones like peppers as temperatures change.
Tips & tricks for perfect vertical wood garden
Building a vertical wood garden is all about balance—between structure and flexibility, drainage and retention. Here are the secrets I've learned to keep my vertical garden thriving and looking great.
Wood Selection Wisdom: Untreated cedar or redwood is your best bet because they naturally resist rot, but if you're on a budget, pressure-treated pine works too—just make sure it's labeled "ground contact use" and let it dry completely for 48 hours before assembly. I've found that pre-drilling screw holes prevents wood splitting, especially with wider slats.
Drainage is Non-Negotiable: Those ¼-inch holes in Step 2 aren't just for show—they're the difference between happy roots and root rot. If you're worried about soil washing out, line the bottom of each pocket with a coffee filter before adding landscape fabric. This creates an extra barrier while still allowing water to drain. Trust me on this: I learned the hard way when my first garden became a swamp!
Soil Mix Matters: The 50/50 blend of coco coir and perlite in Step 3 isn't arbitrary—it's designed to prevent compaction while still holding moisture. For heavier plants like tomatoes, you might want to add 10% worm castings to this mix for extra nutrients. And remember, those pockets should only be ¾ full to give roots room to grow downward without feeling cramped.
Light Strategy for Success: The 6 hours of sunlight recommendation in Step 4 is your baseline, but don't stop there. If you're growing leafy greens like lettuce, they'll actually appreciate partial shade in hot afternoons. For herbs like basil, you can push it to 8 hours of light—they'll reward you with more flavorful leaves. And if you're using grow lights, position them 6-12 inches above the plants for optimal coverage.
Pro Tips for Vertical Wood Garden
- Building a vertical wood garden is all about balance—between structure and flexibility, drainage and retention.
- I've found that pre-drilling screw holes prevents wood splitting, especially with wider slats.
- Drainage is Non-Negotiable: Those ¼-inch holes in Step 2 aren't just for show—they're the difference between happy roots and root rot.
Frequently asked questions
Got questions about creating your own vertical wood garden?
You’re not alone! Here are some of the most common queries—plus straightforward answers to help you grow with confidence.
What’s the best wood to use for a vertical garden?
Opt for naturally rot-resistant woods like cedar, redwood, or treated pine. Avoid pressure-treated wood with arsenic (older versions) or softwoods like pine if untreated—they’ll warp or degrade faster. Cedar is a top pick for its durability and natural pest resistance!
How long does it take to see results in a vertical wood garden?
Fast-growing herbs like basil or lettuce may sprout in 2–4 weeks, while veggies (e.g., tomatoes or peppers) or flowers (like sunflowers) take 6–12 weeks to mature. Patience pays off—consistent watering and sunlight speed up the process!
How often should I water a vertical wood garden?
Check moisture daily! Vertical gardens dry out faster due to limited soil. Water every 1–2 days (or more in hot climates) and ensure proper drainage to avoid root rot. A self-watering system or drip irrigation can save you time and effort.
Can I reuse the wood after one growing season?
Yes! Clean the wood thoroughly (scrub with soapy water, disinfect with vinegar or hydrogen peroxide), remove old soil, and let it dry completely. Sand rough spots to prep for the next season. Just avoid reusing wood with mold or severe rot.
What if my plants aren’t thriving in a vertical setup?
Troubleshoot with these fixes:
Not enough light? Move to a sunnier spot or add grow lights.
Yellow leaves? Overwatering or poor drainage—adjust your watering routine.
Pests? Spray with neem oil or introduce beneficial insects like ladybugs.
Most issues are fixable with a little tweaking!Are there alternatives to wood for vertical gardens?
Try:
- Plastic pallets (lightweight, affordable, and reusable).
- Metal frames (durable but may need rust-proofing).
- Fabric grow bags (flexible, great for herbs).
- Hanging pockets (no wood needed—just soil and plants!).
Wrapping up and next steps
A vertical wood garden isn’t just a clever way to save space—it’s a creative, sustainable solution for bringing greenery into your home or garden. Whether you’re growing herbs for cooking, vibrant flowers for beauty, or fresh veggies for meals, this design makes it easy and rewarding. 🌱
Ready to transform your space? Start small—pick a design, gather your materials, and let your green thumb shine! Your future self (and your plants) will thank you.
- 🔨 Next step: Sketch your design and gather supplies!
- 🌿 Pro tip: Begin with low-maintenance plants to build confidence.