Tools
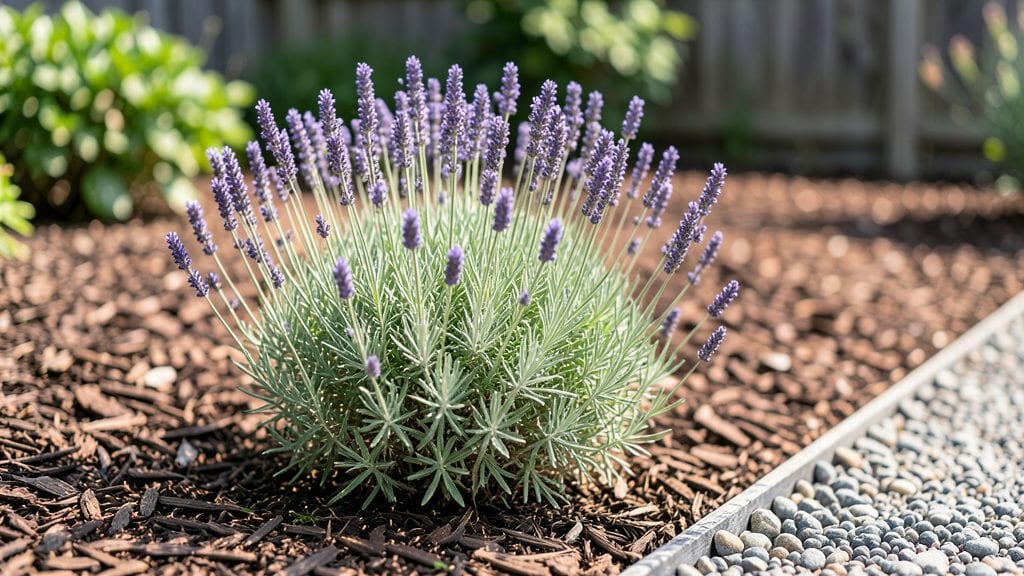
A weed-free garden starts with blocking invaders before they take root. 🌱 I spent years pulling weeds by hand until I discovered natural barriers that actually work—no chemicals, no backbreaking labor, just smart layering that smothers weeds while protecting your plants.
The secret isn’t complicated: thick mulch, living ground covers, and strategic plant placement create a physical barrier weeds can’t penetrate. My vegetable beds now stay clean for months with just a 3-inch layer of straw and clover, while flower borders use dense perennials to outcompete weeds naturally.
Even lawns benefit from corn gluten or cardboard sheets that block sunlight.
By the end of summer, you’ll see fewer weeds popping up and more space for the plants you actually want. The key is consistency—once established, these barriers reduce weed seeds from germinating in the first place, saving you hours of digging. Plus, your soil stays healthier without synthetic treatments.
Works for raised beds, in-ground gardens, and even container edges. The best part? These methods get stronger every year as the ecosystem balances out. Let’s get those weeds under control the natural way.
📚 In This Guide
- What you need
- Instructions
- Tips and common mistakes
- Wrapping up and next steps
What you need
- ● Landscape Fabric: 3–5 ft wide rolls (depending on garden size), non-woven, breathable (e.g., 3 oz density).
- ● Mulch: 2–3 cubic yards of organic mulch (wood chips, straw, or shredded leaves).
- ● Gravel or Pebbles: 1–2 bags (50 lb each) for decorative pathways or edging.
- ● Edging Tools: Metal or plastic edging strips (1–2 ft wide, 5–10 ft lengths).
- ● Heavy-Duty Gloves: Pair of gardening gloves (waterproof, cut-resistant).
- ● Shovel & Rake: Flat-head shovel and a stiff-bristle rake for prep work.
- ● Measuring Tape: 25 ft tape for precise barrier placement.
- ● Staple Gun & Staples: Heavy-duty landscape staples (1/2"–3/4" long).
- ● String or Twine: For marking garden boundaries (100 ft roll).
- ● Corn Glue or Adhesive: For securing fabric edges to prevent shifting.
- ● Living Mulch Plants: Fast-growing ground covers (e.g., clover, creeping thyme) to smother weeds naturally.
- ● Vinyl or Corrugated Plastic: As a temporary weed barrier (e.g., for pathways).
- ○ Natural Dye (Optional): For coloring mulch (e.g., cocoa powder for brown hues).
Step-by-Step instructions for creating natural weed barriers
Here's the method I've used to keep my garden beds weed-free without a single chemical.
🪴 Step 1: Choose Your Barrier Material
Start by selecting a natural barrier that suits your garden style. Cardboard works well for temporary suppression, while landscape fabric offers long-term control. I prefer using 3-4 layers of wet newspaper for a biodegradable, cost-effective option that breaks down over time. Lay your chosen material flat in the area where you want to block weeds.
Make sure the barrier covers the entire planting area by at least 12 inches beyond your intended garden bed. This extra coverage prevents weeds from creeping in along the edges. For existing garden beds, remove any existing weeds first—this is the moment that matters: clean soil means fewer weeds to begin with.
🌱 Step 2: Prepare the Soil and Lay the Barrier
Before installing your barrier, till the soil to a depth of 6-8 inches to loosen compacted areas and uproot any existing weeds or their roots. This step ensures your barrier works effectively by eliminating the seed bank already present in the soil. Once the soil is prepped, lay your chosen barrier material flat, overlapping edges by 4-6 inches to create a seamless weed-blocking layer.
Smooth out any wrinkles or bubbles to ensure full coverage. If using cardboard or newspaper, wet it thoroughly with water to help it break down faster and prevent it from blowing away in windy conditions. This also ensures it won't dry out and become brittle over time.
✂️ Step 3: Secure the Barrier and Add Mulch
Secure the edges of your barrier with landscape staples or rocks to keep it in place. I like to use garden staples along the perimeter, placing them every 12-18 inches to hold everything down firmly. This prevents the barrier from shifting when you add mulch or plants later.
Next, add a 3-4 inch layer of organic mulch—such as wood chips, straw, or shredded leaves—on top of the barrier. The mulch will help suppress any weeds that manage to sprout through the barrier while also improving soil health as it breaks down. Keep the mulch at least 6 inches away from plant stems to prevent rot.
☀️ Step 4: Plant and Monitor Regularly
Create small holes in the barrier where you plan to plant. Use your fingers or a small trowel to cut openings just large enough for your plants' root balls. Plant your chosen vegetables, flowers, or herbs as usual, ensuring the soil around the roots is firm but not compacted. Water the plants thoroughly after planting to help them establish roots.
Check your barrier and mulch layer every 2-3 weeks to ensure it remains intact. If you notice gaps or areas where weeds are starting to poke through, add more mulch or repair the barrier as needed. This proactive approach keeps your garden looking neat and weed-free with minimal effort.
🌿 Step 5: Maintain and Refresh as Needed
Over time, organic barriers like newspaper or cardboard will break down completely. When this happens, simply add a new layer on top of the existing mulch. I refresh my barriers every 6-12 months, depending on how quickly the material decomposes in my climate. This method ensures your garden stays weed-free without relying on harsh chemicals.
Keep an eye out for any persistent weeds that might still find their way through. If you notice a few stubborn weeds, pull them by hand immediately—they won’t have a chance to establish themselves if you catch them early. With consistent maintenance, your garden will stay lush, healthy, and virtually weed-free all season long.
Tips & tricks for creating effective natural weed barriers
These practical strategies will help you maximize the effectiveness of your weed-blocking system while saving time and effort in your garden.
Soil Preparation Matters: In Step 2, when you till the soil to a 6-8 inch depth, don't just loosen the top layer—aim to break up compacted areas completely. I've found that adding a handful of compost to the tilled soil not only improves drainage but also helps prevent weed seeds from sprouting later. This extra step creates a healthier foundation for your barrier system. The deeper you till, the fewer weed roots you'll have to contend with over time.
Barrier Overlap Technique: The 4-6 inch overlap between barrier layers in Step 2 is crucial for preventing weeds from sneaking through gaps. I recommend using a straightedge or ruler to ensure consistent overlap along the edges. For larger garden beds, consider using a second material like burlap between layers to create an extra barrier. This double-layering approach works especially well in areas prone to weed invasion like garden edges or pathways.
Mulch Layer Strategy: When adding your 3-4 inch mulch layer in Step 3, choose mulch that complements your garden's aesthetic while serving its purpose. I prefer using wood chips for their long-lasting quality, but straw works well for vegetable gardens as it breaks down quickly and adds organic matter. Keep that 6 inch clearance from plant stems to prevent rot—this is where many gardeners make the mistake of piling mulch too close, which can actually encourage disease.
Maintenance Shortcut: Instead of checking your barrier every 2-3 weeks as suggested in Step 4, I've found that installing a 1-inch layer of pea gravel along the perimeter creates a visible boundary that makes it easier to spot any gaps or weed growth. This simple addition cuts my maintenance time in half while keeping the system just as effective. The gravel also helps prevent erosion from watering.
Pro Tips for Weed Free Garden
- These practical strategies will help you maximize the effectiveness of your weed-blocking system while saving time and effort in your garden.
- Soil Preparation Matters: In Step 2, when you till the soil to a 6-8 inch depth, don't just loosen the top layer—aim to break up compacted areas completely.
- Barrier Overlap Technique: The 4-6 inch overlap between barrier layers in Step 2 is crucial for preventing weeds from sneaking through gaps.
Frequently asked questions
Got questions about keeping your garden weed-free naturally?
Here are some of the most common concerns—and practical answers—to help you maintain a thriving, invader-free space without harsh chemicals.
How soon can I expect to see results after using natural barriers?
Results vary based on the barrier type and weed pressure, but many gardeners notice a dramatic reduction in weeds within 4–6 weeks. Mulch (like straw or wood chips) suppresses growth immediately, while landscape fabric takes longer (3–6 months) to fully block light. Consistency is key—reapply or top up as needed!
What’s the best natural barrier for heavy weed infestations?
For stubborn weeds, combine landscape fabric (buried under 2–3 inches of mulch) with cardboard or newspaper layered beneath. Add a thick layer of gravel or pine needles on top to deter sprouts. Pro tip: Solarization (covering soil with clear plastic for 4–6 weeks) also kills weed seeds naturally!
Will natural barriers harm my plants or soil?
Not if used correctly! Organic mulches (like straw, leaves, or grass clippings) enrich soil over time. Avoid plastic or treated wood near edible plants. Landscape fabric should have holes for water/roots. Always choose untreated, non-toxic materials to protect your garden’s health.
How often do I need to maintain natural weed barriers?
Check barriers monthly and refresh as needed:
- Mulch: Top up to 2–3 inches when it breaks down.
- Fabric: Patch tears or shift settled layers.
- Living mulches (like clover): Trim back to maintain coverage.
Weeds pop up fastest in spring and fall, so stay vigilant during these seasons!
What if weeds keep growing through my barrier?
If weeds persist, they’re likely sprouting from seeds in the soil or growing through gaps. Try:
- Adding a thicker layer of mulch (4+ inches).
- Using corn gluten meal (a pre-emergent) in early spring.
- Hand-pulling stubborn weeds before they seed.
Remember: Patience and persistence pay off—natural barriers improve with time!
Wrapping up and next steps
A weed-free garden isn’t just a dream—it’s an achievable goal with the right natural barriers and consistency! By leveraging mulch, landscape fabric, or even clever plant pairings, you can keep those pesky invaders at bay without harsh chemicals.
Your hard work will pay off in lush, thriving plants and less frustration.
Ready to take the next step? Start small—pick one barrier method and test it in a section of your garden. Track your progress and adjust as needed. You’ve got this! 🌱✨