Tools
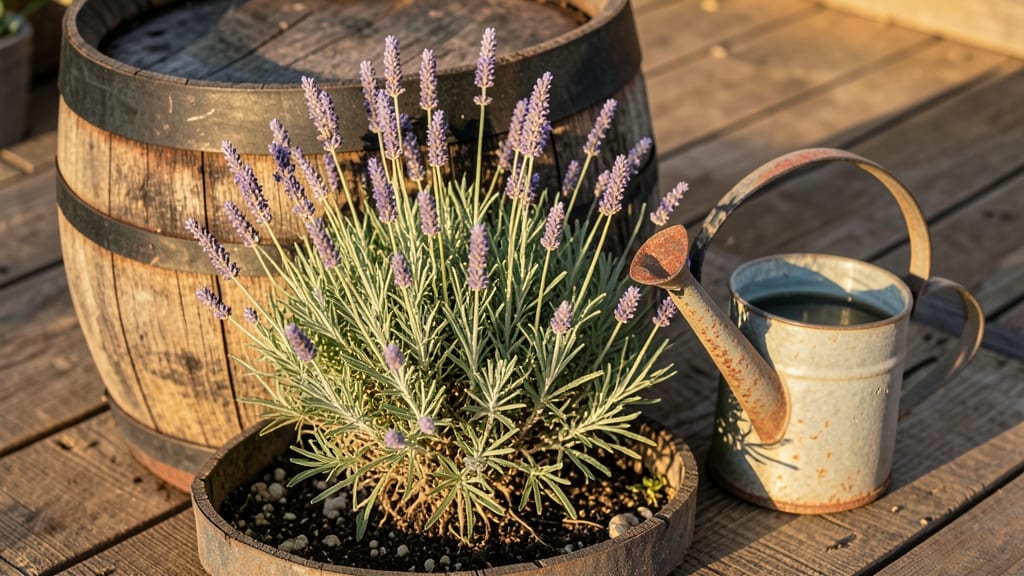
Transforming a whiskey barrel into a garden planter gives your outdoor space that effortless, aged charm—like a well-loved piece of furniture that only gets better with time. 🌿 I’ve turned three repurposed barrels into a vertical herb garden that’s both functional and stunning, and the best part?
They’re free if you know where to look. The rich wood grain and weathered look create instant character, while the sturdy construction means these planters last for years without splintering or rotting.
You don’t need fancy tools or skills to get started—just a barrel, a drill, and some basic hardware. I’ve used barrels from local distilleries, but even a clean, empty barrel from a homebrew setup works.
Drill drainage holes at the bottom, line with landscape fabric to prevent soil loss, and fill with well-draining potting mix. The key is choosing plants that thrive in containers—herbs like rosemary and thyme, succulents, or even small vegetables like cherry tomatoes.
They’ll love the cozy, contained space and the barrels’ natural insulation.
Imagine a rustic patio or garden corner where these barrels are stacked vertically, overflowing with greenery, or arranged horizontally as a planter bed. The color contrast of fresh plants against the barrel’s aged wood creates a striking visual—like a living, breathing piece of art.
Maintenance is simple: water when the top inch of soil feels dry, and fertilize lightly every few weeks. The barrels even add a whimsical touch to any outdoor space, whether you’re going for cottage-core vibes or a modern farmhouse look.
Pro tip: Stain or seal the barrels first to protect them from moisture and extend their life. And if you’re feeling extra creative, paint the insides with non-toxic paint for a pop of color or even a fun mural.
The possibilities are endless, and the best part? You’re giving these barrels a second life instead of letting them gather dust. Let’s get growing!
📚 In This Guide
- What you need
- Instructions
- Tips and common mistakes
- Wrapping up and next steps
What you need
- ● Whiskey barrel: 1 used or repurposed oak barrel (preferably food-grade, like those from bourbon or whiskey distilleries). Pro tip: Check local breweries or distilleries—they often give these away for free!
- ● Drill: 1 cordless drill (or hand drill) with 1–1.5 inch hole saw for drainage.
- ● Screws or lag bolts: 4–6 (2–3 inches long) for securing the barrel’s base if needed.
- ● Sandpaper: Medium-grit (80–120) to smooth rough edges.
- ● Outdoor paint or sealant: Non-toxic, waterproof option (e.g., exterior wood stain or paint) to protect the barrel from weather.
- ● Potting soil: 1–2 cubic feet (depending on barrel size) of well-draining, organic soil.
- ● Plants: Choose container-friendly varieties like herbs (basil, thyme), succulents, or shallow-rooted veggies (lettuce, strawberries).
- ● Staple gun: For securing landscape fabric to the barrel’s interior (prevents soil loss).
- ● Level: Ensures your barrel sits evenly on uneven ground.
- ● Wheelbarrow or tarp: For easy soil transport.
- ● Decorative accents: Twine, moss, or metal brackets to elevate the rustic charm.
Step-by-Step instructions for creating a whiskey barrel garden
Turn a barrel into a stunning planter that adds rustic charm to any outdoor space.
🪴 Step 1: Prepare the Barrel for Planting
Start by cleaning the barrel thoroughly with warm, soapy water to remove any residue. Scrub the interior with a stiff brush to ensure no old whiskey smell lingers. Rinse it out completely and let it dry in the sun for a day or two. This step is crucial—any leftover moisture or odors can harm plants.
Once dry, drill several drainage holes along the bottom of the barrel using a power drill and a ½-inch bit. Space them about 4 inches apart in a circular pattern. This ensures excess water escapes, preventing root rot. If the barrel has a metal band around the top, remove it to create an open rim for planting.
🌱 Step 2: Add a Drainage Layer and Soil Mix
Line the bottom of the barrel with 2-3 inches of gravel or broken pottery shards to create a drainage layer. This prevents soil from clogging the holes while allowing water to flow freely. Use the 4 gallons of potting mix you’ve prepared, blending it with 1 cup of perlite for extra aeration.
Fill the barrel about ⅔ full with the soil mix, pressing it down lightly to remove air pockets. Leave space at the top for plants to grow. If you’re using a barrel with a tight rim, consider lining the inside with a biodegradable landscape fabric to prevent soil from spilling out while still allowing roots to penetrate.
☀️ Step 3: Choose and Plant Your Garden
For a 4-barrel garden, select plants that thrive in containers and complement each other. I recommend pairing herbs like rosemary or thyme with flowers like petunias or marigolds for color and fragrance. Dig holes in the soil mix, about twice as wide as the root ball of each plant.
Gently remove plants from their nursery pots and place them in the holes, ensuring the top of the root ball sits 1 inch below the barrel’s rim. Fill in around the roots with more soil mix, pressing lightly to secure the plant. Water thoroughly to settle the soil and encourage root growth. Avoid overwatering—just enough to moisten the soil without creating puddles.
💧 Step 4: Water and Maintain Your Barrel Garden
Water the barrel garden deeply once a week, or more often in hot, dry weather. Check the soil with your finger—if the top 2 inches feel dry, it’s time to water. Since barrels have limited soil volume, they dry out faster than in-ground gardens. A 5-gallon watering can works perfectly for this task.
Place your barrel garden in a spot with at least 6 hours of sunlight daily, ideally near a patio or deck where you can enjoy the rustic charm. Add a layer of mulch around the base to retain moisture and suppress weeds. Fertilize lightly every 4-6 weeks with a balanced, slow-release fertilizer to keep plants healthy and vibrant.
✂️ Step 5: Prune and Enjoy Your Harvest
Regularly trim back overgrown foliage to encourage bushier growth and prevent the barrel from looking cluttered. Pinch off dead flowers to promote more blooms, especially for annuals like petunias. Harvest herbs in the morning when their oils are most potent—snip leaves just above a set of leaves to encourage new growth.
Here’s the thing—your barrel garden will only get better with age. The wood will weather beautifully, and the plants will thrive in their unique home. Over time, you might even notice the barrel developing a charming patina that matches your outdoor decor perfectly. Enjoy your rustic, functional, and stylish garden!
Tips & tricks for perfect whiskey barrel garden
Here's what I've learned after transforming my own barrels into thriving planters—tricks that make all the difference in your rustic garden's success.
Drainage Layer Wisdom: When creating that 2-3 inch gravel layer in Step 2, use a mix of different sized stones—smaller ones near the drainage holes and larger ones toward the outer edges. This creates a natural filtration system that prevents soil from clogging while allowing water to flow freely. I've found that broken terracotta pots work wonderfully too, as they're lightweight and provide excellent aeration.
Soil Preparation Secret: The 4 gallons of potting mix should be amended with that 1 cup of perlite, but don't stop there—add a handful of composted cow manure or worm castings for extra nutrients. This boosts the soil's fertility without overwhelming the plants. Press the soil down firmly in Step 2 to eliminate air pockets, but don't compact it too tightly—roots need room to grow!
Plant Placement Strategy: In Step 3, arrange your plants with their most attractive features facing outward. Place taller plants toward the back (center of the barrel) and shorter ones toward the front. For a 4-barrel garden, consider creating a color theme—like purples and blues—that will look stunning together. Remember to space plants according to their mature size, not just their current size in the pot.
Sunlight Positioning: The 6 hours of sunlight requirement is non-negotiable, but placement matters too. Position barrels so they receive morning sun (which is gentler) and afternoon shade if you're in a hot climate. This prevents the soil from drying out too quickly. For extra protection, you can paint the outside of the barrel with a light-colored, non-toxic paint—this reflects heat and keeps roots cooler.
Pro Tips for Whiskey Barrel Garden
- Here's what I've learned after transforming my own barrels into thriving planters—tricks that make all the difference in your rustic garden's success.
- Drainage Layer Wisdom: When creating that 2-3 inch gravel layer in Step 2, use a mix of different sized stones—smaller ones near the drainage holes and larger ones toward the outer edges.
- Soil Preparation Secret: The 4 gallons of potting mix should be amended with that 1 cup of perlite, but don't stop there—add a handful of composted cow manure or worm castings for extra nutrients.
Frequently asked questions
Got questions about turning whiskey barrels into garden gems? Here are answers to the most common ones—because even the best whiskey needs a little patience (and know-how) to age just right!
Can I use any whiskey barrel for gardening?
Not all barrels are created equal! Ideally, use food-grade barrels (like ex-bourbon or wine barrels) to avoid toxins. Avoid barrels that held industrial liquids—always check for labels or ask the supplier. If unsure, give it a good rinse with vinegar and water to play it safe.
How long does it take for a whiskey barrel to season?
Seasoning a barrel takes 4–6 weeks of outdoor exposure to weather and sunlight. This process helps prevent mold and stabilizes the wood. If you’re impatient, you can speed it up by soaking the barrel in water for a few days first, but let it dry completely before planting.
What’s the best way to keep pests out of my whiskey barrel garden?
Pests love cozy barrels too! Use copper tape around the rim, plant pest-repelling herbs (like basil or mint), or add a layer of gravel or diatomaceous earth at the bottom. Elevate the barrel slightly off the ground to deter burrowing critters—just like you’d protect a fine cask!
Can I grow vegetables in a whiskey barrel, or is it just for flowers?
Whiskey barrels are great for tomatoes, peppers, herbs, and even strawberries. Just ensure the barrel has drainage holes and use lightweight, well-draining soil. Heavy root veggies (like potatoes) might struggle, but leafy greens and vining plants thrive. Think of it as a mini vineyard for your kitchen!
What if my barrel starts leaking or warping?
Leaks usually mean the barrel wasn’t properly sealed or the wood isn’t fully seasoned. Reinforce the staves with waterproof sealant or line the inside with a plastic liner if needed. Warping can happen if the wood isn’t fully dry—let it cure longer or replace damaged staves. A little TLC keeps your barrel as sturdy as a well-aged whiskey!
Wrapping up and next steps
A whiskey barrel garden isn’t just a trend—it’s a timeless, functional, and stylish way to bring rustic charm to your outdoor space while giving new life to repurposed materials. Whether you’re a seasoned gardener or a beginner, these planters offer unmatched character and a sustainable twist on traditional gardening. 🌿✨
Ready to dive in? Start small—pick a barrel, gather your tools, and let your creativity flow! Your garden (and your whiskey stash) will thank you. Cheers to growing something beautiful! 🍃