Tools
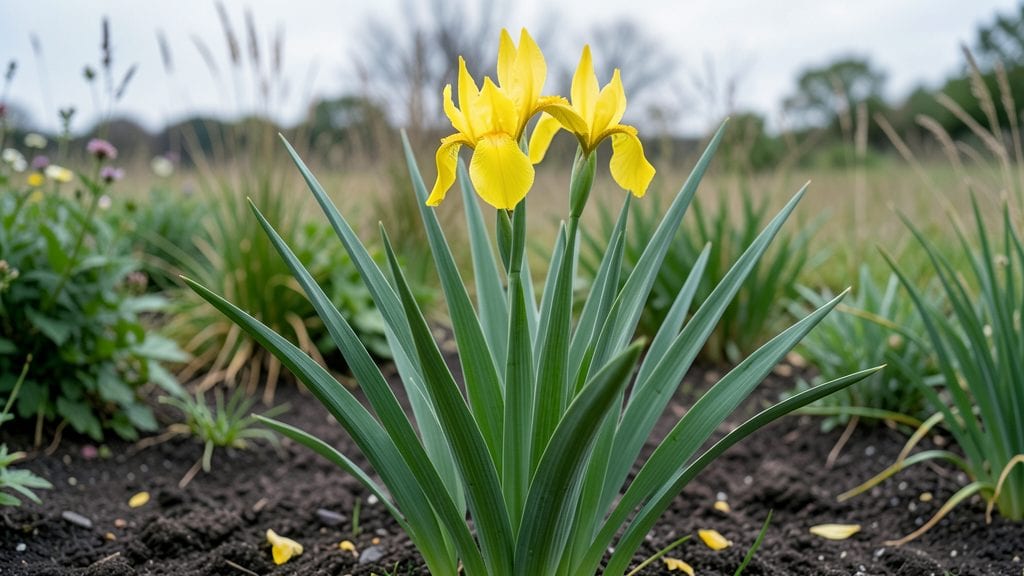
Creating a yellow iris garden that hummingbirds can't resist starts with the right spot—moist, sunny soil where those bright blooms can shine. 🌸 I remember the first time I saw my irises swaying in the breeze, their golden petals catching the morning light like tiny suns.
That moment made me realize how transformative a single color can be in a garden.
The secret lies in pairing them with the right companions: deep purple salvias to contrast their brightness, feathery grasses for texture, and maybe a small water feature nearby. Hummingbirds will flock to the nectar, and you'll get that magical dance of color and movement all season.
Even in formal designs, irises bring unexpected joy—just imagine them lining a gravel path or framing a bench.
By mid-summer, your garden will burst with those signature yellow blooms, their petals unfurling like little trumpets calling to pollinators. The fragrance—sweet but not overpowering—will linger in the air, making every stroll through the garden feel like a celebration.
Maintenance is simple: divide clumps every few years, and you'll have fresh blooms for decades.
Works in cottage gardens, modern landscapes, or even small urban spaces with containers. The key is letting those irises take center stage while surrounding them with plants that enhance their natural beauty. Let's make your garden their happy home!
📚 In This Guide
- What you need
- Instructions
- Tips and common mistakes
- Wrapping up and next steps
What you need
- ● Yellow iris rhizomes: 10–20 healthy, disease-free rhizomes (depending on garden size). Look for Iris pseudacorus or Iris xiphium varieties for vibrant yellow blooms.
- ● Well-draining soil: 5–10 bags of sandy loam mix or peat-based potting soil (avoid heavy clay).
- ● Compost: 2–3 bags of organic compost to enrich soil and retain moisture.
- ● Slow-release fertilizer: 1 bag of 10-10-10 or 5-10-10 granular fertilizer (follow package instructions for application rates).
- ● Mulch: 2–3 bags of pine bark or straw mulch (3–4 inches thick) to suppress weeds and retain moisture.
- ● Garden trowel or spade: For digging trenches (6–8 inches deep).
- ● Garden fork: To loosen soil before planting.
- ● Pruners or shears: For trimming dead foliage post-bloom.
- ● Watering can or hose with nozzle: For gentle, deep watering (avoid overhead spraying).
- ● Gloves: Heavy-duty gardening gloves to protect hands.
- ● Measuring tape or ruler: To space rhizomes 12–24 inches apart.
- ● Hummingbird-friendly plants: Add 2–3 bee balm, columbine, or salvia plants to attract pollinators.
- ● Decorative stones or pebbles: For a polished look around the garden edges.
- ● Drip irrigation system: For low-maintenance watering (especially in hot climates).
- ● Pest control: Neem oil or copper tape to deter iris borers.
Step-by-Step guide to designing a thriving yellow iris garden
Here's how to create a vibrant yellow iris garden that attracts hummingbirds and blooms reliably year after year.
🌱 Step 1: Select the Perfect Planting Location
Yellow irises thrive in full sun—choose a spot that gets at least 6-8 hours of direct sunlight daily. I always look for areas with morning sun and afternoon shade if your climate runs hot, as irises appreciate some relief from intense afternoon rays. The soil should drain exceptionally well; irises rot quickly in soggy conditions.
Test your soil's drainage by digging a 12-inch hole and filling it with water. If it drains within 1 hour, your site is perfect. If not, amend with sand or gravel> to improve drainage. I like to plant irises near a water feature or in a gently sloping area to encourage natural drainage.
🪴 Step 2: Prepare the Soil for Optimal Growth
Irises prefer slightly acidic to neutral soil with a pH between 6.0 and 7.5. Test your soil's pH using a simple kit—if it's too alkaline, mix in sulfur or peat moss> to lower the pH. Avoid heavy, clay soils; irises struggle in compacted ground. Instead, loosen the soil to a depth of 12-18 inches> with a garden fork or tiller.
Work in 2-3 inches of compost> to enrich the soil without adding too much nitrogen, which can promote leaf growth at the expense of blooms. I like to add a handful of bone meal> at planting time to provide slow-release phosphorus, which encourages strong root development and vibrant blooms.
☀️ Step 3: Plant Iris Rhizomes Correctly
Plant iris rhizomes in early fall or late winter> for the best results. Dig a hole about 3-4 inches deep> and place the rhizome so the top is just visible above the soil line—this prevents rot while allowing the plant to soak up sunlight. Space rhizomes 12-24 inches apart>, depending on the variety; dwarf irises can be planted closer together.
Spread the roots gently into the hole and cover lightly with soil, leaving the top of the rhizome exposed. Water thoroughly after planting to settle the soil and encourage root growth. I always plant irises in a slightly raised bed to ensure excellent drainage, especially in rainy climates.
💧 Step 4: Water and Maintain for Season-Long Blooms
Water irises deeply once a week> during the first growing season to establish strong roots. Once established, irises are drought-tolerant, but they'll reward you with more blooms if you water during dry spells. Avoid overhead watering, which can cause fungal diseases; instead, water at the base of the plant.
After blooming, cut back the flower stalks but leave the leaves intact until they turn yellow in late summer. This ensures the plant stores enough energy for next year's blooms. I like to fertilize irises in early spring with a low-nitrogen, high-phosphorus fertilizer> to promote strong flower production.
✂️ Step 5: Divide and Renew for Long-Term Health
Divide iris clumps every 3-5 years> in early fall to prevent overcrowding and maintain vigor. Dig up the rhizomes carefully and separate them, ensuring each division has at least 1-2 fans of leaves>. Discard any rhizomes that look soft, mushy, or diseased—these can spread problems to healthy plants.
Replant the divisions immediately in fresh soil, following the same spacing and depth guidelines. This is also a great time to rotate your planting area to prevent soil-borne diseases. I always replant divisions in a slightly different location to keep the garden looking fresh and to reduce the risk of pests.
Tips & tricks for perfect yellow iris gardens
A few simple tricks will help you create a thriving yellow iris garden that blooms beautifully and attracts hummingbirds all season long.
The Sunlight Secret: While 6-8 hours of sunlight is ideal, irises can actually tolerate up to 10 hours in cooler climates. In hotter regions, I've found that afternoon shade after 3 PM helps prevent stress on the plants. Watch for wilting leaves as a sign they're getting too much midday sun.
Drainage is Non-Negotiable: That 1-hour drainage test in Step 1 is crucial—irises absolutely hate soggy roots. If your soil doesn't pass, consider creating a raised bed with a gravel base. I've seen irises planted in regular garden soil rot within weeks when drainage wasn't adequate. A slight mound or gentle slope can also help water run off naturally.
Soil Prep Game-Changer: Don't skip the 12-18 inch deep tilling in Step 2—this creates the perfect loose environment for iris roots to spread. I like to add a thin layer of coarse sand mixed with the compost to further improve drainage. The bone meal you add at planting provides phosphorus that helps create those vibrant yellow blooms we're all after.
Planting Precision: When planting those rhizomes in Step 3, think of the exposed top like a sunbathing lizard—it needs to soak up sunlight while the roots stay cool. I've found that planting in a slightly raised bed (even just 2-3 inches higher than surrounding soil) gives that extra drainage boost, especially in rainy climates. This small elevation makes all the difference in preventing rot.
Pro Tips for Yellow Iris Garden
- A few simple tricks will help you create a thriving yellow iris garden that blooms beautifully and attracts hummingbirds all season long.
- The Sunlight Secret: While 6-8 hours of sunlight is ideal, irises can actually tolerate up to 10 hours in cooler climates.
- Drainage is Non-Negotiable: That 1-hour drainage test in Step 1 is crucial—irises absolutely hate soggy roots.
Frequently asked questions
Got questions about creating your own yellow iris garden?
Here are some of the most common ones—plus expert tips to help you grow a stunning, hummingbird-friendly space!
When is the best time to plant yellow irises?
The ideal time to plant yellow irises is in early fall (4-6 weeks before the first frost) or late winter/early spring (just as new growth appears). This gives roots time to establish before summer heat. Avoid planting in extreme heat or freezing conditions—irises hate soggy soil when stressed!
Will yellow irises really attract hummingbirds?
Yellow irises are a magnet for hummingbirds thanks to their bright color and nectar-rich blooms. For extra appeal, pair them with other hummingbird favorites like bee balm, salvia, or columbine. Just ensure your garden has perches nearby (like small branches or trellises) for safe feeding.
How do I keep my yellow irises blooming all season?
Consistent care is key! After blooming, trim spent stalks but leave the leaves until they yellow naturally (they feed the rhizomes). Fertilize lightly in early spring with a balanced, low-nitrogen mix, and divide clumps every 3-4 years to prevent overcrowding. Mulch lightly to retain moisture without smothering the rhizomes.
What if my yellow irises aren’t blooming?
No blooms? Check these fixes:
- Too much fertilizer (especially high-nitrogen) = leafy but no flowers. Switch to a low-nitrogen, high-phosphorus blend.
- Overcrowded rhizomes? Dig up and divide clumps in fall.
- Not enough sun? Irises need 6+ hours of direct sunlight daily.
- Dormant period disrupted? Let foliage die back naturally before new growth starts.
Are there yellow iris alternatives for shady gardens?
If your garden is low-light, try these hummingbird-friendly swaps:
- Daylilies (Hemerocallis) – Tough, colorful, and thrive in partial shade.
- Coral Bells (Heuchera) – Adds texture and attracts pollinators.
- Foxtail Lilies (Eremurus) – Dramatic spikes that love shade.
- Bleeding Heart (Dicentra) – Soft blooms and shade tolerance.
For full sun, consider yellow daylilies or black-eyed Susans as complementary plants.
Wrapping up and next steps
Creating a yellow iris garden isn’t just about adding beauty to your space—it’s about crafting a thriving ecosystem that delights both you and nature’s tiny visitors. 🌸 These vibrant blooms bring color, resilience, and a hummingbird haven to your yard, proving that even small gardens can make a big impact.
Whether you’re a seasoned gardener or just starting, this guide gives you the tools to nurture a stunning, low-maintenance retreat.
Ready to transform your outdoor space? Start small—plant a few irises this season and watch your garden bloom with confidence. Before you know it, you’ll be the envy of the neighborhood with your golden, buzzing oasis!