
Tools
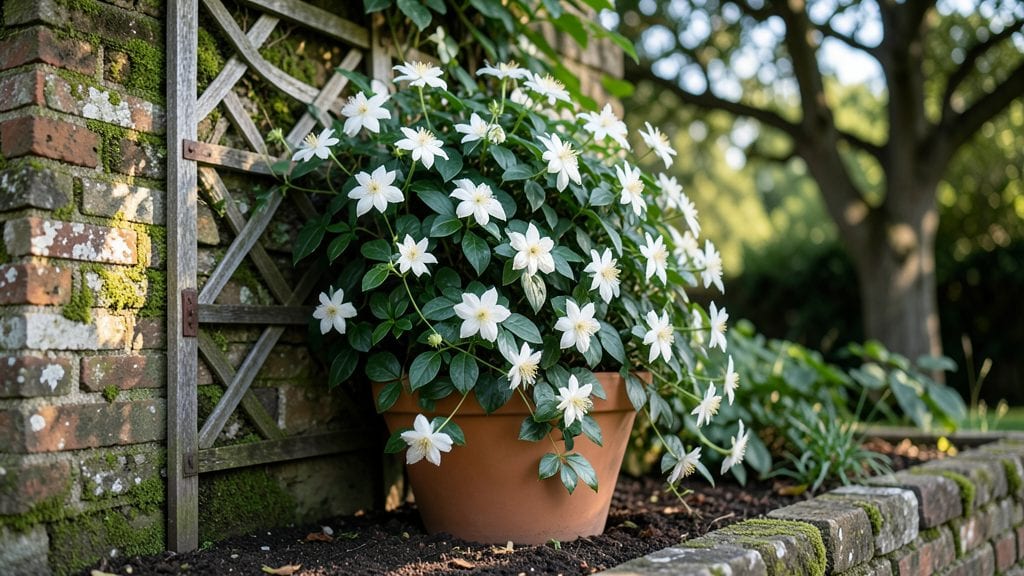
Creating lush living privacy screens behind garden walls transforms bare spaces into vibrant, functional retreats. 🌿 I’ve turned my own backyard’s shadowy corners into thriving green barriers that block nosy neighbors while adding beauty—no fence or lattice required.
The key is choosing the right plants that handle shade and tight spaces without sacrificing height or density.
You’ll need a mix of evergreen shrubs for year-round coverage—think boxwoods, holly, or dwarf aralias—and fast-growing climbers like ivy or clematis for vertical drama. Wall-mounted planters or sturdy trellises anchor the design, while layered planting ensures no gaps appear as plants mature.
Most setups take 1-2 seasons to fill in completely, but the payoff is immediate privacy with seasonal interest.
Imagine stepping into a secluded oasis where sunlight filters through emerald leaves and fragrant blooms soften the air. These screens reduce outside noise, increase property value, and create a sense of escape—even in small yards.
The best part? They adapt to any wall type, from brick to stucco, and thrive with minimal maintenance once established.
Whether you’re working with a sunny patio or a shady alley, the same principles apply: start with shade-tolerant plants, add vertical structure, and let nature do the heavy lifting. Here’s how to design a screen that feels like a natural extension of your garden, not just a barrier.
📚 In This Guide
- What you need
- Instructions
- Tips and common mistakes
- Wrapping up and next steps
What you need
- ● Plants: 3–5 mature privacy plants (e.g., Bamboo, Holly, Arborvitae, or Boxwood) – choose based on height (6–12 ft) and climate needs.
- ○ Optional: Fast-growing vines (e.g., Ivy, Clematis, or Wisteria) for vertical coverage.
- ● Structural Support: 1–2 wooden or metal trellises (6–8 ft tall, adjustable spacing).
- ● OR 2–3 sturdy garden walls (pre-built or DIY with cedar planks or lattice panels).
- ● Soil & Amendments: 50 lbs of well-draining potting mix or native soil enriched with compost.
- ● Slow-release fertilizer (10-10-10 NPK) for nutrient boost.
- ● Tools: Shovel, trowel, and pruners (bypass pruners for clean cuts).
- ● Measuring tape, stakes, and string for layout.
- ● Wheelbarrow (for hauling soil/plant materials).
- ● Mulch (3–4 inches) to retain moisture and suppress weeds.
- ● Drip irrigation system for low-maintenance watering.
- ● Decorative lighting (solar-powered string lights or spotlights).
- ● Privacy fabric or lattice for instant coverage while plants grow.
Step-by-Step guide to designing living privacy screens that last
Here's how to create a lush, evergreen barrier that grows stronger each season.
🌱 Step 1: Select Fast-Growing, Drought-Tolerant Plants
For a year-round screen, I focus on evergreen shrubs that tolerate pruning and thrive in partial shade—think Arborvitae, Holly, or Boxwood. These varieties grow 2-3 feet annually and maintain dense foliage even in winter. For faster results, mix in Bamboo (clumping types only) or Russian Olive if your climate allows.
Measure your wall height and width first. A 6-foot-tall screen requires plants spaced 3-4 feet apart for full coverage in 3-5 years. I always sketch a quick layout to visualize the mature spread before planting—this prevents overcrowding later.
🪴 Step 2: Prepare the Soil and Planting Trench
Dig a 12-inch-wide trench along the wall, running the full length of your screen. Amend the native soil with 3 inches of compost and 1 cup of slow-release fertilizer per plant hole. This ensures roots establish quickly in the first season.
For clay-heavy soil, I add 1 part perlite to 3 parts soil to improve drainage. Water the trench deeply 24 hours before planting—this helps roots penetrate moist soil instead of dry, compacted earth. Use a shovel or trenching tool to keep the trench straight and even.
☀️ Step 3: Plant and Stagger for Continuous Coverage
Place each plant in the trench at the same depth it grew in its container. Space taller varieties (like Arborvitae) at 4 feet apart, while shorter shrubs (like Boxwood) can go 2-3 feet apart. This staggered planting ensures no gaps appear as plants mature.
Backfill with native soil, pressing gently to remove air pockets but not compacting the roots. Water immediately after planting to settle the soil and encourage root contact. I like to add 1 inch of mulch around each plant to retain moisture and suppress weeds—just keep it 6 inches away from stems to prevent rot.
✂️ Step 4: Prune and Train for Density
Trim new growth back by one-third in the first year to encourage bushier growth. Use clean, sharp pruners to make cuts just above a leaf node. For Arborvitae, I shape them into a slight wedge—wider at the base—to create a natural, wind-resistant form.
After the first growing season, prune again in early spring to remove any dead or crossing branches. This keeps the screen dense and healthy while preventing disease. I avoid heavy pruning in late summer—it stresses plants and reduces winter hardiness.
💧 Step 5: Water and Maintain for Long-Term Growth
Water deeply twice weekly for the first month, then taper to once weekly once plants establish. You’ll know they’re settled when leaves stay firm and vibrant (not wilting or yellowing). Drip irrigation works best—it delivers moisture directly to roots without wetting foliage, which reduces fungal risks.
Fertilize annually in early spring with a balanced 10-10-10 formula. I also monitor for pests like spider mites or aphids—a strong spray of water usually clears them before they become a problem. With consistent care, your screen will fill in completely within 3-5 years.
Tips & tricks for perfect living privacy screens
Creating a lush, year-round privacy screen takes planning—but these pro tips will help you avoid common pitfalls and ensure your green barrier thrives for decades.
Plant Selection Strategy: When choosing between Arborvitae, Holly, or Boxwood in Step 1, consider their mature heights. For a 6-foot-tall screen, I recommend planting Arborvitae 'Green Giant' (fastest grower at 2-3 feet annually) in the back row and Boxwood 'Green Velvet' (slower at 1-2 feet annually) in front. This creates natural layers that fill in evenly over time. For climate zones with hot summers, Russian Olive is my go-to for drought tolerance—though check local regulations first, as some areas consider it invasive.
Soil Preparation Secret: In Step 2, don't skip the 24-hour pre-watering of your trench—this is non-negotiable for clay-heavy soils. I've seen roots struggle to penetrate dry, compacted earth, leading to stunted growth. For extra insurance, add 1 tablespoon of mycorrhizal fungi to each planting hole. These beneficial microbes help roots absorb nutrients more efficiently, especially in the first critical growing season.
Pruning Technique: The one-third pruning rule in Step 4 might seem drastic, but trust me—this encourages bushier growth by stimulating multiple side shoots. When shaping Arborvitae into a wedge, I make the cuts at a 45-degree angle just above a leaf node. This creates a natural wind-resistant form while promoting denser foliage. Avoid pruning in late summer, as you mentioned—plants need time to harden off before winter.
Long-Term Maintenance Hack: For the annual spring fertilization in Step 5, I switch to organic compost tea after the first year. This feeds the soil ecosystem rather than just the plants, leading to stronger root systems. Pair this with a mulch top-up every spring—just remember to keep it 6 inches away from stems to prevent rot. This combo reduces watering needs by up to 30% while keeping your screen vibrant year-round.
Pro Tips for Behind Garden Walls
- Creating a lush, year-round privacy screen takes planning—but these pro tips will help you avoid common pitfalls and ensure your green barrier thrives for decades.
- Plant Selection Strategy: When choosing between Arborvitae, Holly, or Boxwood in Step 1, consider their mature heights.
- Soil Preparation Secret: In Step 2, don't skip the 24-hour pre-watering of your trench—this is non-negotiable for clay-heavy soils.
Frequently asked questions
Got questions about creating lush, year-round privacy screens?
Here are answers to the most common concerns—so you can transform your garden walls into a thriving, secluded oasis with confidence!
What are the fastest-growing plants for quick privacy?
For rapid coverage, opt for Bamboo (clumping varieties), Leyland Cypress, or Hornbeam. These grow 2–3 feet per year and create dense screens in 2–3 seasons. Pair them with Ivy or Clematis for vertical speed!
How long does it take for a garden wall screen to become fully private?
Most plants take 2–5 years to reach full privacy, depending on species. Fast growers like Willow or Arborvitae can block views in 1–2 years, while slower options (e.g., Boxwood) may need 3–5 years. Plan ahead!
Are there budget-friendly alternatives to expensive plants?
Yes! Use Native shrubs (e.g., Privet or Forsythia) for low-cost, low-maintenance screens. Vines on trellises (like Wisteria) or stacked planters with Succulents also work—just ensure they’re sturdy and well-supported!
How do I maintain a garden wall screen without it looking messy?
Prune 2–3 times a year (spring, summer, fall) to encourage dense growth. Remove dead branches, thin overcrowded areas, and fertilize lightly in early spring. Mulch the base to retain moisture and suppress weeds—keep it tidy!
Will these plants survive harsh winters or hot climates?
Choose hardy species for your climate: Evergreens (e.g., Holly) thrive in cold; Bougainvillea or Lantana handle heat. Research USDA zones for your area, and consider windbreaks or shade cloth for extreme conditions.
Wrapping up and next steps
Creating a thriving, year-round privacy screen behind your garden walls is simpler—and more rewarding—than you might think! With the right plants, thoughtful design, and a little patience, you can transform your outdoor space into a lush, secluded oasis that blooms in every season.
Whether you’re drawn to evergreens for year-round coverage or vibrant seasonal blooms for color, the key is starting small and letting nature do the work. 🌿
Ready to take the next step? Sketch a rough layout of your garden walls, research the best plants for your climate, and gather your tools. Before you know it, your private retreat will be flourishing—one layer of greenery at a time! 🌱