Tools
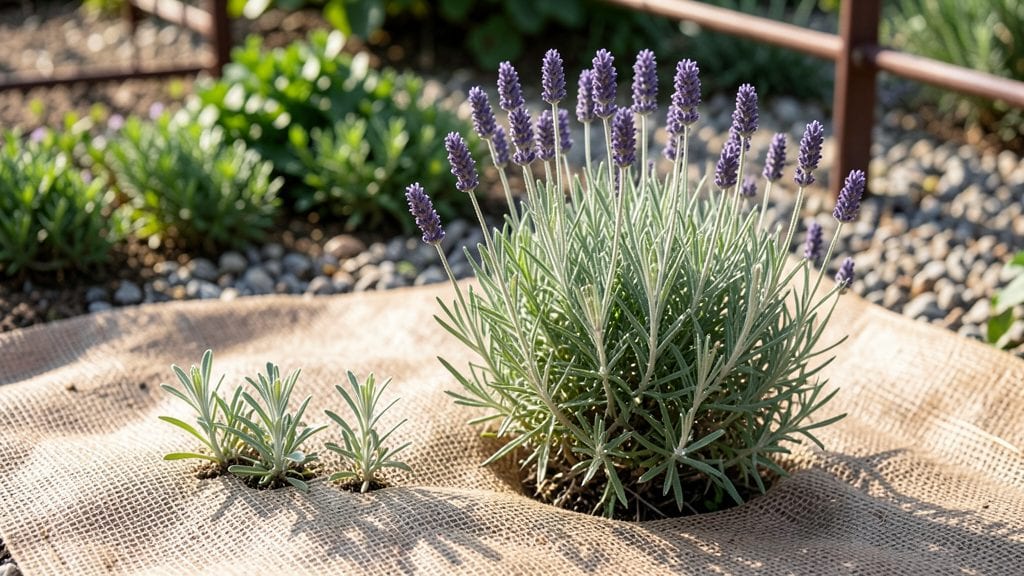
My first try with biodegradable garden fabric changed how I think about weed barriers forever—it blocks weeds now while feeding the soil later. 🌱 Unlike plastic sheets that smother the earth for decades, this stuff breaks down in just two to three seasons, leaving behind organic matter that improves soil structure.
The difference in my raised beds was immediate: fewer weeds to pull, and plants that thrived without the struggle.
You’ll need rolls of the fabric, some landscape staples or rocks to hold it down, and a pair of scissors for cutting. It’s lightweight enough to handle by hand but sturdy enough to last through a full growing season.
The best part? No digging or removing old fabric when it’s time to replant—just let nature take its course. I’ve used it under perennials, around fruit trees, and even in vegetable rows where weeds used to be a nightmare.
What you’ll end up with is a garden that stays tidy without the hassle of plastic. The fabric keeps soil moist, suppresses weeds aggressively, and eventually turns into compost right where it lies.
My tomatoes and peppers grew stronger last year, and the soil was richer by the end of the season. It’s the kind of tool that makes gardening easier while being kinder to the planet—something every gardener should try at least once.
Works in raised beds, around shrubs, or even under mulch for extra weed control. If you’re tired of fighting weeds or want a more sustainable way to garden, this is the solution that pays off twice—once by keeping your garden clean, and again when it disappears without a trace.
📚 In This Guide
- What you need
- Instructions
- Tips and common mistakes
- Wrapping up and next steps
What you need
- ● Biodegradable garden fabric – Choose a certified compostable option (e.g., 100% plant-based cellulose or PLA-based fabric). Standard sizes: 10’ x 25’ (3m x 7.5m) or 10’ x 50’ (3m x 15m) (adjust based on your garden area).
- ● Shovel or spade – For digging trenches or securing edges.
- ● Staple gun + biodegradable staples – To fasten fabric to stakes or soil (avoid metal staples).
- ● Biodegradable landscape staples or garden pins – For temporary securing (e.g., 100-200 pieces depending on size).
- ● Garden stakes or rocks – To weigh down edges (e.g., 6-12 wooden or bamboo stakes or 10-15 flat rocks).
- ● Pruners or scissors – For cutting fabric to fit tricky spots.
- ● Gloves – To protect your hands while handling soil or fabric.
- ● Compost activator – Speeds up biodegradation (e.g., worm castings or compost tea).
- ● Edging material – Like biodegradable plastic edging to keep fabric neat.
- ● Mulch or straw – To cover fabric edges and prevent erosion.
- ● Watering can or hose – For moistening soil before installation (helps fabric settle).
Step-by-Step guide to installing biodegradable garden fabric
This plant-friendly barrier works like weed cloth but vanishes over time—here's how to use it properly.
🌱 Step 1: Prepare Your Planting Area
Clear the area of existing weeds and debris, then loosen the soil with a garden fork to a depth of 6 inches. I like to work in sections about 4 feet by 4 feet at a time—this keeps the fabric manageable and prevents wrinkling. Smooth any large rocks or clumps so the fabric lays flat against the ground.
If you're installing around established plants, gently move them aside or create small cutouts in the fabric later. The key is to have a clean, level surface before laying down the biodegradable material. This ensures good contact with the soil and prevents gaps where weeds can sneak through.
💧 Step 2: Lay the Fabric Evenly
Unroll the biodegradable fabric over your prepared area, allowing 6-12 inches of extra fabric around the edges. This extra helps secure it later without gaps. Smooth out any wrinkles by hand or with a broom—wrinkles create pockets where weeds can grow or where the fabric might tear.
For curved edges or around plants, cut the fabric with sharp scissors rather than tearing it. A clean cut prevents fraying and keeps the edges neat. If you're covering a sloped area, anchor the fabric with landscape staples or rocks to prevent shifting.
✂️ Step 3: Secure the Edges and Create Plant Openings
Fold the extra fabric edges 2-3 inches inward and secure them with landscape staples or heavy rocks. This keeps the fabric in place while allowing rain to penetrate. For plants you've moved aside, cut X-shaped openings in the fabric—this prevents tearing when you replant.
I mark plant locations with small sticks before cutting to ensure accuracy. The openings should be just large enough to fit the root ball of your plants. If you're installing this under mulch, you can skip the staples and just tuck the edges under the mulch layer.
☀️ Step 4: Add Mulch and Plant
Spread 2-3 inches of organic mulch over the fabric to hold it in place and suppress weeds further. This also helps retain moisture and regulate soil temperature. Water the area gently to settle everything and encourage contact between the fabric and soil.
Replant your saved plants or sow new seeds directly through the fabric openings. The fabric will break down naturally over 1-3 years, enriching the soil as it decomposes. You'll know it's working when you see fewer weeds popping up between your plants.
Tips & tricks for perfect biodegradable garden fabric installation
These practical pointers will help you get the most out of your plant-friendly barrier without the common headaches.
Prep Work is Everything: In Step 1, don't skip the soil loosening—those 6 inches of depth are crucial. I've seen fabric shift when planted into compacted soil, creating gaps where weeds pop up. Use a garden fork to break up clumps thoroughly, especially if you have heavy clay soil. This ensures the fabric stays put and works as intended.
Fabric Fit Matters: When laying the fabric in Step 2, those 6-12 inches of extra around edges aren't just decoration—they're your weed-blocking insurance. If you're short on fabric, overlap edges by at least 4 inches instead of stretching. I learned this the hard way when a windstorm lifted my edges after just one week!
Cut with Precision: For Step 3, grab your sharpest scissors—seriously, don't use dull ones. The clean cuts you make for plant openings are what prevent fraying and tearing later. I mark my plant locations with small sticks first, then cut the X-shaped openings while the fabric is still flat on the ground. This keeps the edges crisp and makes replanting a breeze.
Mulch Makes the Difference: In Step 4, the 2-3 inches of mulch isn't just decoration—it's what holds everything in place. Use organic mulch like straw or wood chips, and don't skimp on the thickness. This layer also helps regulate soil temperature and keeps your fabric from drying out too quickly, which can make it brittle and less effective.
Pro Tips for Biodegradable Garden Fabric
- These practical pointers will help you get the most out of your plant-friendly barrier without the common headaches.
- Prep Work is Everything: In Step 1, don't skip the soil loosening—those 6 inches of depth are crucial.
- Fabric Fit Matters: When laying the fabric in Step 2, those 6-12 inches of extra around edges aren't just decoration—they're your weed-blocking insurance.
Frequently asked questions
Got questions about biodegradable garden fabric?
You’re not alone! Here are answers to the most common queries to help you make the best choice for your garden.
How long does biodegradable garden fabric take to break down?
Most biodegradable fabrics decompose within 12 to 24 months, depending on material (e.g., jute, coconut fiber) and soil conditions. Warmer, moist soil speeds up the process. Check the product label for specifics—some brands offer faster (6–12 months) or slower (2+ years) options.
Can I use biodegradable fabric under mulch or topsoil?
This fabric is designed to disintegrate safely when buried under 2–4 inches of soil or mulch. It’s ideal for suppressing weeds, improving soil structure, or creating plant beds. Just avoid placing it directly against plant roots—leave a 1–2 inch gap for airflow.
Will it harm plants or soil microbes as it breaks down?
Nope! High-quality biodegradable fabric is non-toxic and enriches soil with organic matter as it decomposes. However, avoid cheap or untreated fabrics—look for certified compostable or OMRI-listed products to ensure safety for edible gardens.
What’s the best alternative if I need a longer-lasting barrier?
For permanent weed suppression, opt for landscape fabric (polypropylene) or cardboard (soaked in water to break down slowly). If you prefer eco-friendly but longer-lasting, try hemp burlap or recycled cotton fabric, which take 2–3 years to decompose.
How do I install it without it blowing away or shifting?
Secure the edges with landscape staples or heavy rocks, and overlap seams by 6–12 inches. For windy areas, weigh it down with garden pins or a thin layer of mulch. Pro tip: Stretch it taut before covering to prevent bunching.
Does it work in cold or wet climates?
Yes, but decomposition slows in cold/wet conditions. In freezing temps, the fabric may stay intact longer—perfect for multi-year weed control. In soggy soil, ensure proper drainage to prevent mold. For faster breakdown, add compost or well-rotted manure to speed up the process.
Wrapping up and next steps
Switching to biodegradable garden fabric is a game-changer for eco-conscious gardeners—it keeps weeds at bay while breaking down harmlessly into the soil, enriching your plants naturally. 🌱 Whether you're tackling a new garden bed or revamping an old one, this sustainable solution makes gardening smarter and greener.
Ready to take the next step? Try it in your next planting project and watch your garden thrive—without the guilt!
- 🔍 Pro Tip: Start small with a test patch to see how your soil responds.
- 🌿 Next Step: Pair it with compost for even better results!