Landscaping
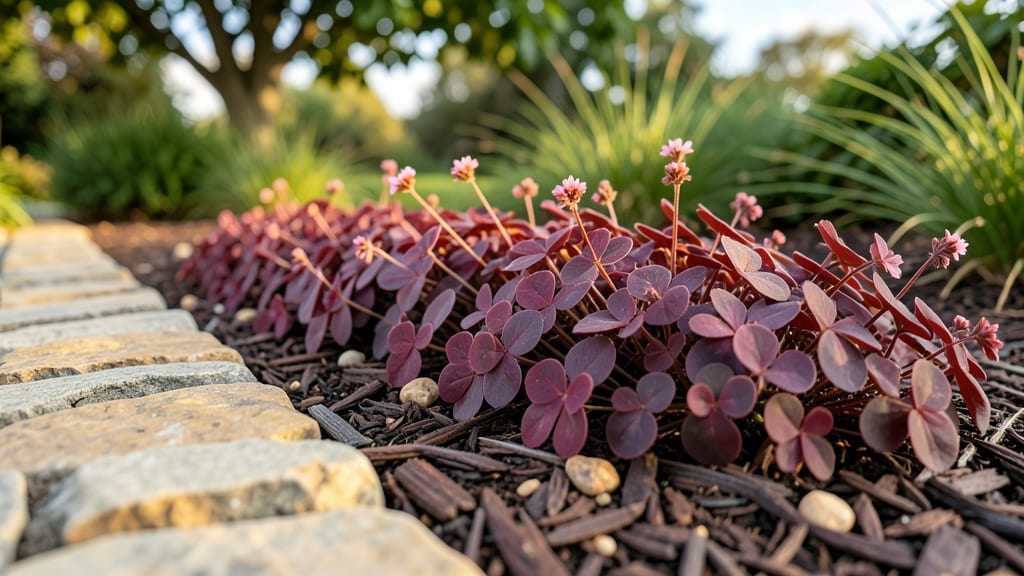
Cobblestone edging transforms a simple garden border into a timeless focal point that adds rustic charm and structure to any outdoor space. 🌿 I remember the first time I saw a perfectly laid cobblestone border—it instantly made my backyard feel more intentional, like a curated piece of art rather than just a patch of grass.
The texture contrasts beautifully with soft mulch or manicured lawns, while the natural irregularity prevents that "too-perfect" look that feels sterile.
You don’t need to be a mason to install this—just a level, some basic tools, and the right stones. Flat, durable cobblestones like bluestone or granite work best, and you can arrange them in a simple straight line for modern gardens or a staggered pattern for that classic cottage feel.
The best part? It lasts for years, resists weeds better than grass, and improves drainage so your plants stay healthier. My own edging has held up perfectly through three winters and countless summer downpours.
Once installed, cobblestone edging becomes the perfect stage for your plants to shine. Pair it with low-growing perennials like creeping thyme or ornamental grasses for a soft contrast, or let it frame a bold border of hydrangeas and hostas.
The stones also warm up in sunlight, creating a cozy microclimate for heat-loving plants. You’ll love how it elevates even the simplest garden design—no fancy hardscaping skills required.
Whether you’re outlining a vegetable patch, a flower bed, or a walkway, cobblestone edging adds structure without overwhelming the space. For larger projects, consider renting a plate compactor to ensure stability, but even a simple hand-tamped base works for smaller borders.
The key is taking your time with the layout—once those stones are set, they’ll define your garden’s character for years to come.
📚 In This Guide
- What you need
- Instructions
- Tips and common mistakes
- Wrapping up and next steps
What you need
- ● Cobblestones: 100–200 pieces (varies by garden length; 3–6" diameter works best for edging). Pro tip: 🌡️ Choose uniform, flat stones for a polished look!
- ● Landscape fabric: 1 roll (to suppress weeds and stabilize soil).
- ● Crushed gravel or sand: 2–3 bags (for base stability and drainage).
- ○ Landscape adhesive (optional): For extra hold on uneven terrain.
- ○ Mulch (optional): 1–2 bags (to enhance aesthetics and retain moisture).
- ● Shovel or spade: For digging trenches (6" deep, 8–12" wide).
- ● Wheelbarrow: To transport gravel, sand, or stones.
- ● Rubber mallet: For gently tapping stones into place.
- ● Level or string line: To ensure a straight, even edge.
- ● Gloves & knee pads: Because comfort matters! 💪
- ○ Safety glasses (optional): For dusty or rocky projects.
- ● Mark your garden edge with spray paint or stakes for a guide.
- ● Clear existing debris, weeds, or plants from the edging area.
- ● Check local regulations if installing near sidewalks or driveways.
Step-by-step instructions for installing cobblestone edging
Transform your garden borders with timeless elegance—here’s how to create durable, rustic edging that lasts for years.
🪴 Step 1: Mark and Prepare the Edging Layout
Use a garden hose or string to outline your desired border shape along the landscape edge. Cobblestones work best in curves, so follow natural contours of your yard. Drive 4-inch wooden stakes every 3-4 feet along the line, tying the string between them for a visual guide. This ensures your edging stays straight and prevents wandering as you work.
Dig a trench 4-6 inches deep along your marked line using a shovel or edging tool. The depth depends on cobble size—deeper for larger stones to sit flush with the ground. Remove any grass, weeds, or debris from the trench and tamp the soil firmly with a plate compactor or the back of your shovel. A solid base prevents stones from shifting over time.
💧 Step 2: Create a Gravel Base for Drainage
Spread a 2-inch layer of coarse gravel (like #57 stone) along the bottom of the trench. This layer is critical—it provides drainage and prevents soil from mixing with your cobblestones, which would cause them to sink unevenly. Use a rake to level the gravel evenly, then compact it with a hand tamper or by walking along it in heavy work boots.
I like to add a landscape fabric layer over the compacted gravel to block weeds while still allowing water to drain. Secure the edges with landscape staples, but leave the fabric loose enough to avoid tension as you place stones. This step saves hours of weeding later and keeps your edging looking sharp.
☀️ Step 3: Lay the Cobblestones Evenly
Start placing cobblestones along the trench, beginning at one corner and working outward. Choose stones with a 2-3 inch thickness for a sturdy, long-lasting border. Press each stone firmly into the gravel base—you want them to sit slightly below ground level so they don’t become a tripping hazard. Use a rubber mallet to tap stubborn stones into place without cracking them.
Leave a ¼-inch gap between stones for flexibility and drainage. If you’re using irregularly shaped cobblestones, rotate them to create a natural, organic look. For straight sections, I like to start with the largest stones at the corners to anchor the rest. As you work, check your layout frequently by stepping back—this helps you spot uneven spots before they become permanent.
✂️ Step 4: Secure the Edging and Finish the Edges
Once all stones are in place, fill the gaps between them with polyester sand (not regular sand—it washes away). Sweep the sand into the joints using a push broom, then mist the area with water to help it settle. Let it dry for 24 hours, then sweep in another thin layer to ensure full coverage. This creates a stable, weed-resistant base that locks the stones in place.
For the final touch, trim any grass or plants growing against the edging with a string trimmer or shears. You can also add landscape edging caps (like metal or plastic strips) to the top of the stones if you want extra security against shifting. Water the area lightly after installation to help the sand and gravel settle, and your edging will be ready for years of rustic charm.
Tips & tricks for perfect cobblestone edging
These game-changing tips will transform your cobblestone edging from a simple border to a stunning landscape feature that stands the test of time.
The Layout Secret: Before driving your 4-inch wooden stakes every 3-4 feet, walk your layout at least twice—once to visualize the curve, and again to check for any obstacles you might miss. I learned this the hard way after having to remove a stake because of a buried pipe! A garden hose makes this easy—just bend it to your desired curve and adjust until it feels right. This step alone prevents costly mistakes later.
Base Prep That Makes All the Difference: When compacting your 2-inch gravel layer in Step 2, go beyond just walking on it. Use a hand tamper or even a heavy board to create a solid foundation. The goal is to achieve 95% compaction—this prevents stones from sinking over time. I've seen projects fail when this step is rushed, so take your time here.
Stone Selection Strategy: For that authentic rustic look, mix cobblestone sizes and shapes—just make sure they're all within the 2-3 inch thickness range. I recommend sorting them by size before laying them out: place the largest stones at the corners and along curves, then fill in with medium and smaller stones. This creates visual interest while maintaining stability. The ¼-inch gaps between stones are crucial for drainage and flexibility, so don't skimp on this detail.
Sand Settlement Hack: After sweeping your polyester sand into the joints, don't be tempted to rush the 24-hour drying time. Instead, lightly mist the area every 6 hours during that period—this helps the sand settle more evenly. I've found that adding a second thin layer after 24 hours creates a more durable finish that resists erosion from rain and foot traffic.
Pro Tips for Cobblestone Edging Garden
- These game-changing tips will transform your cobblestone edging from a simple border to a stunning landscape feature that stands the test of time.
- The Layout Secret: Before driving your 4-inch wooden stakes every 3-4 feet, walk your layout at least twice—once to visualize the curve, and again to check for any obstacles you might miss.
- Base Prep That Makes All the Difference: When compacting your 2-inch gravel layer in Step 2, go beyond just walking on it.
Frequently asked questions
Got questions about cobblestone edging? Here are some of the most common ones—and their answers—to help you create the perfect garden border!
What’s the best cobblestone size for garden edging?
For edging, 3- to 5-inch cobblestones work best—they’re sturdy enough to define borders while staying manageable to install. Smaller stones (1-2 inches) can look charming but may shift over time. Larger ones (6+ inches) require heavy machinery and are better for pathways than tight garden edges.
When is the best time to install cobblestone edging?
Install edging in spring or fall when temperatures are mild (50–75°F). Avoid winter (freezing soil) or summer (extreme heat). If you’re in a warm climate, early morning or late afternoon installations help stones set properly without cracking.
Can I DIY cobblestone edging, or should I hire a pro?
DIY is totally doable if you’re handy! Basic tools (shovel, level, rubber mallet) and a clear layout plan make it manageable. For large projects, uneven terrain, or intricate patterns, hiring a pro ensures precision and saves headaches. Rent a plate compactor for the best results.
What are some alternatives to cobblestone edging?
If cobblestones aren’t your style, consider:
- Brick or pavers: Clean lines, durable, and easy to customize.
- Natural stone: Slate or flagstone for a softer, organic look.
- Wooden edging: Budget-friendly but requires maintenance (rot-resistant cedar lasts longest).
- Metal or vinyl: Low-maintenance but less rustic.
Why is my cobblestone edging shifting or sinking?
Shifting often happens due to poor base prep (insufficient gravel or sand) or freeze-thaw cycles. Fix it by:
- Excavating the area slightly deeper.
- Adding a 4-inch compacted gravel base.
- Tamping stones firmly into place.
- Using edging restraints (metal or plastic) to lock them in.
Wrapping up and next steps
Adding cobblestone edging to your garden isn’t just about aesthetics—it’s about creating a timeless, functional border that elevates your outdoor space with rustic charm.
Whether you’re framing flower beds, pathways, or lawns, this versatile technique blends durability with natural beauty, making it a worthwhile investment for any landscaper or DIY enthusiast. 🌿✨
Ready to transform your garden? Start small—pick a section, gather your materials, and dive in! With patience and creativity, your cobblestone edging will become the standout feature of your landscape. Happy building!