
Tools
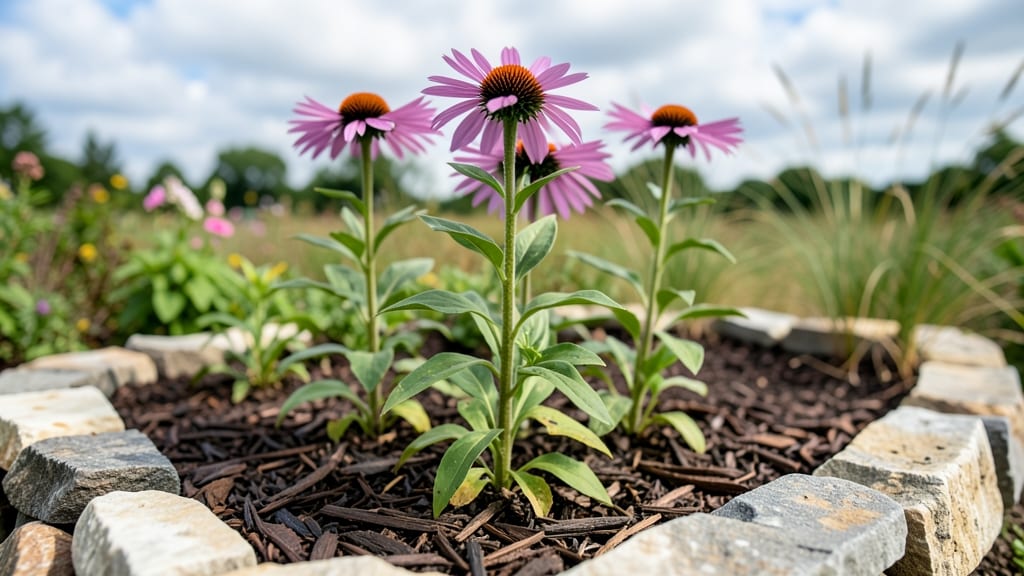
Building composite garden beds transformed my backyard from a patchy, water-hogging mess into a year-round powerhouse where plants thrive without constant fuss. 🌱 The secret lies in layering organic materials—think straw, leaves, and compost—to create a living soil that retains moisture, fights weeds, and feeds roots for months.
Unlike traditional beds that need annual tilling, composite beds improve with age as materials break down. I started with a simple 4'x8' in-ground version using free yard waste and a few bags of compost—no fancy tools required.
The best part? You can adapt this for raised beds, slopes, or even small urban plots by adjusting layer thickness.
Within weeks, my tomatoes grew twice as fast, herbs stayed lush through droughts, and I cut watering time by half. The soil smells rich, not sterile, and pests barely notice the beds.
For anyone tired of struggling with poor soil or seasonal slumps, this is the game-changer you’ve been waiting for.
Works for vegetables, flowers, or shrubs—just tweak the carbon-to-nitrogen ratio based on what you’re planting. Let’s get your layers right the first time so you skip the trial-and-error years I went through.
📚 In This Guide
- What you need
- Instructions
- Tips and common mistakes
- Wrapping up and next steps
What you need
- ● Carbon-rich base layer: Cardboard or newspaper (black-and-white only, no glossy ink), 2–4 sheets per sq. ft.
- ● Dried leaves or straw (1–2 inches thick, lightly shredded).
- ● Nitrogen-rich green layer: Fresh grass clippings (lightly wilted, 1–2 inches), or
- ● Composted manure (2–3 inches, well-aged), or
- ● Kitchen scraps (fruit/veggie peels, coffee grounds, no meat/dairy).
- ● Soil & amendments: Topsoil (6–12 inches deep, sifted for weeds).
- ● Compost (2–3 inches, finished, not fresh).
- ○ Optional boosters: Vermiculite (1 part), worm castings (1 cup per sq. ft.), or bone meal (1 tbsp per sq. ft.).
- ● Tools: Garden fork (for aerating layers).
- ● Rake or shovel (for spreading materials).
- ● Wheelbarrow (to haul bulk items).
- ● Watering can or hose (for dampening layers).
- ● Biochar (½ cup per sq. ft., for moisture retention).
- ● Wood chips or bark mulch (1–2 inches, to suppress weeds).
- ● PVC pipes or drip irrigation (for low-maintenance watering).
- ● Landscape fabric (under beds to block weeds, if needed).
- ● Garden twine or stakes (to secure cardboard in windy areas).
Step-by-Step instructions for building composite garden beds
Layering soil like this transforms poor ground into a nutrient-rich haven where plants flourish year-round.
🌱 Step 1: Mark and Prepare the Bed Layout
Use the landscape fabric to outline your bed shape—lay it flat and trace the edges with the garden hose to create a smooth, even perimeter. I like to add a 1-inch border beyond the fabric to allow for easy maintenance access. Remove any weeds or grass within this marked area, then loosen the top 6 inches of native soil with the garden fork to break up compaction.
This prep prevents invasive roots from competing with your layered system. If you encounter rocks or hardpan, simply move them to the edges—they’ll become part of your bed’s border. The goal is to create a clean slate where your custom layers can work their magic.
🪴 Step 2: Install the Foundation Layers
Start by placing the cardboard pieces directly on the prepared soil to smother weeds and prevent regrowth. Overlap the edges by 2 inches and cut them to fit snugly against any curves. Next, lay the landscape fabric over the cardboard, ensuring it extends 6 inches beyond the bed’s edges to contain the soil layers.
This double barrier is critical—it blocks weeds while allowing water to penetrate. Press the fabric edges down gently with the garden fork to secure them without tearing. If your bed has steep sides, tuck the fabric into the soil at the base to prevent slumping.
🌿 Step 3: Build the Carbon-Rich Base Layer
Spread the 12 inches of coarse wood chips evenly across the bed, breaking them up slightly with the garden fork to create pockets for air circulation. This layer is your moisture regulator—it holds water while preventing compaction. I like to rake it lightly to achieve a 3-inch deep, even surface before adding the next layer.
Don’t skip this step. The wood chips provide the structural backbone that keeps your bed from becoming too dense. If you’re working in a windy area, weigh down the edges with a few rocks to prevent the chips from blowing away before the next layer is added.
💧 Step 4: Add the Compost and Topsoil Mix
Mix the 6 inches of compost and 6 inches of topsoil together in a wheelbarrow until you achieve a crumbly, dark blend. Spread this evenly over the wood chips, creating a 12-inch deep growing medium. Use the garden rake to level the surface, ensuring no pockets remain where roots could rot.
This is where the magic happens—the compost introduces beneficial microbes and organic matter, while the topsoil provides the structure plants need. I like to run my fingers through the mix to check for consistency; it should feel like damp, crumbly cake batter, not mud or dry powder.
☀️ Step 5: Finish with Mulch and Plant
Top the bed with the 2 inches of straw mulch, spreading it evenly to protect the soil from erosion and retain moisture. Plant your chosen perennials or annuals directly into the bed, spacing them according to their mature size. Water deeply right after planting to settle the layers and encourage root growth.
Here’s the thing—this bed will stay moist longer and require less watering than traditional gardens. The mulch suppresses weeds while the wood chips regulate drainage. Within a few weeks, you’ll notice healthier foliage and stronger stems as your plants tap into this nutrient-rich environment.
Tips & tricks for perfect composite garden beds
A few strategic moves will help you avoid common pitfalls and create a thriving garden foundation that lasts for years. Here's what I've learned from building these beds myself:
Layering Precision: In Step 3, when spreading the 12 inches of coarse wood chips, focus on creating a consistent 3-inch deep layer rather than just eyeballing it. Use a straight board or level as a guide to maintain uniformity—this prevents uneven settling later. I've seen beds where one side was thicker, leading to drainage issues or compaction problems. The key is to work in sections if your bed is large, checking depth frequently with a measuring stick.
Compost Quality Check: Before mixing the 6 inches of compost with topsoil in Step 4, test your compost's readiness by squeezing a handful. It should hold its shape but crumble easily when pressed—like damp potting soil. If it's too wet or clumpy, spread it out to dry for a day or two first. Poor quality compost can introduce weeds or pathogens to your new bed. I always sift mine through a ¼-inch mesh screen to remove any large debris that could create pockets where roots might rot.
Fabric Edge Strategy: In Step 2, when tucking the landscape fabric edges into the soil at steep sides, use a garden fork to create small pockets rather than just pressing it down. This creates a secure anchor that won't pull up when you water or plant. I've seen fabric edges lift after heavy rain if not properly secured, which defeats the purpose of the weed barrier. For extra security in windy areas, weigh down the edges with small landscape rocks or bricks temporarily until the bed is fully planted.
Planting Timing: After completing all layers in Step 5, wait at least 24 hours before planting—this allows the wood chips to start breaking down slightly and the compost to settle. I've made the mistake of planting immediately and had seeds or transplants sink too deeply into the still-settling layers. The 24-hour wait also gives you time to adjust the mulch layer if needed, ensuring even coverage that will protect your new plants from temperature fluctuations.
Pro Tips for Composite Garden Beds
- A few strategic moves will help you avoid common pitfalls and create a thriving garden foundation that lasts for years.
- Layering Precision: In Step 3, when spreading the 12 inches of coarse wood chips, focus on creating a consistent 3-inch deep layer rather than just eyeballing it.
- Compost Quality Check: Before mixing the 6 inches of compost with topsoil in Step 4, test your compost's readiness by squeezing a handful.
Frequently asked questions
Got questions about composite garden beds? You’re not alone—this method can feel overwhelming at first! Below, we’ve tackled the most common queries to help you build confidence and avoid pitfalls. Whether you’re a beginner or refining your technique, these answers will keep your layered beds thriving.
What’s the best time of year to build composite garden beds?
Spring or early fall are ideal for building composite beds, as the soil is workable and less prone to erosion. Avoid winter (unless in mild climates) or peak summer heat, which can stress plants during the initial settling phase. Pro tip: If starting in summer, water deeply daily for the first 2 weeks to help layers bond.
Are composite beds more expensive than traditional in-ground gardening?
Upfront costs may be higher due to materials like cardboard, compost, and mulch, but they pay off long-term. Composite beds reduce water use (up to 50%), eliminate tilling, and cut down on fertilizer needs. Over 3–5 years, they’re often cheaper than conventional gardening—plus, they improve soil health faster!
What do I do if my composite bed sinks or collapses?
Sinking is normal as materials decompose, but drastic collapse usually means insufficient bulk or poor layering. Reinforce by adding straw or coarse wood chips between layers, or top with a 2–3" layer of mulch to stabilize. If the bed is too low, rebuild sections with fresh compost and organic matter.
Can I use composite beds for vegetables, or are they better for flowers?
Composite beds excel for both! The rich, aerated soil is perfect for root crops (carrots, potatoes), leafy greens, and even fruiting plants. Just ensure layers are 3–4 feet deep for heavy feeders like tomatoes. Flowers thrive too—just avoid over-mulching near shallow roots (like lettuce).
How often should I add new materials to maintain my composite bed?
Top up with 2–3 inches of compost or aged manure annually in early spring. For high-yield beds (like vegetable patches), add a thin layer of mulch or straw every 3–4 months. Watch for: Compacted spots (fluff with a fork) or weeds (smother with cardboard before adding fresh layers).
What’s the fastest way to troubleshoot poor plant growth in a composite bed?
Check these 3 things first:
- Moisture: Stick your finger 2" deep—soil should feel damp, not soggy or dry.
- pH: Test with a kit (aim for 6.0–7.0). Amend with lime or sulfur if needed.
- Nutrients: Yellow leaves? Add a balanced organic fertilizer or compost tea.
Wrapping up and next steps
Composite garden beds are your secret weapon for lush, low-maintenance gardens that thrive year-round! By layering organic materials like cardboard, compost, and mulch, you create a nutrient-rich, self-sustaining ecosystem that reduces watering, weeds, and soil depletion.
Whether you're a beginner or a seasoned gardener, this method is game-changing—and the best part? You can start small with just a few materials.
Ready to transform your garden? Grab your tools, pick a sunny spot, and build your first composite bed today—your plants (and future harvests) will thank you! 🌱✨