Container Gardens
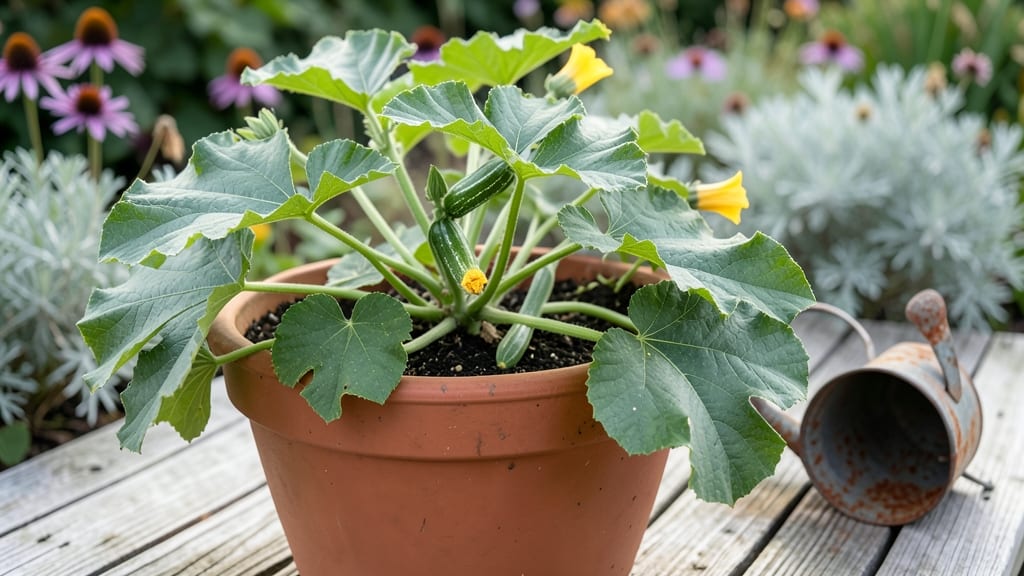
This container garden squash lets you grow more than you ever thought possible in tiny spaces—watch bush varieties like ‘Eight Ball’ and ‘Patio Star’ produce 10-pound harvests from just 5-gallon pots! 🌿 The key is choosing the right varieties and giving them what they truly need to thrive.
You’ll need containers at least 12 inches deep, well-draining soil mixed with compost, and a spot that gets 6-8 hours of sun daily.
Most people overlook the importance of support for vining types, but even bush varieties benefit from a small trellis to keep leaves off the soil and prevent disease. My first attempt without support ended with squash rotting on damp foliage—don’t make that mistake.
By midsummer, you’ll be harvesting glossy, 3-6 inch fruits that taste sweeter than anything from the store. The plants stay productive for weeks, and the lush green leaves make your containers look like a jungle oasis.
With proper care, you’ll get more harvests per square foot than in a traditional garden bed.
This method works for balconies, fire escapes, or even sunny windowsills. The same principles apply whether you’re growing zucchini, pattypan, or acorn squash—just adjust container size and support as needed. Let’s get those vines climbing!
📚 In This Guide
- What you need
- Instructions
- Tips and common mistakes
- Wrapping up and next steps
What you need
- ● Container: At least 5-gallon (for bush varieties) or 10+ gallons (for vining types). Use fabric grow bags, plastic pots, or wooden barrels with drainage holes.
- ● Potting Mix: 10-15 lbs of high-quality, well-draining container mix (avoid garden soil—it compacts!). Add 1 cup perlite or vermiculite per 5 lbs for aeration.
- ● Squash Seeds: Choose compact varieties like ‘Eight Ball’ zucchini, ‘Patio Star’ pumpkin, or ‘Bush Delicata’. Plant 2-3 seeds per container (thin to the strongest seedling).
- ● Compost or Fertilizer: 1 cup of balanced organic fertilizer (10-10-10) or worm castings to enrich the soil.
- ● Drainage: Pebbles or broken pottery (1-2 inches) at the container’s bottom to prevent root rot.
- ● Required: Trowel or small hand shovel
- ● Watering can or hose with gentle spray nozzle
- ● Pruning shears (for harvesting and trimming vines)
- ○ Optional (but helpful!): Garden gloves (to protect from prickly stems)
- ● Trellis or cage (for vining varieties like ‘Straightneck’ squash)
- ● Mulch (straw or shredded leaves to retain moisture)
- ● pH test kit (ideal range: 6.0–6.8)
- ● Sunlight: 6–8 hours of full sun daily (south or west-facing spots are ideal).
- ● Space: Ensure containers are 12+ inches apart to allow airflow and prevent disease.
- ● Warmth: Start seeds indoors 2–4 weeks before the last frost or sow directly after soil reaches 60°F+.
- ● Water Access: Containers dry out fast—plan for 1–2 inches of water per week (adjust for heatwaves!).
Step-by-step instructions for growing compact squash in containers
Here's how to grow bush varieties that thrive in pots and deliver plentiful harvests.
🪴 Step 1: Choose the Right Containers and Drainage
Select containers that are at least 12 inches deep and 12 inches wide—squash roots spread aggressively, so bigger is better. I use fabric grow bags for my compact varieties because they prevent root circling and allow excess water to evaporate through the sides. Make sure each container has multiple drainage holes—squash roots rot quickly in soggy soil.
If your containers lack drainage, drill 3-4 holes in the bottom. Place a 1-inch layer of gravel at the bottom before adding soil to prevent clogging. This ensures water flows freely while protecting roots from sitting in standing water.
🌱 Step 2: Prepare Soil and Plant Seeds
Fill your containers with high-quality potting mix—avoid garden soil, which compacts easily and suffocates roots. I mix in 1 cup of compost per container to provide nutrients without overwhelming the plants. Moisten the soil until it's evenly damp but not soggy—you should see slight moisture at the surface but no puddles.
Plant 2-3 seeds per container, burying them 1 inch deep and spacing them 6 inches apart. Squash seeds germinate best in warm soil (70-85°F), so I place the containers in a sunny spot or use a seedling heat mat to speed up germination. Cover the soil lightly with additional potting mix to protect the seeds from drying out.
☀️ Step 3: Provide Sun and Water Consistently
Squash needs full sun (6-8 hours daily) to produce fruit, so place your containers in the sunniest spot available. If you're growing in partial shade, expect smaller yields. I rotate my containers every few days to ensure even growth—you'll notice plants leaning toward the light if they're not getting balanced exposure.
Water deeply 1-2 times per week, ensuring the soil dries out 1-2 inches below the surface between waterings. Overwatering leads to blossom-end rot or fungal diseases, while underwatering causes bitter fruit. Check moisture by sticking your finger into the soil—if it feels dry past your first knuckle, it's time to water.
🌿 Step 4: Support Vines and Prune for Health
Even compact varieties benefit from light trellising to keep vines off the ground and improve airflow. I use small tomato cages or wire trellises to support the plants as they grow. Gently weave the vines through the support as they climb—this prevents breakage and encourages upward growth.
Prune any yellowing or diseased leaves immediately to prevent spread. I also pinch off side shoots that form at the base of the plant to direct energy toward fruit production. Watch for male and female flowers—female flowers have tiny squash at their base, and these are the ones to protect by removing excess male blooms.
✂️ Step 5: Harvest at Peak Ripeness
Check for harvest readiness by gently pressing the squash—it should feel firm but slightly soft when ripe. Summer squash (like zucchini) is ready when it reaches 6-8 inches long, while winter squash (like pattypan) should have a hard rind and deep color. Harvest in the morning when fruits are coolest and most flavorful.
Use a sharp knife or pruners to cut the stem, leaving ½ inch attached to the fruit. This prevents bruising and encourages more production. I harvest every 2-3 days during peak season to keep the plant focused on producing new fruit—overripe squash leads to bitter, seedy produce.
Tips & tricks for perfect container garden squash
A few simple strategies will help you maximize your squash harvest in containers without common pitfalls.
Container Size Matters: While the instructions call for containers at least 12 inches deep and wide, I've found that going slightly larger—like 14 inches deep—gives roots more room to spread without becoming root-bound. This is especially helpful for bush varieties that develop extensive root systems. If you're using fabric grow bags, choose ones with reinforced bottoms to prevent tearing when roots expand.
Soil Temperature Secret: The instructions mention warm soil (70-85°F) for germination, but here's what nobody tells you—soil stays cooler in containers than in garden beds. If your seeds aren't sprouting within 10-14 days, try placing containers on a heat mat or near a sunny window during the day. I've seen germination times cut in half with this simple adjustment.
Watering Wisdom: The 1-2 times per week watering guideline works best when your containers are in full sun. If you notice the soil drying out faster than expected (within 2-3 days), you're either overwatering or dealing with hotter conditions. Instead of increasing frequency, water more deeply each time—aim for water to run out the drainage holes. This encourages roots to grow downward where moisture is more stable.
Harvest Timing Tip: For summer squash like zucchini, the 6-8 inch size guideline is perfect for tender, sweet fruit—but here's the thing: if you wait until 8 inches, you'll get fewer harvests. I pick mine at 5-6 inches for continuous production. For winter squash, wait until the rind is completely hard before harvesting, or it won't store well. Tap the squash—it should sound hollow when ripe.
Pro Tips for Container Garden Squash
- A few simple strategies will help you maximize your squash harvest in containers without common pitfalls.
- Container Size Matters: While the instructions call for containers at least 12 inches deep and wide, I've found that going slightly larger—like 14 inches deep—gives roots more room to spread without becoming root-bound.
- Soil Temperature Secret: The instructions mention warm soil (70-85°F) for germination, but here's what nobody tells you—soil stays cooler in containers than in garden beds.
Frequently asked questions
Got questions about growing squash in containers?
You’re not alone! Here are answers to the most common concerns—from space-saving tips to pest control—so you can grow a thriving harvest with confidence.
What are the best squash varieties for small containers?
Opt for compact, bush-type varieties like Eight Ball zucchini or Table Queen summer squash. These stay under 2–3 feet tall and thrive in 5-gallon containers. Avoid vining types (like butternut) unless you’re using a large pot or trellis. Pro tip: Check seed packets for "container-friendly" labels!
When should I plant squash in containers?
Wait until after the last frost when soil is at least 60°F (15°C). Start seeds indoors 2–3 weeks earlier if your growing season is short, but transplant carefully to avoid root shock. Bonus: Use black plastic pots to warm soil faster in cooler climates!
How do I prevent pests like squash bugs or powdery mildew?
Start with disease-resistant varieties (e.g., Defender zucchini). Keep leaves dry with proper spacing, and use row covers early on. For mildew, spray neem oil weekly. Quick fix: Handpick pests in the morning when they’re sluggish!
Can I grow squash in a 5-gallon bucket or small pot?
Yes! A 5-gallon container works for bush varieties, but add a 3-inch layer of compost and a slow-release fertilizer. Larger pots (10+ gallons) support bigger harvests. Remember: Squash needs 6+ hours of sun daily—place pots where they’ll get plenty of light!
Why aren’t my container-grown squash producing fruit?
Check for these issues: not enough sun, poor pollination (hand-pollinate with a brush if bees are scarce), or overcrowding. Prune excess leaves to improve airflow, and fertilize with a high-potassium mix (like 5-10-10) when flowers appear.
What can I do if my container squash outgrows its space?
If vines escape, trim them back to redirect energy to fruit. For bush types, upgrade to a larger pot (15+ gallons) or divide roots into two containers. Last resort: Harvest smaller squash sooner—they’ll taste sweeter!
Wrapping up and next steps
Growing squash in containers is a game-changer for small-space gardeners—proving that big harvests don’t need big plots! 🌱 With the right compact varieties, sunlight, and care, you’ll enjoy fresh, homegrown squash all season long.
Whether you’re a beginner or a seasoned gardener, this method makes it easy to green up your space without the fuss.
Ready to dive in? Start by picking your favorite squash variety, grab your containers, and get planting! Your future meals—and neighbors—will thank you. 🥒✨