Tools
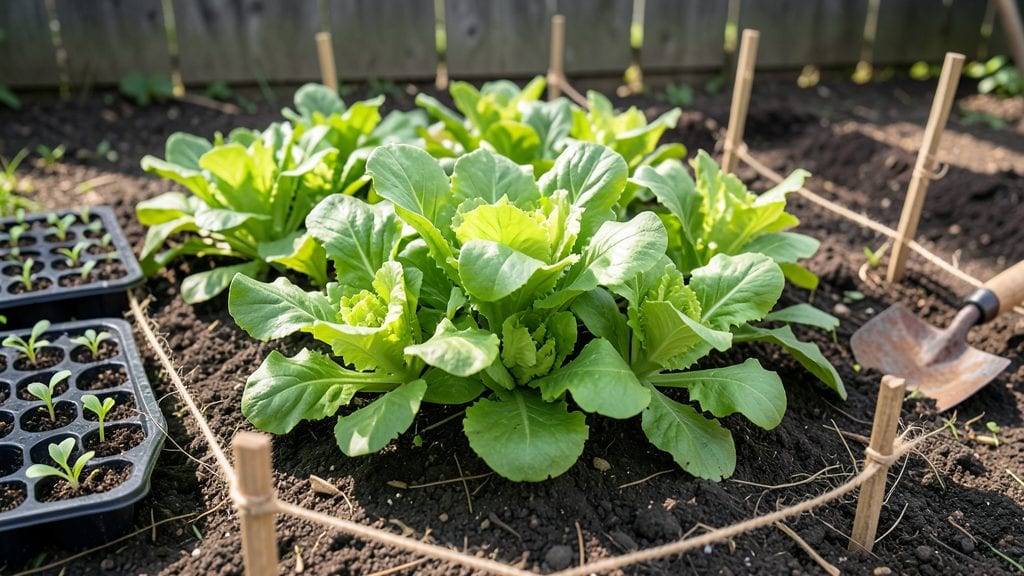
My temporary garden beds saved my backyard last summer when I needed a quick, flexible way to grow vegetables without committing to permanent planting. The best part? No digging, no mess, and no guilt when it’s time to move them—just roll them up and store them until next season.
I used them for everything from salad greens to cherry tomatoes, and they worked perfectly in my small urban space.
You’ll need cardboard, landscape fabric, and a sturdy container—think plastic bins, old pallets, or even repurposed dresser drawers.
The key is keeping it simple: line your container with cardboard to block weeds, add a layer of landscape fabric for drainage, and fill with a lightweight soil mix designed for containers.
Most plants thrive in these beds for 3-6 months, and you can even reuse the soil for compost later.
Imagine harvesting fresh lettuce in June, then swapping in peppers by July without any soil disturbance. These beds stay moist longer, warm up faster in spring, and let you grow in spots where permanent gardens wouldn’t work—like driveways, patios, or even balconies.
The only rule? Avoid heavy feeders like corn or squash unless you’re prepared to fertilize frequently.
Pro tip: Mark your bed locations with stakes so you can reuse the same spots next year. If you’re renting or just want to test layouts, this is the foolproof way to garden without permanent changes. Ready to try it? Let’s get those beds set up!
📚 In This Guide
- What you need
- Instructions
- Tips and common mistakes
- Wrapping up and next steps
What you need
- ● Base Layer: Cardboard or thick newspaper (2–3 sheets per bed, to block weeds and grass)
- ● Compost (2–3 inches deep, well-aged or homemade)
- ● Soil & Growing Medium: Potting mix or garden soil (6–12 inches deep, depending on plant type)
- ○ Optional: Perlite or vermiculite (1 part per 4 parts soil, for drainage)
- ○ Bordering (Optional but Helpful): Wooden planks, cinder blocks, or landscape fabric (to contain soil and define edges)
- ● Stakes or heavy rocks (to weigh down borders if needed)
- ● Tools: Garden fork or trowel (for mixing soil and compost)
- ● Measuring tape (to plan bed dimensions)
- ● Gloves (to keep hands clean!)
- ● Mulch (straw, wood chips, or leaves to retain moisture)
- ● Slow-release fertilizer (mix into compost for nutrient boost)
- ● Drip irrigation kit or soaker hose (for consistent watering)
- ● Plant markers (to track what’s growing where)
Step-by-step instructions for creating no-dig temporary garden beds
Here’s how to build a low-maintenance, season-long planting area without permanent soil disruption.
Select and Prepare the Site
Choose a flat, easily accessible area with at least 6 hours of sunlight daily. Avoid spots where water pools after rain—temporary beds need good drainage. Clear away weeds, rocks, and debris, but leave any existing grass or vegetation intact. This no-dig approach preserves soil structure and microbial life, which means healthier plants with less effort.
Mark your bed dimensions with stakes and string—4 feet wide by 8 feet long works well for four plants, as listed. The width allows easy reach from both sides, while the length maximizes space without overwhelming maintenance. If your site has slopes, create level terraces to prevent erosion and uneven water distribution.
Layer the Base for Drainage and Fertility
Lay down 12 inches of untreated cardboard (or thick newspaper) to smother weeds and prevent regrowth. Overlap edges by 4 inches and dampen with water to help it break down. This layer acts as a weed barrier and will decompose over time, adding organic matter to the soil below.
Next, spread 3 inches of coarse wood chips or straw over the cardboard. This creates a porous layer that improves drainage while retaining moisture. Avoid fine mulch here—it compacts easily and can suffocate roots. For fertility, top with 2 inches of compost, spreading it evenly across the bed. This layer will feed your plants as it breaks down, reducing the need for mid-season amendments.
Plant Directly Into the Layered Bed
Dig small holes—twice as wide as the root ball—only deep enough to accommodate the roots of your transplants. Gently loosen the sides of the holes with your fingers to avoid compacting the layers below. Place each plant in its hole, ensuring the top of the root ball sits just below the surrounding layer—this prevents stem rot from sitting too deep in moist mulch.
Backfill the holes with a mix of the remaining compost and the topsoil from the holes. Press lightly around the base to eliminate air pockets, but don’t pack it down. Water deeply immediately after planting to settle the soil and encourage root contact with the moist layers below. You’ll know it’s done right when water drains through the bed within 10-15 minutes—no soggy spots.
Mulch and Maintain for Season-Long Growth
Cover the entire bed with 3 inches of straw or wood chips, leaving a 2-inch gap around plant stems to prevent rot. This mulch conserves moisture, suppresses weeds, and regulates soil temperature. Check moisture weekly by pressing your finger 1 inch into the soil—water when it feels dry but not powdery. Temporary beds dry out faster than permanent ones, so aim for deep, infrequent watering rather than light daily doses.
As the season progresses, top up mulch if it decomposes below 2 inches. Avoid disturbing the bed—no digging or tilling. Instead, add fresh compost or mulch directly on top. By late fall, the cardboard will have broken down, and the wood chips will have decomposed into a rich, crumbly layer. This makes transitioning to a permanent bed effortless if you choose to expand your garden next season.
Transition Out or Extend the Bed
If you’re keeping the bed for another season, simply add 1-2 inches of fresh compost in early spring and refresh the mulch. The decomposed layers from the previous year will already be enriching the soil, so minimal effort is needed. For a clean exit, remove any remaining mulch and cardboard, then till the area lightly to reintegrate the organic matter into the native soil.
This method works year after year—just rotate locations to avoid depleting nutrients in one spot. The key is patience: the first season builds soil fertility, while subsequent years require even less maintenance. You’ll notice stronger plants, fewer weeds, and a garden that thrives with minimal intervention.
Tips & tricks for perfect temporary garden beds
These practical insights will help you maximize the effectiveness and longevity of your no-dig temporary garden beds while avoiding common pitfalls.
Site Selection Wisdom: The 6 hours of sunlight requirement is non-negotiable for most vegetables and herbs, but don't overlook microclimates. Morning sun with afternoon shade works better in hot climates—just rotate your bed orientation seasonally. For slopes, create terraces with slightly raised edges (about 2 inches) to prevent water runoff while maintaining accessibility. This subtle elevation helps maintain consistent moisture levels across the entire bed.
Cardboard Preparation: When using 12 inches of untreated cardboard, remove any glossy or colored sections first—they contain chemicals that can inhibit decomposition. For extra durability in windy areas, secure the edges with landscape staples or bricks rather than relying solely on the overlapping technique. I've found that dampening the cardboard thoroughly before adding wood chips creates a more stable foundation that resists shifting during watering.
Planting Depth Technique: The rule of placing the root ball just below the surrounding layer is crucial for preventing stem rot, but don't overlook the importance of proper hole preparation. Use a small hand trowel to create holes that are twice as wide as the root ball—this prevents root circling and allows roots to spread naturally. After planting, I press the surrounding mulch gently against the base of stems to create a slight mound, which helps direct water toward the roots during irrigation.
Watering Strategy: The 10-15 minute drainage test is your best indicator of proper moisture management. For new beds, I recommend watering immediately after planting, then checking the moisture level at the 1-inch depth every other day during establishment. In hot weather, you might need to water twice daily, but always aim for deep saturation rather than surface wetting. The key is building a consistent moisture profile that encourages deep root growth rather than shallow, drought-sensitive roots.
Pro Tips for Temporary Garden Beds
- These practical insights will help you maximize the effectiveness and longevity of your no-dig temporary garden beds while avoiding common pitfalls.
- Site Selection Wisdom: The 6 hours of sunlight requirement is non-negotiable for most vegetables and herbs, but don't overlook microclimates.
- Cardboard Preparation: When using 12 inches of untreated cardboard, remove any glossy or colored sections first—they contain chemicals that can inhibit decomposition.
Frequently asked questions
Got questions about temporary garden beds? You’re not alone! Here are some of the most common concerns—and straightforward answers—to help you get started with confidence.
What’s the best time of year to set up temporary garden beds?
Spring and early summer are ideal for most temporary beds, as the soil is workable and plants can thrive before winter. However, you can set them up almost year-round in mild climates—just avoid freezing or waterlogged ground. For fall crops, aim for 6–8 weeks before your first frost to maximize harvests.
How long can I use a temporary garden bed before replacing it?
With proper care, temporary beds can last one to three growing seasons. Over time, organic matter breaks down, and soil structure degrades. Rotate locations yearly to refresh nutrients and prevent soil depletion. If weeds or pests become an issue, it’s time to refresh the bed with new materials.
Are temporary garden beds more cost-effective than permanent ones?
Temporary beds require minimal upfront investment (just materials like cardboard, straw, and compost) and no long-term maintenance like tilling or fencing. They’re perfect for renters, small spaces, or testing crops before committing to permanent beds. Over time, they can save you money on soil amendments and labor.
What are the best plants for temporary garden beds?
Fast-growing, shallow-rooted crops thrive here: leafy greens (lettuce, spinach), herbs (basil, cilantro), radishes, bush beans, and zucchini. Avoid heavy feeders like tomatoes or corn unless you’re willing to replenish nutrients frequently. Succession planting (like swapping radishes for beans) keeps beds productive all season.
How do I deal with pests or weeds in temporary beds?
Prevent pests with row covers or companion planting (e.g., marigolds deter nematodes). For weeds, mulch heavily or hand-pull early. If soil-borne issues arise, disassemble the bed, replace the top layer of materials, and restart. Avoid chemical solutions—they can harm future plants and disrupt the no-dig ecosystem.
Can I reuse the materials from my old temporary bed?
Yes! Compost the decomposed cardboard and plant debris, but avoid reusing contaminated soil or heavily degraded materials. Sterilize tools and containers with a 10% bleach solution (1 part bleach to 9 parts water) if pests were an issue. Fresh straw, compost, and cardboard will give your next bed a clean start.
Wrapping up and next steps
Temporary garden beds offer a flexible, low-effort way to grow veggies, herbs, or flowers without long-term commitment. Whether you’re testing spots, extending seasons, or maximizing small spaces, these no-dig beds deliver fast results with minimal tools—perfect for beginners and green thumbs alike. 🌱
Ready to green your space? Start small with one bed this season, experiment with crops, and let your success inspire bigger projects. Happy planting! 🌿