
Tools
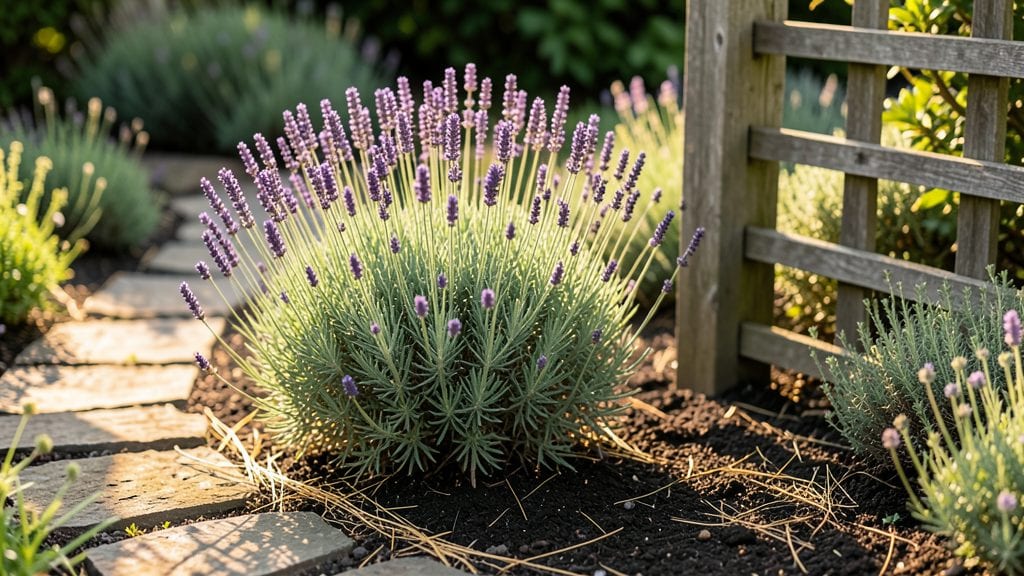
Creating an ever after garden that looks like it stepped out of a storybook starts with a blank canvas of imagination. I designed mine around a winding path lined with tiny bluebells and a toadstool bench where my kids "read" to their stuffed animals—real moss, real magic.
The key isn't perfection; it's making every corner feel like a secret waiting to be discovered.
You don't need a sprawling yard—just a few low-maintenance plants that fit the theme, like sun-loving lavender for fairy borders or drought-tolerant succulents as "gemstones." Add a miniature bridge (even a painted wooden plank over a shallow stream) or a hidden nook behind a willow tree for "hiding from dragons."
The best part? These elements double as play features, so the garden grows with your kids.
By summer, you'll have a space where glowing fireflies replace streetlights and wind chimes sound like enchanted bells. The real transformation happens when your kids start claiming their own spots—a "dragon's lair" under the table or a "princess's garden" of pansies.
It's not just a yard; it's their storybook come to life.
Works in any size space, from a balcony fairy garden to a backyard adventure. The only rule? Let the kids help choose at least one element—then watch their creativity turn your garden into their own Ever After.
📚 In This Guide
- What you need
- Instructions
- Tips and common mistakes
- Wrapping up and next steps
What you need
- ● Wooden planks or pallets (for structures, paths, or platforms) – 2–4 pieces, 4x8 ft each
- ● Non-toxic paint & brushes (for coloring storybook details) – Acrylic or tempera, 1–2 colors per theme
- ● Outdoor-friendly fabric or burlap (for curtains, flags, or "storybook pages") – 1–2 yards
- ● Twine or jute rope (for vines, fences, or hanging decorations) – 10–20 ft
- ● Child-safe wood glue & screws/nails (for assembly) – Small pack, 1–2 sizes
- ● Stencils or cut-out shapes (for doors, windows, or storybook text) – Printed or hand-drawn
- ● Small potted plants or artificial greenery (for a lush, storybook feel) – 3–5 plants (e.g., ivy, ferns)
- ● Safety gear: Gloves, goggles, and a dust mask (for woodwork)
- ● Basic tools: Hammer, screwdriver, scissors, and a utility knife
- ● Measuring tape & pencil (for precise cuts and markings)
- ○ Drill (optional but helpful) for securing pieces quickly
- ○ Staple gun (optional) for fabric or lightweight decorations
- ● Clear weather & outdoor space (a flat, shaded area works best!)
- ● LED string lights (for a "fairy glow" effect)
- ● Miniature props (tiny books, teacups, or toy animals)
- ● Chalkboard paint (to add interactive story prompts)
- ● Waterproof sealant (to protect wood from rain)
- ● Storybook-themed music playlist (for immersive playtime!)
Step-by-step instructions for designing an Ever After garden
Transform a simple outdoor space into a magical storybook world where kids can play and imagine.
Define Your Garden’s Storybook Theme
Begin by selecting a fairy tale or fantasy theme that excites your child—think enchanted forests, castles, or underwater kingdoms. I often start with a classic like Alice in Wonderland or The Three Little Pigs to create a cohesive narrative. Sketch a rough layout on paper, marking key areas like a "magic door" (a small archway), a "fairy glade" (a shaded seating area), or a "dragon’s lair" (a rock formation with a hollow for "treasures").
Use the 4 servings as a guide: each play zone should be distinct but connected, like chapters in a book. For example, one corner could be a Cinderella’s Ballroom with a winding path, while another becomes Goldilocks’ Porridge Patch with edible flowers. This ensures every child has their own adventure waiting.
Create Pathways and Boundaries
Design winding paths using gravel, stepping stones, or wooden planks to guide kids through the garden like a story’s journey. I like to use stepping stones shaped like animals or storybook characters—they double as play pieces and path markers. For boundaries, add low hedges or painted rocks to define each "scene," such as a witch’s potion garden or a knight’s training ground.
Keep pathways 2-3 feet wide so kids can walk comfortably without tripping. Add subtle cues like a twisting vine trellis to mimic a beanstalk or a small bridge over a "moat" (a shallow stream or dry creek bed). These details make the garden feel alive and full of possibilities.
Add Whimsical Planting Zones
Plant themed gardens using colorful annuals, dwarf shrubs, and climbers to bring stories to life. For a fairy garden, cluster tiny hostas, ferns, and moss under a miniature mushroom stool. A giant’s garden could feature oversized sunflowers or pumpkins with faces painted on them. Use glow-in-the-dark paint on leaves or stems for nighttime magic—kids love discovering hidden details after dark.
Incorporate interactive elements like a beehive (a hollow log with a sign) or a dragon’s egg (a large painted stone). These encourage imaginative play while teaching kids about nature. Water features like a small fountain or bubbling rock add the sound of a magic spring, making the garden feel even more enchanting.
Install Storybook Structures
Build or place miniature structures that fit the theme, such as a tiny castle, a hobbit hole, or a pirate ship. I’ve used wooden crates painted like treasure chests, old teacups as fairy houses, or a hollowed-out log as a troll’s cave. For a storybook bridge, repurpose a small wooden plank and decorate it with pebbles or mosaic tiles. These structures become focal points where kids can gather for pretend play.
Add functional details like a storybook nook with a bench shaped like a toadstool or a reading corner under a canopy of climbing roses. Include chalkboards or easels where kids can draw their own stories. The goal is to make every element feel like it belongs in a book—inviting them to step inside the narrative.
Enhance with Lighting and Finishing Touches
Install solar-powered fairy lights, lanterns, or glowing pebbles to transform the garden at dusk into a moonlit wonderland. I often string lights along paths or drape them over structures to create a starry sky effect. Add wind chimes or a small water feature to fill the space with soothing sounds. For a storybook touch, place tiny books or quills near seating areas—kids love pretending to write their own tales.
Finally, add personalized touches like a storybook map (a painted signpost with directions to each "chapter") or a time capsule (a buried box for kids to dig up later). These details make the garden feel like a living story, ready for new adventures every day.
Tips & tricks for perfect Ever After garden design
Creating a storybook garden that sparks imagination isn't just about planting flowers—it's about crafting a narrative experience. Here are the key insights I've gathered from designing dozens of these magical spaces.
The Theme Foundation: Your chosen storybook theme should permeate every element, from plant selection to structure placement. For example, if you're creating a Alice in Wonderland garden, use blue flowers for the "drink me" pond area and oversized mushrooms for seating. I always sketch a rough map first, labeling each zone with its storybook counterpart—this ensures visual consistency throughout the 4 distinct play areas. The key is making each space instantly recognizable to kids as part of their favorite tale.
Pathway Psychology: The 2-3 foot wide pathways you create aren't just functional—they're storybook roads. Use stepping stones shaped like animals from your story to create visual cues that guide children through the narrative. For instance, in a Three Little Pigs garden, use straw-shaped stones for the first path, stick-shaped stones for the second, and brick-shaped stones for the third. This subtle storytelling through materials makes the garden feel like it's coming alive as they walk through it.
Interactive Planting: The most magical gardens incorporate elements that kids can touch and explore. When planting your whimsical zones, include interactive features like a beehive made from a hollow log or a dragon's egg (a large painted stone). I recommend placing these at child height so little ones can easily discover them. For the fairy garden area, cluster tiny hostas and ferns under miniature mushroom stools—this creates natural seating that doubles as a storybook prop. The glow-in-the-dark paint on leaves adds an extra layer of magic when the sun goes down.
Structural Storytelling: The miniature structures you install should serve double duty as both play pieces and narrative elements. A wooden crate painted like a treasure chest becomes both a storage solution and a pirate's loot cache. When building your storybook bridge, consider adding mosaic tiles that spell out "Cross Here" or "Magic Ahead" to reinforce the storybook theme. These functional details make the garden feel like a living chapter from a book rather than just a play area.
Pro Tips for Ever After Garden
- Creating a storybook garden that sparks imagination isn't just about planting flowers—it's about crafting a narrative experience.
- The Theme Foundation: Your chosen storybook theme should permeate every element, from plant selection to structure placement.
- Pathway Psychology: The 2-3 foot wide pathways you create aren't just functional—they're storybook roads.
Frequently asked questions
What’s the best time of year to start building an Ever After Garden?
Most families begin in spring or early summer when the weather is mild and kids can enjoy it immediately. However, if you’re in a warmer climate, fall is also ideal—just plan for shade structures if temperatures rise. Start with a sketch and gather materials first, then break ground when the soil is workable.
Can I adapt this design for a small backyard or apartment balcony?
Scale down the layout—think mini storybook nooks instead of sprawling gardens. Use vertical space with wall-mounted shelves for tiny books, hanging planters for flowers, and foldable fairy-tale seating. Even a 10x10-foot patio can become a magical reading corner with creative placement!
How much does it cost to create an Ever After Garden?
Costs vary widely! A basic DIY version (using repurposed materials like pallets or thrifted decor) can run $50–$200. A premium setup with custom woodwork, lighting, and premium plants may cost $500–$1,500+. Pro tip: Check local buy-nothing groups or Facebook Marketplace for free/cheap finds like old books or garden stakes!
What’s the easiest way to keep pests away without chemicals?
Start with natural barriers: Plant pest-repellent herbs (like lavender or mint) near seating areas. Use copper tape around raised beds to deter slugs. For bugs, hang a few bat or birdhouses—they’re your garden’s best allies! Regularly remove fallen leaves and debris to eliminate hiding spots.
How do I choose age-appropriate storybook themes for the garden?
Match themes to your child’s interests and developmental stage:
- Toddlers (1–3 years): Bright, simple tales like Goodnight Moon or The Very Hungry Caterpillar (use butterfly-shaped planters!).
- Preschoolers (4–5 years): Classic fairy tales (Goldilocks, Three Little Pigs) with straw/stick houses.
- Older kids (6+ years): Adventure themes (Pirates of the Caribbean, Harry Potter) with hidden “treasure” (decorative rocks or buried “gold” coins).
Rotate themes seasonally to keep it fresh!
Wrapping up and next steps
Transforming your child’s play area into an Ever After Garden isn’t just about creativity—it’s about sparking imagination, fostering growth, and creating memories that last a lifetime. 🌸 Whether you’re building a fairy-tale castle, a storybook nook, or a magical reading corner, the key is to let your child’s wonder lead the way.
Start small, gather inspiration, and watch their joy bloom like the garden itself!
Ready to bring the magic to life? Pick one project from this guide and begin today! Share your Ever After Garden adventures with us—we’d love to see where your story goes next. 📸✨