
Tools
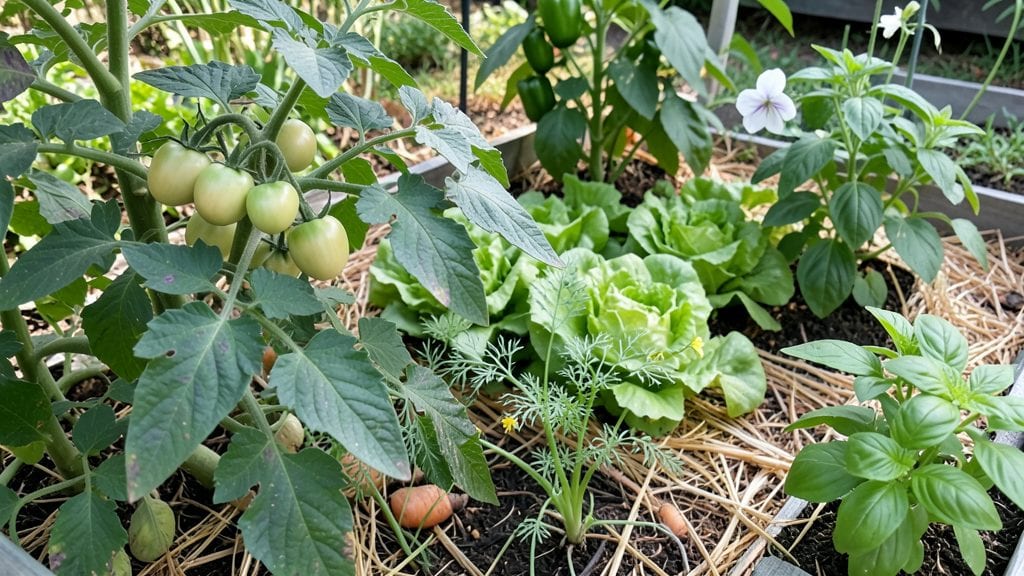
A fenced veggie garden isn't just about keeping critters out—it's about reclaiming your harvest from deer, rabbits, and even neighborhood cats. 🌱 I learned the hard way when my first zucchini plants became a buffet for a family of bunnies; now, my garden thrives behind a simple cedar fence that doubles as a living room backdrop.
The best part? You don’t need a massive yard or fancy materials. A 4-foot-tall fence keeps out most pests while giving you space to design pathways or add trellises for climbing plants. Cedar lasts years without rotting, and chicken wire stretched along the bottom stops digging critters.
For small spaces, even a 3-foot lattice fence works if you focus on taller crops like pole beans or peas.
With a fence in place, you’ll watch your tomatoes ripen undisturbed, your lettuce grow crisp without being munched, and your herbs stay lush instead of trampled.
The privacy also means fewer weeds creeping in from the lawn, and you can finally grow those squash plants you’ve always wanted—no more losing them to curious critters. It’s the one upgrade that changes everything.
Works for urban backyards, suburban plots, or even a 10-by-10-foot patch on a patio. The key is matching fence height to your biggest threats—here’s how to pick the perfect fit for your space and pests.
📚 In This Guide
- What you need
- Instructions
- Tips and common mistakes
- Wrapping up and next steps
What you need
- ● Fencing materials: T-posts or wooden posts (4–6 ft tall, spaced 6–8 ft apart)
- ● Fence panels or wire mesh (galvanized or PVC-coated, 4–6 ft high)
- ● Concrete mix or post anchors (for securing posts)
- ● Garden bed supplies: Garden fabric or landscape cloth (to block weeds)
- ● Topsoil or compost (at least 6–12 inches deep)
- ● Mulch (straw, wood chips, or shredded leaves)
- ● Tools: Post hole digger or auger
- ● Shovel and rake
- ● Measuring tape, level, and stakes
- ● Hammer or mallet (for driving posts)
- ● Wire cutters (if using mesh fencing)
- ● Gloves and safety glasses
- ● Automatic gate opener (for convenience)
- ● Solar-powered lights (for nighttime visibility)
- ● Decorative lattice or trellis (for climbing plants)
- ● Drip irrigation kit (for easy watering)
- ● Wildlife deterrents (chicken wire for rabbits, netting for birds)
Step-by-Step instructions for building a fenced veggie garden
Here’s how to create a secure, functional fence that keeps pests out and your harvest safe.
🪴 Step 1: Plan Your Garden Layout and Fence Design
Sketch your garden’s shape on paper first—most veggie patches work best as 4x8-foot rectangles for easy access. Mark where the fence will go, leaving 2-3 feet of clearance between the fence and any permanent structures like sheds or trees. This prevents shading and allows room for tools or trellises.
Decide on fence height: 3-4 feet deters most small pests, while 5-6 feet keeps out rabbits, deer, and determined raccoons. If you’re in a high-wind area, opt for 4x4 posts set 2 feet deep in the ground for stability. Measure the perimeter and calculate how many fence panels or posts you’ll need based on your chosen spacing.
🌱 Step 2: Mark and Dig Post Holes
Use wooden stakes and string to outline your fence line. Drive stakes every 6-8 feet along the perimeter, then stretch the string taut to ensure straight lines. For corner posts, dig holes 12 inches wide and 2 feet deep—deeper in loose or sandy soil. For intermediate posts, 10-inch-wide holes at 18-inch depth work fine.
Check depth with a level or by eyeballing: the top of the post should sit 1 inch below ground level after backfilling. If your soil is rocky, use a post hole digger instead of a shovel to avoid damaging roots or compacting the soil around future plants. Real talk: Skipping this step leads to wobbly fences that won’t last a season.
☀️ Step 3: Install Posts and Attach Fence Panels
Place a 4x4 post in each hole, then mix 1 part concrete with 3 parts sand (or use pre-mixed post anchor mix) to secure it. Pour the mixture into the hole, tap the post gently to settle it, and let the concrete cure for 24 hours before attaching panels. For wire fencing, use U-shaped brackets to connect panels to posts, while wooden or vinyl fences typically screw directly into the posts.
Stretch wire fencing taut between posts—no sagging allowed, or pests will slip through. For privacy, add hardware cloth (1/2-inch mesh) to the inside of the fence if rabbits or squirrels are a problem. Double-check that gates swing freely and latch securely. I always test the gate’s swing before finalizing—nothing worse than a jammed gate mid-harvest.
✂️ Step 4: Secure the Bottom Edge and Add Finishing Touches
Bury the bottom 6 inches of fence (or attach hardware cloth) to block burrowing animals. For wood or vinyl, dig a shallow trench along the fence line, then bend the bottom edge inward and secure it with galvanized staples or screws. If using chain-link, bend the bottom strand outward and staple it to the ground.
Add gravel or mulch along the base to discourage rodents from digging underneath. Paint or stain wood fences now to protect them from weather—two coats of exterior paint last longer. Finally, test the fence’s integrity by gently pushing on panels and shaking gates. If anything feels loose, reinforce it immediately before planting.
⏰ Step 5: Prep the Soil Inside the Fence
Now that your fence is secure, focus on the garden bed. Remove weeds, rocks, and debris, then loosen the soil to a depth of 12 inches with a broadfork or tiller. Mix in 2-3 inches of compost (or the 3 gallons of compost you’ve set aside) to improve drainage and fertility. Avoid tilling when the soil is wet—it compacts and creates clods that roots can’t penetrate.
Level the bed gently with a rake, creating a slight crown in the center to encourage water runoff. This is where your veggies will thrive—no more losing crops to rabbits or wind. Water the bed lightly after prepping to settle the soil before planting. You’ll see the difference in root growth within weeks.
Tips & tricks for building a sturdy fenced veggie garden
Here's what I've learned after building (and fixing) multiple fences over the years—these tricks will save you time and frustration.
Post Placement Precision: When marking your fence line in Step 1, use a laser level if you have one—it ensures perfectly straight lines that make assembly much easier. I learned this the hard way after realizing my first fence was crooked until I rebuilt it. For corners, cut your string at a 45-degree angle to create crisp, professional-looking joints. This small detail makes all the difference when attaching panels later.
Concrete Curing Strategy: After pouring concrete around your posts in Step 3, don't rush to attach panels right at 24 hours. Let it cure for 48 hours in dry weather or 72 hours if it's been rainy—this gives you maximum stability. I've seen posts shift when concrete wasn't fully set, leading to wobbly fences. Pro tip: Mix in a concrete additive if your soil is particularly loose or sandy for extra strength.
Fence Material Flexibility: If you're using wire fencing, consider adding galvanized wire mesh along the bottom 12 inches of the fence in Step 4—this creates an extra barrier against burrowing pests like moles and voles. For wooden fences, pre-drill holes for screws to prevent wood from splitting. And if you're in a windy area, add diagonal braces between posts every 8 feet for extra stability—this is something I wish I'd known before my first fence blew over in a storm.
Soil Prep Shortcut: In Step 5, if you're working with heavy clay soil, mix in coarse sand along with your compost to improve drainage. For rocky soil, use a broadfork instead of a tiller to loosen the soil without creating large clods. And here's a game-changer: after loosening the soil, water it thoroughly and let it settle for 24 hours before planting—this helps prevent soil compaction when you start working the bed.
Pro Tips for Fenced Veggie Garden
- Here's what I've learned after building (and fixing) multiple fences over the years—these tricks will save you time and frustration.
- Post Placement Precision: When marking your fence line in Step 1, use a laser level if you have one—it ensures perfectly straight lines that make assembly much easier.
- Concrete Curing Strategy: After pouring concrete around your posts in Step 3, don't rush to attach panels right at 24 hours.
Frequently asked questions
Got questions about creating a fenced veggie garden? You’re not alone! Here are some common concerns—and straightforward answers—to help you plan with confidence.
What’s the best fencing material for a veggie garden?
Choose based on your needs: chicken wire is budget-friendly but less durable; vinyl or wood offers longevity and a polished look; wrought iron deters pests but requires more effort to install. For lightweight options, bamboo or composite fencing blends aesthetics with functionality.
How tall should my fenced veggie garden be?
Aim for 3–4 feet tall to block prying eyes and keep out critters like rabbits or deer. If you’re growing tall plants (e.g., corn or sunflowers), add extendable panels or trellises to avoid overcrowding. Pro tip: Sloped fencing (taller at the back) maximizes privacy without sacrificing garden space!
When is the best time to install a fenced veggie garden?
Install fencing before planting season (early spring or fall) to avoid disturbing roots. If retrofitting, do it during off-seasons (winter or late fall) when pests are less active. Warning: Avoid installing in wet soil—wait for dry conditions to prevent erosion or uneven settling.
Can I build a fenced veggie garden on a budget?
Use repurposed materials like old pallets, scrap wood, or even stacked rocks for a rustic look. Skip decorative posts and opt for T-posts or concrete anchors for stability. DIY kits (e.g., roll-out fencing) also cut costs while keeping pests out.
How do I keep pests out without chemicals?
Combine physical barriers (fencing buried 6–12 inches deep) with natural deterrents: plant marigolds or basil near the fence, use mulch to confuse burrowing pests, and install motion-activated sprinklers for larger critters. Bonus: A mix of textures (e.g., wire + wood) makes climbing harder!
What’s the easiest way to secure fencing to uneven ground?
Use adjustable brackets or post-leveling kits to compensate for slopes. For temporary fixes, drive posts into gravel or sand (instead of dirt) to improve stability. Pro move: Bury a concrete footing at the base of each post for long-term durability.
Wrapping up and next steps
A fenced veggie garden isn’t just about keeping critters out—it’s your secret weapon for year-round growing success! 🌱 Whether you’re a seasoned gardener or just starting, a sturdy fence protects your hard work, boosts privacy, and even adds charm to your space.
The best part? With the right materials and a little planning, you’ll enjoy fresh, homegrown veggies without the stress.
Ready to take the next step? Sketch your design, gather supplies, and start building! Your future harvests—and peace of mind—will thank you. Happy gardening! 🌿