Tools
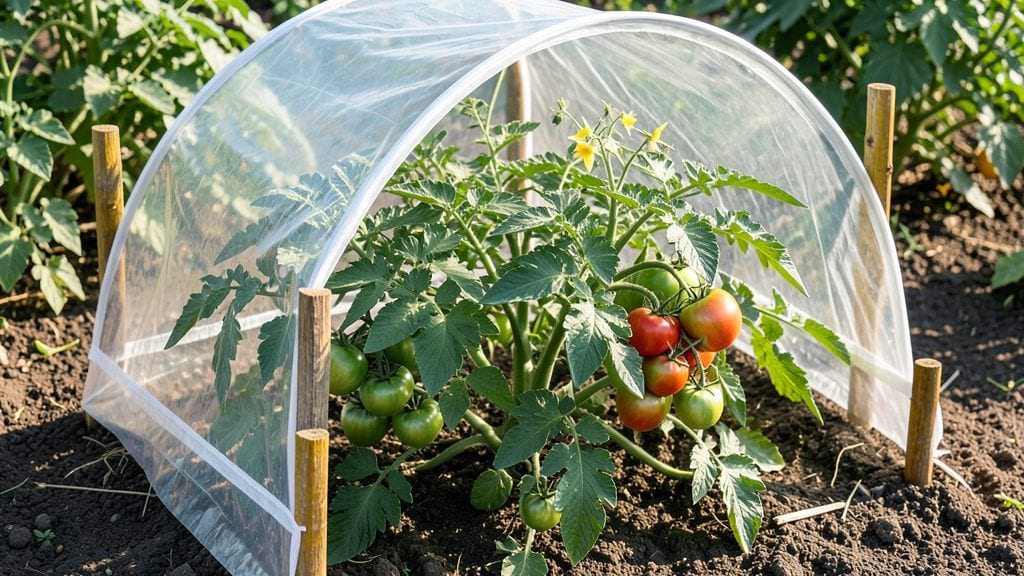
Hail can turn a thriving garden into a war zone in minutes—unless you've got garden hail protection ready. ✨ I learned this the hard way when a summer storm shredded my heirloom tomatoes and pepper plants overnight, leaving me staring at a once-lush bed of jagged leaves and bruised fruit.
The right mesh or shelter isn't just about saving plants; it's about preserving months of work in seconds.
Most solutions start with shatterproof mesh—either fine netting for delicate veggies or heavier-duty row covers for larger plants. You’ll also need sturdy stakes or hoops to create a dome, and for high-risk areas, temporary shelters like pop-up tents or even old window screens stretched over frames.
The key is balancing breathability with durability; plants need airflow, but they can’t afford hail’s impact.
With the right setup, your tomatoes, peppers, and melons will stay intact through even the fiercest storms. You’ll harvest ripe fruit instead of picking up debris, and your plants will recover faster because their structure remains unbroken.
The peace of mind alone makes it worth the effort—especially when you’re watching those first blossoms turn into fruit.
Whether you’re dealing with a backyard garden or a small farm, these methods adapt to any scale. The secret is planning before the forecast calls for storms. Let’s get your garden armored up before the next hail warning hits.
📚 In This Guide
- What you need
- Instructions
- Tips and common mistakes
- Wrapping up and next steps
What you need
- ● Hail mesh netting: 1–3 rolls (depending on garden size), 19-gauge or finer (smaller holes = better protection). Look for UV-resistant polyethylene for longevity.
- ● Width: 6–10 feet (standard rolls).
- ● Sturdy support frames: PVC pipes (½"–1" diameter, 10–12 ft lengths) or galvanized metal hoops (for arches).
- ● T-posts or stakes (8–12, 4–6 ft tall, spaced 4–6 ft apart).
- ● Fasteners: Zip ties (100–200, heavy-duty, UV-resistant).
- ● Staple gun + staples (for securing netting to frames).
- ○ Bungee cords or shock cords (optional, for extra tension).
- ● Measuring tape, scissors/utility knife, and gloves (for safety and precision).
- ● Corner anchors or ground stakes (to prevent wind blowout).
- ● Reflective tape (to deter pests from nesting in the mesh).
- ● Portable fabric weights (sandbags or bricks to secure edges during storms).
- ● Collapsible hoop house kit (if you want a pre-made, reusable system).
Step-by-Step instructions for installing hail protection mesh
Here's how to shield your garden without sacrificing airflow or sunlight.
🪴 Step 1: Measure and Cut Mesh to Fit Garden Layout
Start by measuring your garden beds or individual plants. Use a tape measure to determine the height and width of each area you want to protect. For example, if you're covering a 4-foot-tall tomato cage, cut the mesh 6 inches taller to allow for secure fastening at the top. I like to cut mesh with sharp fabric scissors for clean edges—this prevents fraying that could snag on plants later.
For rectangular beds, cut mesh to extend 12 inches beyond the bed edges on all sides. This extra length lets you tuck the mesh under soil or secure it with stakes. Label each piece with the plant type or bed location if you're covering multiple areas—trust me, you'll forget which piece goes where after a few weeks.
☀️ Step 2: Install Support Structures for Mesh
Set up lightweight bamboo stakes or metal hoops around the perimeter of each garden bed. Space stakes 3 feet apart for small beds and 4-5 feet apart for larger areas. Drive stakes 6-8 inches deep into the soil so they don't topple in wind. For taller plants like corn or sunflowers, add intermediate supports every 2 feet up the height of the mesh.
If you're using hoops, bend them into a slight arch (about 12 inches taller than your plants) and secure the base with stakes. The arch shape helps rainwater bead and roll off instead of pooling on the mesh. Avoid metal hoops that conduct heat—stick with plastic or wood to prevent burning plants during summer sun.
🌱 Step 3: Secure Mesh Without Restricting Growth
Drape the mesh over the support structure, starting at one end and working toward the other. For stakes, use soft plant ties or twist ties to attach the mesh at the base and mid-height. At the top, fold the excess mesh inward and secure it loosely—you want it to sag slightly when empty but still provide coverage. Never pull the mesh taut; plants need room to grow, and tight mesh can break stems as they expand.
For hoop systems, use clips or zip ties to fasten the mesh to the hoops every 2 feet. Check that the mesh sits 4-6 inches above the tallest plants—this prevents it from brushing against leaves and creating abrasions during wind. If you're covering a large area, consider overlapping mesh pieces by 6 inches for seamless protection.
✂️ Step 4: Test and Adjust for Seasonal Changes
After installation, give the mesh a gentle shake to ensure it's securely fastened but still flexible. Walk through the protected area and check that no part touches plant foliage. If you notice leaves brushing against the mesh, loosen ties or adjust support structures. During the first storm, watch how the mesh behaves—if it billows excessively, add more stakes or lower the height slightly.
Before each season, inspect the mesh for tears or weakened areas. Replace damaged sections immediately, especially before hail season. I like to store mesh rolls in a dry, shaded area when not in use—UV light degrades the material over time. For winter storage, clean the mesh with a damp cloth and mild soap to remove dirt and debris that could harbor pests.
💧 Step 5: Maintain Airflow and Monitor Plant Health
Check protected plants weekly for signs of restricted airflow, like yellowing leaves or powdery mildew. If you see these symptoms, loosen mesh ties or add ventilation by cutting small holes (about 2 inches wide) in strategic spots. Just avoid cutting near edges where the mesh might fray. For container plants, ensure mesh doesn't block access to watering cans—adjust supports so you can still reach the base of pots easily.
Remove mesh during heavy rain if possible—it collects water that can weigh it down and stress plants. If you must leave it up, tilt the mesh slightly to encourage water runoff. After rain, shake off excess water to prevent mold growth on the underside. This simple habit keeps your protection system working efficiently for years.
Tips & tricks for perfect garden hail protection
Here's what I've learned after testing different setups to keep your garden safe without sacrificing growth.
Cutting Tip: When measuring for your mesh in Step 1, add an extra 6 inches to the height of your tallest plants—not just the plants themselves. This accounts for the natural sway during wind storms. For example, if your tomato plants are currently 4 feet but will grow taller, cut the mesh to 5 feet to ensure full coverage as they mature. Use a permanent marker to label each piece with the plant type before installation—this saves frustration later when you're scrambling to remember which piece goes where.
Support Strategy: In Step 2, don't skimp on stake depth. Driving stakes only 4 inches deep might seem sufficient, but wind gusts during storms can easily topple them. Aim for 6-8 inches deep and space them 3 feet apart for small beds—this creates a stable perimeter that won't shift when the mesh catches wind. For hoop systems, bend them into a slight arch (about 12 inches taller than your plants
Securing Secret: The key to Step 3 is tension control. When fastening mesh to hoops every 2 feet, use clips that allow slight movement—this prevents tearing when the mesh flexes in wind. For stakes, leave 4-6 inches of clearance above your tallest plants. This might seem like overkill, but it prevents the mesh from brushing against leaves during storms, which can create abrasions that invite pests. If you're covering a large area, overlap mesh pieces by 6 inches for seamless protection without gaps. Maintenance Hack: After installation, make it a habit to give your mesh system a weekly "health check" during Step 5. Look for small tears near the edges where the mesh meets ties or clips—these are the most vulnerable spots. Store your mesh rolls in a dry, shaded area when not in use, and clean them with mild soap before winter storage. This simple routine extends the life of your protection system by years, saving you money in the long run.
Pro Tips for Garden Hail Protection
- Here's what I've learned after testing different setups to keep your garden safe without sacrificing growth.
- Cutting Tip: When measuring for your mesh in Step 1, add an extra 6 inches to the height of your tallest plants—not just the plants themselves.
- Support Strategy: In Step 2, don't skimp on stake depth.
Frequently asked questions
How soon can I install hail protection after purchasing the mesh?
Most shatterproof mesh systems can be installed immediately after purchase, but timing depends on your garden’s vulnerability. If hail season is approaching, prioritize installation—especially for delicate plants like tomatoes or peppers. For established crops, install mesh as soon as possible to avoid damage. Pro tip: Early spring or late winter prep ensures you’re ready for sudden storms!
Does hail protection work for all types of plants?
Yes! Hail mesh is versatile and protects all garden plants—vegetables, flowers, fruits, and even young trees. It’s ideal for:
- Delicate leaves (e.g., lettuce, basil)
- Fruiting plants (e.g., berries, melons)
- Tender perennials (e.g., hostas, lavender)
Is hail mesh a one-time purchase, or do I need to replace it yearly?
High-quality hail mesh is durable and lasts multiple seasons (3–5+ years) if stored properly. Clean it after use, fold it flat, and store in a dry place to prevent UV degradation. Troubleshooting: If tears appear, patch with UV-resistant tape or replace small sections. Not a disposable tool—just low-maintenance!
What’s the best alternative if I can’t use mesh?
If mesh isn’t feasible, try these DIY alternatives:
- Row covers: Lightweight fabric for small plants (e.g., lettuce). Remove when pollination is needed.
- Plastic sheeting: Temporary cover for young seedlings (secure edges to avoid wind damage).
- Cloche bells: Protect individual plants (great for herbs or seedlings).
- Straw mulch: Cushions impact for shallow-rooted crops (less effective for large hail).
How do I remove and store hail mesh without damaging it?
After the season, fold mesh neatly (don’t roll—creases can weaken fibers) and store in a cool, dry place (e.g., garage shelf or bin). Avoid plastic bags (traps moisture). For large panels, use bungee cords to compress them. Pro tip: Add a silica gel packet to prevent mildew. Next season, inspect for tears before reuse!
Wrapping up and next steps
Protecting your garden from hail doesn’t have to be a daunting task—with the right shatterproof mesh, you can shield your hard work and preserve your harvest with ease! 🌱 Whether you’re a seasoned gardener or just starting, investing in durable hail protection ensures your plants thrive year after year.
Now that you’re armed with the knowledge, take the next step—measure your garden, gather your materials, and install your mesh before the next storm rolls in. Your future harvest (and peace of mind) will thank you!