Companion Plants
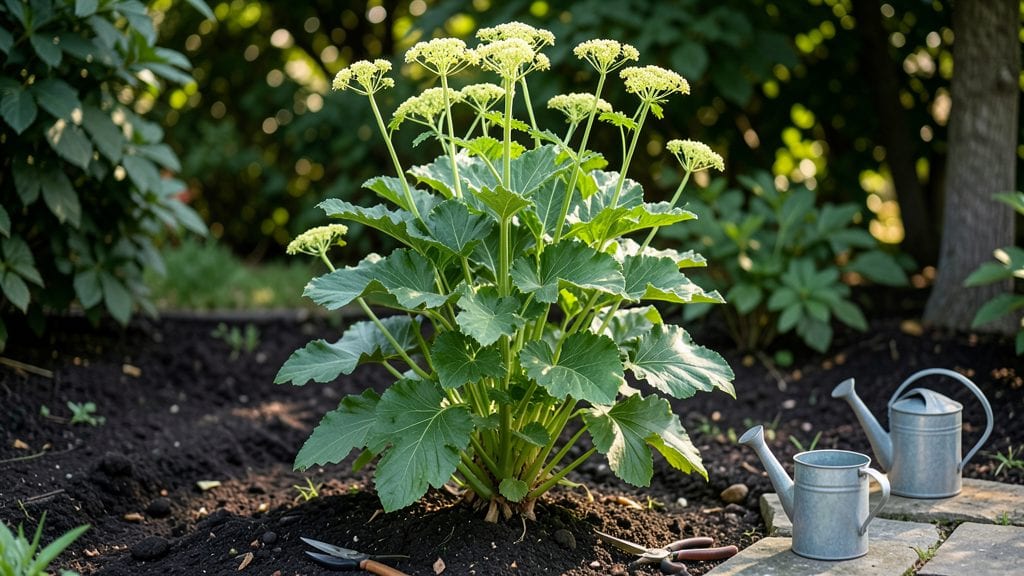
Growing garden lovage plants transforms your yard into a fragrant, self-sustaining herb garden that thrives for decades. 🌿 I planted mine three years ago, and now it spreads effortlessly—no digging, no fuss—while providing fresh foliage for soups and teas.
The key lies in its love for rich soil and patience with slow growth.
The real magic happens in moist, well-draining soil with plenty of organic matter. Lovage tolerates partial shade but truly shines in full sun, where its tall, celery-like stalks reach 5-6 feet by midsummer.
Water consistently the first year to establish roots, then let nature take over—this plant handles drought better than most herbs.
By late summer, you’ll harvest aromatic leaves and stems that taste like a cross between celery and parsley. The roots even make a caffeine-free tea, and bees adore the flowers. Just watch for slugs—they love young shoots—so mulch heavily to deter them.
Perfect for cottage gardens, permaculture plots, or even large containers. Once established, lovage needs almost no maintenance, making it the ultimate low-effort perennial. Let’s get yours growing!
📚 In This Guide
- What you need
- Instructions
- Tips and common mistakes
- Wrapping up and next steps
What you need
- ● Lovage seeds – 1 packet (50-100 seeds) for direct sowing or 3-5 seedlings for transplanting.
- ○ Well-draining soil – A mix of garden soil, compost (20-30%), and sand (optional for heavy clay).
- ● Sunlight access – A spot with full sun to partial shade (6+ hours of sunlight daily).
- ● Watering can or hose – For consistent moisture (especially in dry spells).
- ○ Mulch (optional but recommended) – Straw, wood chips, or shredded leaves to retain moisture.
- ● Garden trowel or shovel – For digging planting holes (6-8 inches deep).
- ● Pruners or shears – To trim dead foliage or harvest stems.
- ○ Gloves (optional) – Lovage’s large leaves can be prickly!
- ○ Stakes or cages (optional) – If your lovage grows tall (up to 5 feet), support may prevent flopping.
- ● Patience! Lovage grows slowly but thrives for years—it’s a true perennial.
- ● Cold hardiness – Lovage tolerates zones 3-9; no special winter prep needed.
- ● Companion plants – Pair with rosemary, thyme, or cabbage for a mutually beneficial garden.
How to plant and establish garden lovage as a hardy perennial
Lovage thrives with minimal fuss—just follow these steps for robust growth and years of harvests.
🌱 Step 1: Choose the Perfect Planting Site
Lovage demands full sun to partial shade—at least 6 hours of direct sunlight daily for maximum vigor. I always scout locations with well-draining soil first, since soggy roots will rot. Test your spot by digging a 6-inch hole: if water pools after 30 minutes, amend with 2-3 inches of compost to improve drainage.
This plant spreads aggressively, so give it 3-4 feet of space between clusters. If your garden is small, contain it with buried landscape fabric—lovage’s roots will push through most barriers, but fabric slows expansion. Mark the area with stakes to avoid accidentally planting nearby perennials too close.
🪴 Step 2: Prepare the Soil for Optimal Growth
Lovage tolerates poor soil but rewards you with bigger yields when given rich, loamy conditions. Mix 2-3 gallons of compost into the top 12 inches of soil per plant, focusing on the 6-inch radius where roots will spread. Avoid fresh manure—it can burn tender roots and attract pests.
For heavy clay soil, blend in 1 part perlite to 3 parts soil to prevent compaction. A soil pH of 6.0-7.5 is ideal—test with a kit if your garden history is unknown. If your soil is acidic, sprinkle dolomitic lime lightly over the area and work it in before planting.
🌿 Step 3: Plant Bare-Root or Container-Grown Starts
For bare-root plants, soak the roots in lukewarm water for 1-2 hours before handling. Dig a hole twice as wide as the root ball but only as deep—lovage’s crown should sit just below soil level after backfilling. Gently tease out any circling roots to encourage outward growth.
If using container-grown plants, remove from pots and loosen roots if they’re tightly bound. Place in the hole, then fill with a 50/50 mix of native soil and compost, tamping lightly to eliminate air pockets. Water deeply to settle the soil and eliminate gaps around roots.
💧 Step 4: Water and Mulch for First-Year Establishment
Water deeply once weekly during the first growing season, aiming for 1-2 inches of moisture per week. Lovage’s deep taproot means it’s drought-tolerant once established, but young plants need consistent moisture. Check soil 2 inches below the surface—if it’s dry, water again.
Apply a 3-inch layer of organic mulch (like straw or shredded leaves) around the base, keeping it 6 inches away from the stem to prevent rot. Mulch conserves moisture, regulates soil temperature, and suppresses weeds—critical for lovage’s slow start. Replenish mulch annually as it decomposes.
✂️ Step 5: Prune and Maintain for Long-Term Health
Cut back dead or yellowed foliage in early spring to encourage new growth. In late summer, trim 1/3 of the plant’s height to promote bushier, more productive growth. Avoid heavy pruning after mid-summer—new growth won’t harden off before frost.
Divide mature clumps every 3-4 years in early spring or fall. Dig up the plant, separate sections with sharp, sterilized pruners, and replant divisions immediately. This rejuvenates the plant and prevents overcrowding. Harvest leaves and stems as needed, but avoid taking more than 1/3 of the plant in any single season.
Tips & tricks for perfect garden lovage establishment
Lovage's hardy nature hides a few key secrets that make all the difference between a struggling transplant and a thriving perennial powerhouse.
Sunlight Strategy: The 6 hours of daily sunlight in Step 1 is non-negotiable, but I've found lovage actually thrives with 7-8 hours when possible. Position your plants where they'll receive morning sun and afternoon shade in hot climates—this prevents leaf scorch while maintaining vigor. Watch for yellowing leaves as your first sign of insufficient light, especially in northern gardens where summer days are shorter.
Soil Test Timing: Before amending soil in Step 2, I recommend testing pH at least 2 weeks before planting. Lovage's root system develops slowly, and giving it the right conditions from day one prevents stunted growth. If your soil tests acidic, apply dolomitic lime 4-6 weeks before planting to allow it to fully integrate into the soil profile. The 6.0-7.5 range is ideal, but lovage can tolerate slightly acidic conditions if amended properly.
Root Care During Planting: When handling bare-root plants in Step 3, never rush the 1-2 hour soaking process—this hydrates the roots thoroughly and reduces transplant shock. I've seen dramatic differences in survival rates when taking this extra time. For container-grown plants, gently squeezing the root ball to loosen it helps prevent root circling, which can strangle growth as the plant matures. The crown sitting just below soil level is critical—any deeper and it risks rotting, any higher and it may dry out.
Mulch Maintenance: The 3-inch mulch layer in Step 4 works wonders, but don't let it become a permanent barrier. After the first growing season, I recommend removing mulch in early spring to allow soil warming, then reapplying after new growth appears. This prevents fungal issues that can develop from persistent moisture against stems. Straw mulch breaks down more slowly than leaves, making it my preferred choice for lovage's long-term establishment.
Pro Tips for Garden Lovage Plants
- Lovage's hardy nature hides a few key secrets that make all the difference between a struggling transplant and a thriving perennial powerhouse.
- Sunlight Strategy: The 6 hours of daily sunlight in Step 1 is non-negotiable, but I've found lovage actually thrives with 7-8 hours when possible.
- Soil Test Timing: Before amending soil in Step 2, I recommend testing pH at least 2 weeks before planting.
Frequently asked questions
Got questions about growing and using garden lovage? You’re not alone!
Here are answers to the most common queries—from planting tips to harvest tricks—so you can cultivate this versatile herb with confidence.
How do I know when lovage seeds are ready to harvest?
Lovage seeds mature slowly—wait until the seed heads turn brown and papery (usually late summer to early fall). Gently twist them off and dry in a paper bag. Pro tip: If left too long, the heads may burst open and scatter seeds!
Can I grow lovage from store-bought roots?
Yes! Purchase a small root section (like a rhizome) from a nursery, soak it in water for 24 hours, then plant it 2–3 inches deep in moist soil. It’ll sprout in weeks, not months. Warning: Avoid grocery-store lovage roots—they’re often treated to prevent sprouting!
Why are my lovage leaves turning yellow?
Yellowing leaves usually signal overwatering or poor drainage. Lovage thrives in well-draining soil—amend heavy clay with compost. Check the roots: mushy = rot; crisp = healthy. Fix it: Reduce watering and mulch to retain moisture without soggy soil.
What’s a good companion plant for lovage?
Lovage pairs beautifully with carrots, beans, and cabbage—it repels pests like carrot flies while attracting beneficial insects. Avoid planting near: dill (competes for space) or fennel (can cross-pollinate and alter flavors). Bonus: Its tall stems make a great living trellis for vining plants!
How do I store fresh lovage for cooking?
Wrap stems loosely in damp paper towels and refrigerate for up to 2 weeks. For long-term storage, chop leaves/stems, freeze in ice cube trays with water (add to soups later), or dry bundles upside-down in a dark, airy spot. Pro move: Freeze whole roots—peel and use like celery!
Does lovage survive winter in cold climates?
Lovage is hardy to USDA Zone 3—it dies back in winter but regrows from its thick rhizome. Mulch heavily with straw or leaves to protect roots. No worries: Even in harsh winters, it’ll bounce back come spring like a resilient superhero!
Wrapping up and next steps
Growing garden lovage is a rewarding adventure—this hardy, versatile perennial brings flavor, fragrance, and beauty to your garden while requiring minimal fuss. Whether you’re drawn to its culinary potential, medicinal benefits, or companion-planting perks, lovage thrives with just a little sunshine and space.
Now that you’re equipped with the know-how, why not plant a few stalks this season and savor the harvest? Start small, experiment with recipes, and watch your garden—and your kitchen—transform!
Next step: Check out our guide on lovage companion plants to maximize your garden’s harmony and productivity!