Tools
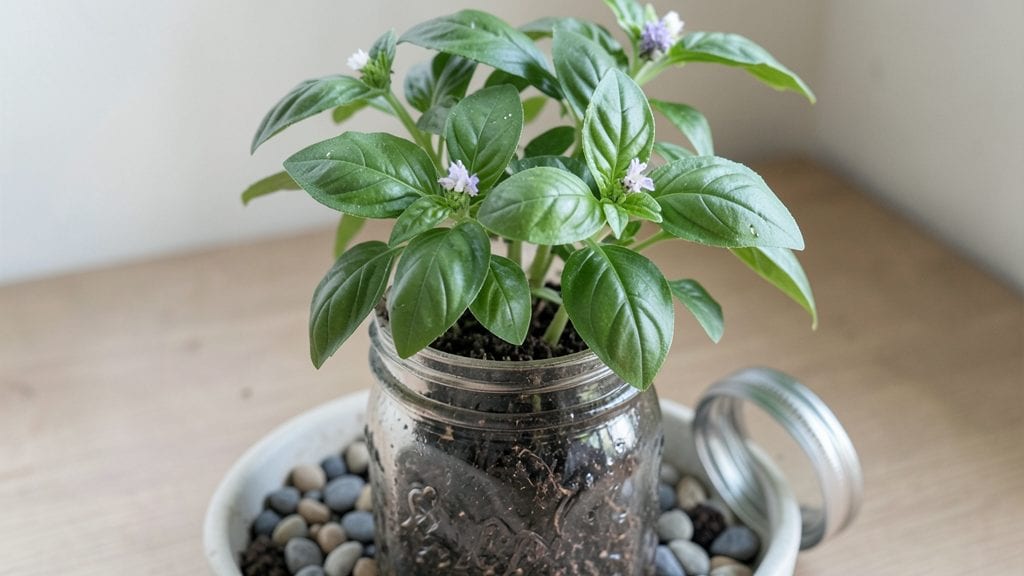
A mason jar herb garden turns empty jars into a thriving kitchen garden that actually works. ✨ I’ve turned my windowsill into a fragrant, self-watering herb factory using nothing but jars, twine, and a few minutes of setup—no fancy equipment required.
The best part? These gardens save space, look stunning, and water themselves for weeks. You can grow basil, thyme, mint, or even tiny succulents in a single jar, and the whole setup costs less than a single grocery-store herb. Just add soil, seeds, and a wick for effortless moisture control.
By the end of the weekend, you’ll have a lush, productive garden that fits on your countertop. Snip fresh herbs for cooking anytime, and watch your neighbors do a double-take when they see your windowsill oasis. The jars even double as decor—no more boring empty shelves.
Works for apartments, balconies, or even office desks. Here’s how to get started without killing a single plant—honestly, I’ve got the battle scars to prove this method is foolproof.
📚 In This Guide
- What you need
- Instructions
- Tips and common mistakes
- Wrapping up and next steps
What you need
- ● Mason jars: 4–6 wide-mouth quart jars (16–24 oz) with lids (for self-watering). Look for ball or mason jar kits with mesh lids for drainage.
- ● Herb seeds: Choose fast-growing varieties like basil, parsley, mint, or chives (start with 2–3 seeds per jar).
- ● Potting soil: 1–2 bags of lightweight, well-draining potting mix (avoid garden soil—it compacts!).
- ● Water: Room-temperature water (distilled or filtered is best).
- ● Scissors or knife: For trimming mesh lids (if needed).
- ○ Optional: Spray bottle (for misting seedlings).
- ● Funnel (to avoid soil spills when filling jars).
- ● Plant markers (chalkboard labels or popsicle sticks for tracking herbs).
- ● Grow lights (if natural light is limited—LED bulbs work great!).
- ● Twine or rubber bands (to secure mesh lids if they’re loose).
- ● Prerequisites: A sunny windowsill (6+ hours of light daily) or a small grow tray.
- ● Patience! Herbs sprout in 7–14 days—resist the urge to overwater.
Step-by-Step instructions for creating a self-watering mason jar herb garden
Here’s how to transform simple jars into a thriving, low-maintenance herb garden that waters itself.
🪴 Step 1: Prepare Your Mason Jars and Supplies
Start by gathering 4 clean, empty mason jars with lids and rings. Remove the lids and rings—you won’t need them for this setup. Next, cut 4 small pieces of mesh fabric (about 2 inches square) from the mesh material and 4 small pieces of felt (about 1 inch square) from the felt padding. These will act as your wicking system.
Place one piece of felt padding inside each jar, pressing it against the bottom. This will absorb water and slowly release it to the roots. The mesh fabric will sit just above the felt, keeping the soil in place while allowing water to wick upward. No special tools needed—just scissors and a steady hand.
🌱 Step 2: Layer Soil and Plant Your Herbs
Fill each jar ¾ full with the potting mix, leaving about 1 inch of space at the top. Press the soil down lightly so it’s firm but not compacted. This ensures good drainage while still holding moisture. Now, gently remove 4 herb seedlings from their containers, being careful not to damage the roots.
Plant one seedling in each jar, burying it just deep enough so the soil covers the roots but doesn’t smother the stem. Water the soil lightly until it’s evenly moist—you’ll see water pooling at the bottom. This is normal and part of the self-watering magic. Place the jars in a spot with bright, indirect light for the first 24 hours to help them adjust.
💧 Step 3: Set Up the Self-Watering Base
Fill a shallow tray or large plate with 2 cups of water. Place the 4 mason jars into the tray, ensuring the felt padding at the bottom of each jar is submerged in the water. The felt will absorb the water and slowly release it to the soil, keeping your herbs hydrated for up to 2 weeks without extra effort.
Watch the water level in the tray—top it off every 3-4 days or whenever it looks low. You’ll know it’s working when the soil stays consistently moist but not soggy. The mesh fabric prevents soil from falling into the water while still allowing the wicking process to continue. This system is perfect for busy gardeners or anyone who struggles with remembering to water.
☀️ Step 4: Position for Growth and Maintenance
Move your mason jar garden to a location with 4-6 hours of sunlight daily. A sunny windowsill or a spot near a grow light works well. Herbs like basil, parsley, and chives thrive in this setup, but avoid placing them in direct midday sun, which can scorch the leaves. Rotate the jars a quarter turn every few days to ensure even growth.
Check your herbs weekly for signs of stress—yellowing leaves often mean too much water, while crispy edges signal thirst. If the soil feels dry to the touch, add a little more water to the tray. Prune the herbs by snipping the outer leaves with clean scissors to encourage bushier growth. Harvest regularly to keep your plants productive and happy.
Tips & tricks for perfect mason jar herb gardens
Here's what nobody tells you about keeping your self-watering herb garden thriving—these tricks make all the difference.
Mesh Fabric Placement: When placing the 2-inch square mesh fabric in Step 1, make sure it sits snugly against the felt padding but doesn't overlap the soil line. The fabric should be about ½ inch below the soil level when you add your potting mix. This creates the perfect wicking channel—too high and water won't reach the roots, too low and soil might fall through. I learned this the hard way after watching soil slip through my first attempt!
Soil Depth Secret: The ¾ full measurement in Step 2 is critical—don't pack it too tightly when pressing down. You want firm enough to hold the seedlings but still light enough for proper drainage. If your soil feels too dense, gently loosen it with a spoon before planting. The extra 1-inch space at the top prevents overflow when you water, which is especially important during that first 24-hour adjustment period.
Water Level Wisdom: Those 2 cups of water in Step 3 should just barely submerge the felt padding—no more, no less. If the felt stays completely submerged, your herbs will get waterlogged. If it's not submerged enough, the wicking won't work properly. I recommend using a clear tray so you can easily monitor the water level without lifting the jars. Topping off every 3-4 days keeps the system balanced perfectly.
Sunlight Strategy: The 4-6 hours of sunlight in Step 4 is a range for a reason—herbs like parsley can handle the lower end while basil craves the full 6 hours. For best results, position your jars on the brighter side of your windowsill (usually the south-facing side in northern hemispheres). Rotate them every few days to prevent leaning toward the light, which keeps growth even and prevents lopsided plants.
Pro Tips for Mason Jar Garden
- Here's what nobody tells you about keeping your self-watering herb garden thriving—these tricks make all the difference.
- Mesh Fabric Placement: When placing the 2-inch square mesh fabric in Step 1, make sure it sits snugly against the felt padding but doesn't overlap the soil line.
- Soil Depth Secret: The ¾ full measurement in Step 2 is critical—don't pack it too tightly when pressing down.
Frequently asked questions
Got questions about your mason jar herb garden?
Here are answers to the most common ones to help you grow like a pro!
Can I reuse mason jars from canning?
Yes! Just thoroughly clean and sterilize them first—scrub with hot soapy water, rinse well, and sanitize with a 1:10 bleach-water mix (or boil for 10 minutes). Remove labels and ensure the jar isn’t cracked. Pro tip: Use a drill to add drainage holes if they’re missing!
How long does it take for herbs to grow in a mason jar?
Most herbs (like basil, parsley, or chives) sprout in 7–14 days and reach harvestable size in 4–8 weeks, depending on light and care. Keep jars in a sunny spot (6+ hours of light daily) for faster growth. Patience pays off—tiny leaves mean fresh flavors soon!
Why is my herb wilting or turning yellow?
Wilting or yellowing usually means overwatering, underwatering, or poor drainage. Check the soil—it should stay lightly moist (not soggy). If roots are mushy, reduce water; if dry, add more. Ensure your jar has drainage holes and isn’t sitting in standing water. Rotate jars weekly for even light exposure!
What’s the best herb for a beginner?
Start with fast-growing, forgiving herbs like:
- Basil – Loves warmth and frequent harvesting.
- Parsley – Slow but hardy; great for beginners.
- Chives – Regrow easily after cutting.
- Mint – Grows aggressively (use a separate jar!).
Can I move my mason jar garden outside?
Transition jars gradually to avoid shock—start with 2–3 hours of morning sun outdoors, then increase exposure. Use a saucer to catch excess water, and avoid harsh afternoon sun (it can scorch tender leaves). Just remember: No direct wind exposure!
What if my jar leaks or breaks?
Leaks happen! If your jar cracks, transfer herbs to a new container ASAP. For drainage issues, wrap the base in a coffee filter or use a small piece of mesh secured with a rubber band. Need a quick fix? Place the jar in a tray or bowl to catch drips—herbs will still thrive!
Wrapping up and next steps
Starting a mason jar herb garden is more than just a fun project—it’s a step toward fresher flavors, sustainable living, and a little slice of nature on your countertop! 🌱 Whether you’re a beginner or a seasoned plant parent, this self-watering system makes growing herbs effortless and rewarding.
Now that you’re armed with the right materials and answers to common questions, there’s nothing left to do but roll up your sleeves and grow!
Ready to dive in? Pick your favorite herbs, grab your jars, and let your green thumb shine. Happy planting! 🌿