
Landscaping
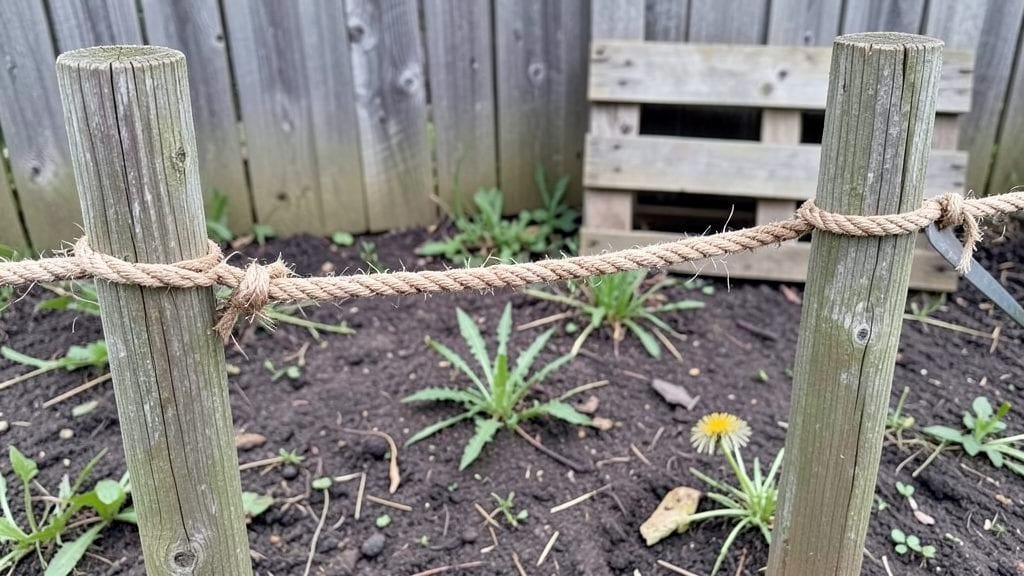
A garden rope fence transformed my backyard from an exposed yard into a cozy retreat where I can finally relax without neighbors' views. I was skeptical at first—would it hold up against wind, rain, and curious critters?
The answer? Absolutely, especially when installed right. This simple, affordable solution gives you privacy without the fuss of heavy wood or metal fencing.
The beauty lies in its versatility—you can drape it over existing posts, string it between trees, or even create a living wall by weaving plants through it. Natural jute ropes blend seamlessly with gardens, while synthetic options resist rot and last longer.
I chose a 3-inch thick jute rope for my 6-foot sections, and it’s held up beautifully for over two years with minimal maintenance.
Imagine stepping into your garden and feeling instantly enclosed by lush greenery or soft rope textures, all while keeping costs low. You’ll love how it softens harsh lines, adds vertical interest, and creates intimate spaces for seating or hidden garden nooks.
The best part? No heavy machinery or permits needed—just a few hours of work and a spool of rope.
Perfect for small urban gardens, patio borders, or even as a temporary solution while you plan a permanent fence. Here’s how to make it work for your space without breaking the bank or sacrificing style.
📚 In This Guide
- What you need
- Instructions
- Tips and common mistakes
- Wrapping up and next steps
What you need
- ● Garden rope fence panels: 1–2 panels (depending on height: 6–8 ft tall, 4–6 ft wide)
- ● Tip: Choose UV-resistant, weatherproof rope (polypropylene or polyester) for longevity.
- ● Post anchors or stakes: 4–6 galvanized metal stakes (12–18 inches long)
- ● Concrete mix: 4–5 bags (for securing posts; ~80 lbs per bag)
- ● Wooden or metal posts: 2–4 posts (4x4 inches, 6–8 ft tall)
- ● Screws or lag bolts: 8–10 heavy-duty outdoor screws (3–4 inches long)
- ● Measuring tape, level, and mallet (for precision and stability)
- ● Drill/driver (with outdoor-rated battery)
Step-by-Step instructions for building a garden rope fence
Create a stylish, functional privacy screen that transforms your garden in just a weekend.
Measure and Mark Post Locations
Start by measuring your garden's length and mark post locations every 6 feet along the perimeter—this ensures stability for the rope. Use a 4-foot tape measure and a stake-and-string line to keep everything straight. I like to snap a chalk line between stakes to visualize the fence before digging. This prevents crooked posts that will make the rope sag unevenly.
Check for underground utilities with a utility locator service before digging. Mark their exact paths with flags so you avoid cutting lines or damaging pipes. Dig holes 12 inches deep and 8 inches wide at each mark using a post hole digger. The wider hole gives the post better soil grip, while depth ensures it won’t tilt in wind or weather.
Set Posts Securely in Concrete
Place each 4×4 pressure-treated post into a hole and check for vertical alignment with a level. Tap the post firmly into place while adjusting until it stands perfectly straight. Mix 1 bag of quick-setting concrete with water according to package instructions—you’ll need about 2 gallons per post. Pour the concrete into the hole around the base, filling it to 4 inches below ground level.
Let the concrete set for 24 hours before attaching the rope. I like to place a small piece of landscape fabric around the post before pouring concrete to prevent weeds from growing against the wood. If you’re installing in windy conditions, consider adding 2 horizontal braces between posts for extra support.
Attach the Rope for a Clean, Taut Look
Unroll the 1-inch thick garden rope along the top of the posts, ensuring it’s centered and level. Secure it tightly with galvanized screws and plastic washers—I drive two screws per post to prevent the rope from slipping. Stretch the rope as taut as possible before securing; this prevents sagging over time. For longer sections, use a rope tensioner to maintain even pressure.
Cut the rope to length, leaving 6 inches extra at each end for tying off. Fold the excess under and secure it with a knot-tying tool or by hand. If you’re using natural jute rope, coat the ends with clear polyurethane to extend its life against moisture. For a polished look, wrap the rope ends with landscape fabric to hide knots.
Add Finishing Touches for Longevity
Apply a waterproof sealant to the posts to protect them from rot and insects—this step doubles their lifespan. I use a brush-on stain in a shade that matches my garden’s aesthetic. Let the sealant dry completely (4-6 hours) before adding any decorative elements, like climbing plants or solar-powered lights. This prevents moisture from trapping under decorations.
For extra privacy, weave bamboo stakes or evergreen branches into the rope for a natural, layered effect. Test the fence’s stability by gently pushing it—if it wobbles, add additional braces or more concrete around the posts. Once satisfied, step back and admire your instant garden retreat!
Tips & tricks for building a garden rope fence
Transforming your garden with a rope fence is easier than you think—these tips will help you avoid common pitfalls and create a durable, stylish privacy screen that lasts for years.
Precision in Post Placement: When marking your 6-foot intervals in Step 1, use a helper to hold the tape measure at both ends to prevent stretching. I've found that even a small misalignment can cause the rope to sag unevenly over time. For curved sections, use flexible measuring tape and mark every 3 feet to maintain consistent spacing. This attention to detail in the beginning saves headaches later when attaching the rope.
Concrete Stability Secrets: The 24-hour concrete setting time in Step 2 is non-negotiable, but you can enhance stability by adding a layer of crushed gravel at the bottom of each hole before pouring. This creates better drainage and prevents soil erosion around the base. For extra wind resistance, I recommend using a concrete mix with fiber reinforcement—it adds just a few dollars per bag but significantly improves durability, especially in exposed areas.
Rope Attachment Pro Tip: In Step 3, when securing the 1-inch thick garden rope, pre-drill pilot holes in the posts to prevent wood splitting. I use a 1/8-inch bit for the pilot holes and then drive the galvanized screws at a slight downward angle—this helps the rope sit flush against the post. For longer sections over 20 feet, consider using a rope tensioner every 10 feet to maintain even tension throughout. This prevents the middle from sagging while keeping the ends taut.
Finishing Touches for Longevity: The 4-6 hour drying time for your waterproof sealant in Step 4 is crucial—don't rush this step! I've learned the hard way that adding decorative elements too soon can trap moisture against the wood, leading to premature rot. For natural jute rope, apply the polyurethane to both ends and any cut sections immediately after installation to prevent fraying. If you're adding climbing plants, space them evenly along the rope to distribute weight and prevent sagging in one area.
Pro Tips for Garden Rope Fence
- Transforming your garden with a rope fence is easier than you think—these tips will help you avoid common pitfalls and create a durable, stylish privacy screen that lasts for years.
- Precision in Post Placement: When marking your 6-foot intervals in Step 1, use a helper to hold the tape measure at both ends to prevent stretching.
- Concrete Stability Secrets: The 24-hour concrete setting time in Step 2 is non-negotiable, but you can enhance stability by adding a layer of crushed gravel at the bottom of each hole before pouring.
Frequently asked questions
Got questions about garden rope fences? You’re not alone!
Here are answers to the most common concerns—from setup to longevity—to help you make the best choice for your outdoor space.
How long does a garden rope fence last before needing replacement?
A high-quality garden rope fence typically lasts 3–5 years with proper care, depending on weather exposure and material (polyester or polypropylene). UV-resistant ropes and regular cleaning (like rinsing off dirt) can extend its life. For longer privacy, consider rot-resistant alternatives like woven wood or bamboo.
Can I install a garden rope fence myself, or do I need a pro?
DIY installation is totally doable for most homeowners! You’ll need basic tools (staple gun, measuring tape, scissors), sturdy posts, and patience for tensioning. Follow the manufacturer’s guidelines for knot spacing (usually 6–12 inches apart). If your yard has uneven terrain or heavy winds, a pro can ensure secure anchoring.
What’s the best way to secure a rope fence against wind or pets?
Wind and pets (especially diggers!) can wreak havoc. Anchor posts deeply (at least 12 inches into the ground) and use sandbags or stakes for extra weight. For pets, opt for thicker rope (1/4" diameter) or add a second layer of horizontal ropes to deter climbing. Avoid loose knots—tighten them like a trampoline!
Are there eco-friendly alternatives to plastic rope fences?
Yes! If sustainability is a priority, try:
- Jute or hemp rope: Biodegradable but less weather-resistant (best for short-term use).
- Recycled plastic ropes: Look for post-consumer recycled options (e.g., from brands like EcoRope).
- Natural materials: Woven willow, bamboo screens, or living hedges (like privet) for a zero-waste solution.
How do I remove stains or mold from my rope fence?
Mold and mildew love damp ropes! Mix a 1:3 vinegar-water solution in a spray bottle, apply, and scrub with a stiff brush. For tough stains, add baking soda to make a paste. Rinse thoroughly and let it dry in the sun—UV light kills mold spores. Avoid bleach; it weakens fibers over time.
Still stuck? Drop your question in the comments—we’re happy to help!
Wrapping up and next steps
A garden rope fence is your go-to solution for creating a serene, private outdoor space without breaking the bank or sacrificing durability.
Whether you're shielding your patio from nosy neighbors, defining a cozy reading nook, or simply adding a stylish boundary to your yard, this versatile option delivers year-round seclusion with minimal upkeep. 🌿
Ready to transform your outdoor space? Start by gathering your materials, measuring your area, and following the simple steps to install—you’ll be enjoying your private oasis in no time! Which corner of your garden will you claim first?