Tools
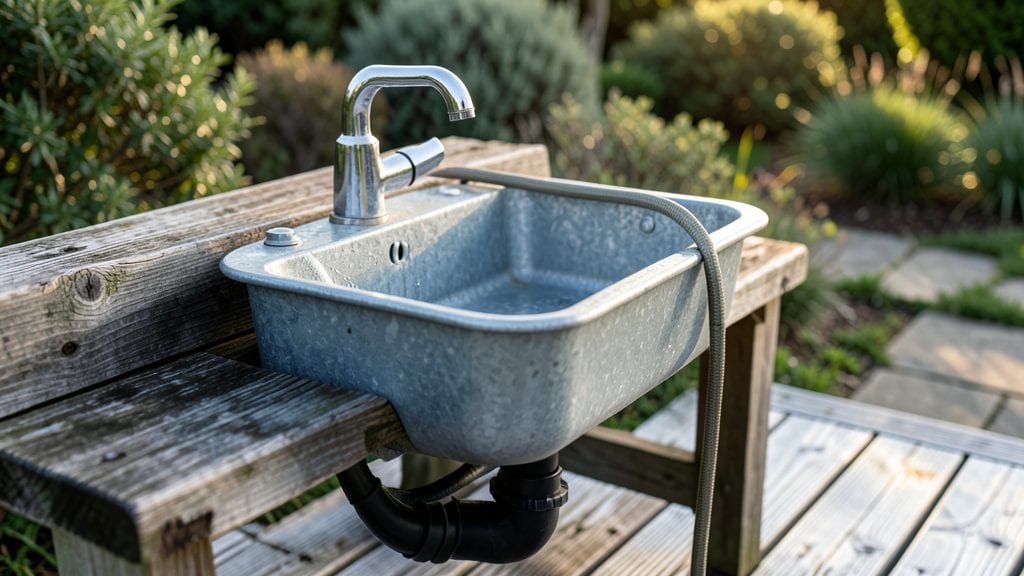
Transform your salvage-yard find into a garden sink DIY project—a sturdy, custom workspace perfect for rinsing tools, filling watering cans, or washing veggies straight from the garden. ✨ I’ve seen old concrete basins at salvage yards for just $20—transforming them into functional sinks is one of those projects that feels like cheating because the results look professional without requiring advanced skills.
The key is repurposing what you already have: a basin, PVC pipe for drainage, and a few basic tools. You’ll need a level spot near your garden hose, some gravel for the base, and a bit of elbow grease to secure everything.
The best part? This setup stays put for years, handles heavy use, and blends seamlessly with any outdoor design—whether you go rustic with natural stone or sleek with metal accents.
Once it’s installed, you’ll wonder how you ever lived without it. No more hauling dirty tools to the house or struggling to rinse off muddy hands in a bucket.
The built-in drainage means water flows away cleanly, and the basin’s weight keeps it from tipping, even when you’re scrubbing stubborn soil off your favorite trowel. Plus, it doubles as a planter or catch basin for rainwater when you’re not using it.
Works for any yard size, from small urban patios to sprawling country gardens. The only limit is your creativity—add a tap, paint it, or even embed it into a raised bed for a built-in watering station. Ready to turn a simple basin into your garden’s workhorse?
📚 In This Guide
- What you need
- Instructions
- Tips and common mistakes
- Wrapping up and next steps
What you need
- ● Concrete basin or sink: 1 (pre-cast or DIY-molded, 12–18" diameter, 4–6" depth)
- ● Drain assembly: 1 (3" PVC pipe with slip joint, 12" length + 1 PVC elbow, 1 PVC drain flange)
- ● Waterproof sealant: 1 tube (silicone or concrete sealer)
- ● Gravel or crushed stone: 5–10 lbs (for drainage layer)
- ● Pebbles or decorative stones: 1–2 bags (for aesthetic finish)
- ● Concrete patch compound: 1 small tub (for sealing cracks)
- ● Drill with masonry bit: 1 (for drain hole)
- ● Safety goggles & gloves: 1 pair each
- ● Level: 1 (to ensure proper placement)
- ● Trowel or putty knife: 1 (for sealant application)
- ● Measuring tape: 1
- ○ Optional: Stain or paint (for customizing your basin)
- ● Access to a water source (hose or faucet nearby)
- ● Flat, stable base surface (patio, deck, or ground)
- ● Basic DIY skills (drilling, sealing, leveling)
- ● Weather-appropriate workspace (avoid rain or extreme heat)
Step-by-Step instructions for building a concrete garden sink
Here's how to create a sturdy, functional garden sink from scratch—no special tools needed.
🪴 Step 1: Prepare Your Workspace and Materials
Clear a flat, level area that's at least 3 feet by 3 feet to accommodate your sink form. Lay down a tarp or concrete board to protect surfaces from spills. Gather your quick-dry concrete mix, plastic tub, plastic pipe, duct tape, waterproof sealant, and safety gloves. I like to work in a shaded spot on a mild day—concrete sets faster in warm weather, so you'll have less time to adjust the shape.
Cut the 4-inch plastic pipe to 8 inches using a hacksaw or utility knife. This will serve as your drain. Wrap the cut end of the pipe with duct tape to seal any rough edges. Place the pipe vertically in the center of the plastic tub, ensuring it stands upright and won't tip over. Secure it with more duct tape if needed—this will create the drain hole in your concrete sink.
💧 Step 2: Mix and Pour the Concrete
Follow the instructions on your quick-dry concrete mix bag to combine the powder and water. Aim for a consistency like thick pancake batter—it should hold its shape when scooped but still be workable. I use a large bucket and a sturdy mixing stick to avoid lumps. Pour the mixture into the plastic tub, smoothing it evenly over the edges and around the pipe.
Use a trowel to create a slight slope toward the drain pipe, ensuring water will flow naturally. Tap the tub gently on all sides to eliminate air bubbles. Leave a 1-inch lip around the edges for the finished look. Let the concrete set for 24 hours before removing the tub—this gives it enough strength to hold its shape without cracking.
✂️ Step 3: Remove the Form and Refine the Shape
After 24 hours, carefully peel away the plastic tub from the concrete. Start at the edges and work your way inward to avoid breaking the sink. If any pieces stick, use a putty knife to gently pry them free. Inspect the drain hole—if the edges are rough, smooth them with a file or sandpaper. This is also the time to adjust the slope if needed; a slight tilt ensures water drains completely.
Once the sink is free of the form, let it cure for an additional 48 hours in a dry, shaded spot. This extra time prevents cracks from forming when you handle it. If you notice any surface imperfections, use a damp sponge to smooth them out while the concrete is still slightly damp. For a polished finish, apply the waterproof sealant after the full 72-hour cure time—this protects against moisture and makes cleanup easier.
☀️ Step 4: Position and Secure Your Garden Sink
Choose a location in your garden that's level and close to a water source. Dig a hole slightly larger than your sink's base to ensure it sits flush with the ground. Place the sink in the hole and adjust the depth so the drain pipe is level with the surrounding soil. Fill the gap around the sink with gravel to improve drainage and prevent shifting.
Backfill the hole with soil, tamping it down gently to secure the sink. Connect the drain pipe to a French drain system or direct it to a low-lying area in your garden. Seal the connection with waterproof sealant to prevent leaks. Once in place, give your sink a test run by filling it with water—watch how it drains and adjust the slope if needed.
🌱 Step 5: Add Finishing Touches
After the sink is fully set, apply a second coat of waterproof sealant to the interior and exterior surfaces. This extra layer ensures longevity, especially if you'll be washing tools or plants regularly. Let it dry completely before use. For a decorative touch, paint the exterior with outdoor-safe paint or leave it natural for a rustic look.
Place a stainless steel basin inside the sink to catch debris and make rinsing easier. Store gardening tools, pots, or even a small watering can nearby. Your new garden sink is now ready for use—whether for rinsing off muddy boots, cleaning tools, or giving your plants a quick soak. Real talk: you'll wonder how you ever managed without it!
Tips & tricks for perfect concrete garden sinks
Here's what I've learned after building several of these—little details that make all the difference between a functional garden sink and one that leaks or cracks.
Form Stability is Everything: In Step 1, when placing your 4-inch plastic pipe in the plastic tub, secure it with extra duct tape around the middle—not just the top. I learned this the hard way when a pipe shifted during pouring, creating an uneven drain hole. Also, work on a level surface—any tilt in your form will translate to an uneven sink. A simple carpenter's level or even a bubble level app on your phone works perfectly for this.
Concrete Consistency Matters: When mixing your quick-dry concrete mix in Step 2, aim for the texture of thick pancake batter—not too wet, not too dry. Too wet and your sink will be weak; too dry and it won't flow properly. I add water gradually until it just starts to glisten slightly. After pouring, tap the tub gently on all sides with a rubber mallet to release trapped air bubbles—this prevents weak spots that could crack later. The 24-hour set time is crucial here; don't rush it or you'll risk structural integrity.
Drain Slope Secret: In Step 3, when refining the shape, create a subtle slope toward your drain pipe—about 1/4 inch per foot. This ensures water flows completely out rather than pooling. I use a straightedge and mark the slope before pouring, then verify it after removing the form. If your sink feels uneven, gently tap it on the high side to settle the concrete. The 48-hour additional cure time is your friend here—it lets you make these adjustments without worrying about cracks.
Sealant Application Tip: For Step 5's finishing touches, apply the waterproof sealant in thin, even coats rather than one thick layer. The first coat needs 24 hours to dry completely before adding the second. I use a small foam brush for edges and a roller for larger surfaces. Pro tip: Test your sealant on a scrap piece of concrete first—some brands need two coats, others work perfectly with one. This extra layer is what protects your sink from moisture damage for years.
Pro Tips for Garden Sink Diy
- Here's what I've learned after building several of these—little details that make all the difference between a functional garden sink and one that leaks or cracks.
- Form Stability is Everything: In Step 1, when placing your 4-inch plastic pipe in the plastic tub, secure it with extra duct tape around the middle—not just the top.
- Concrete Consistency Matters: When mixing your quick-dry concrete mix in Step 2, aim for the texture of thick pancake batter—not too wet, not too dry.
Frequently asked questions
Got questions about your garden sink DIY project? You’re not alone! Here are answers to the most common concerns to keep your upcycled concrete basin on track—without the guesswork.
What’s the easiest way to create a drainage hole in concrete?
Use a hole saw or masonry drill bit for clean cuts. For thicker basins, start with a small pilot hole to guide the saw. Wear safety goggles—concrete dust isn’t fun! If the hole’s uneven, seal edges with hydraulic cement to prevent leaks.
How long does the concrete need to cure before use?
Most DIY concrete mixes cure in 7–14 days, but full strength takes 28 days. For a functional garden sink, wait at least 3–5 days before adding water or plants. Pro tip: Cover it with plastic during curing to retain moisture and speed up hardening.
Can I use a regular sink drain pipe for outdoor drainage?
Not ideal! Outdoor pipes need sloped PVC (Schedule 40) or flexible corrugated drain hose to prevent clogs. Add a screen or mesh over the drain to block debris. For heavy rain, consider a French drain system to redirect water away from your sink’s base.
What’s the best way to waterproof a garden sink?
Seal the concrete with a waterproofing membrane (like Sikagard) or apply a concrete sealer after curing. For extra protection, line the inside with flexible pond liner or EPDM rubber. Avoid silicone caulk—it degrades in UV light!
My DIY sink leaked after the first rain—what went wrong?
Check these fixes:
- Seal gaps between the basin and base with hydraulic cement or waterproof caulk.
- Ensure the drainage hole is properly sloped (¼” per foot) toward the outlet.
- Verify the drain pipe isn’t crushed or clogged with debris.
Wrapping up and next steps
Creating a garden sink DIY from an upcycled concrete basin is a rewarding project that adds both functionality and charm to your outdoor space! 🌿 With just a few tools and a little creativity, you’ve transformed a simple basin into a stylish, practical water feature—perfect for washing hands, plants, or even small tools.
The best part? You’ve saved money and reduced waste by giving new life to materials you already had.
Now that your sink is ready, why not take it a step further? Consider adding a solar-powered light for evening use, or plant some herbs around the base for a handy kitchen garden combo! The possibilities are endless—happy building! 🛠️✨