
Tools
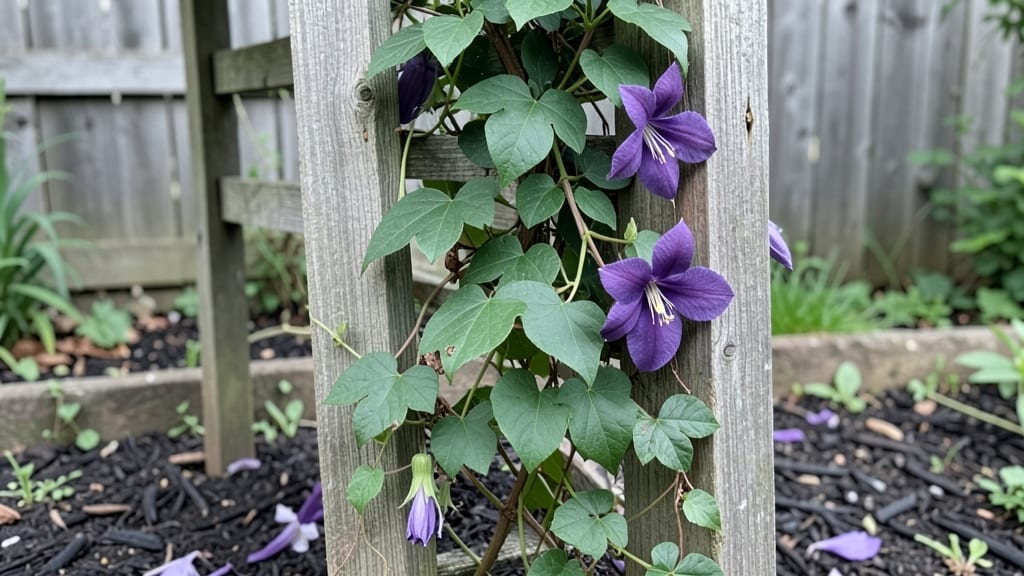
A vertical garden with vines can turn your blank walls into a lush, living privacy screen that outshines any fence. 🌿 I used to think vines were just for grandma’s cottage garden, but now they’re my go-to for transforming small spaces into vibrant, functional areas without taking up a single square foot of ground.
The magic happens with the right mix of fast climbers like morning glories for quick coverage and slower growers like clematis for long-term drama. Pair them with a sturdy trellis or decorative lattice—my favorite is the woven bamboo style—and suddenly, you’ve got a privacy solution that’s both practical and stunning.
Plus, you’ll attract hummingbirds and butterflies while you’re at it.
Imagine stepping outside to a wall covered in fragrant jasmine or deep purple wisteria, all while keeping your neighbors’ eyes to themselves. The best part? These gardens thrive with minimal fuss—just water, occasional pruning, and maybe a little fertilizer in the spring.
You’ll have a living tapestry that changes with the seasons, from spring blooms to autumn foliage.
Works for patios, balconies, or even the side of your house—just pick vines that match your light conditions and growth goals. Let’s make your space feel bigger, greener, and more alive than ever before.
📚 In This Guide
- What you need
- Instructions
- Tips and common mistakes
- Wrapping up and next steps
What you need
- ● Vine plants (3–5 per trellis): Clematis (hardy, fast-growing, or evergreen varieties)
- ● Jasmine (fragrant, climbing roses)
- ● Wisteria (dramatic blooms, needs strong support)
- ● Ivy (evergreen, great for year-round coverage)
- ● Trellis or vertical structure: 1–2 freestanding trellises (6–8 ft tall, metal or wood)
- ● OR wall-mounted lattice panels (for fences or walls)
- ● OR DIY wire mesh (galvanized steel, 1"–2" grid)
- ● Potting mix: 5–10 gallons well-draining potting soil (add perlite or compost for aeration)
- ● Containers: 1–2 large pots or grow bags (15–20 gallons each, with drainage holes)
- ● Basic tools: Garden trowel
- ● Pruning shears
- ● Measuring tape
- ○ Gloves (optional but recommended!)
- ● Fertilizer: Slow-release granular or liquid vine fertilizer (follow package instructions).
- ● Mulch: Wood chips or shredded bark to retain moisture.
- ● Support ties: Soft plant ties or Velcro strips to guide vines.
- ● Drip irrigation: A small kit for consistent watering.
- ● Decorative accents: Solar lights, hanging planters, or lattice paint for a polished look.
How to create a thriving vertical vine garden
Here's the method I use to transform walls and fences into lush, private green spaces that grow stronger each season.
🌱 Step 1: Choose the Right Vines and Location
Start with vines that match your climate and needs. Fast-growing options like morning glories or clematis thrive in most regions, while wisteria and jasmine need warmer zones. I always check the mature spread—some vines reach 30+ feet if unchecked. Place your structure in full sun to partial shade (6+ hours of light daily), but avoid harsh afternoon sun for heat-sensitive varieties.
Test your location first: Place a white board where the structure will go and check sun exposure every few hours. You'll see dark spots where sun hits hardest—this tells you where to position heat-loving vines. For cooler climates, opt for partial shade varieties like ivy or climbing hydrangea.
🪴 Step 3: Install the Trellis or Support Structure
Use the 4-foot tall trellis or 6-foot fence panel you've selected, ensuring it's securely anchored. For trellises, screw them directly into studs or use heavy-duty brackets. Fence panels should sit on a solid base—concrete blocks or buried posts prevent leaning. I always add 1-inch diameter support poles at 4-foot intervals for heavier vines like wisteria.
Leave 12-18 inches of space between the structure and any walls to allow airflow. Poor circulation leads to mildew and weak growth. Test stability by gently pushing the structure—it should not wobble. For windy areas, add guy wires to reinforce taller panels.
🌿 Step 4: Plant or Attach Vines Properly
For container-grown plants, dig a hole twice as wide as the root ball but only as deep as the container. Loosen the roots slightly before placing the vine in—this encourages faster establishment. Press the soil firmly around the base, then water deeply until moisture reaches 6 inches down. I always add 1 cup of compost to the planting hole for extra nutrients.
For bare-root vines, soak the roots in lukewarm water for 20-30 minutes before planting. Position the crown 1-2 inches above soil level—burying it too deep causes rot. Secure young plants with soft plant ties to the trellis, adjusting as they grow. Never use wire or tight ties that can girdle stems.
💧 Step 5: Water and Fertilize for Strong Growth
Water deeply 2-3 times weekly until the first 6 inches of soil feels moist. New vines need consistent moisture to establish roots—let the top inch dry between waterings to prevent fungal issues. I use a soaker hose to deliver water slowly at the base, avoiding wetting leaves. Mulch with 2 inches of shredded bark to retain moisture and suppress weeds.
Fertilize with balanced 10-10-10 when new growth appears in spring, then switch to low-nitrogen 5-10-10 in summer. Over-fertilizing causes leafy growth at the expense of flowers and fruit. Watch for yellowing leaves—this signals overwatering or nutrient imbalance. Adjust your routine until the vines show deep green, glossy foliage with steady growth.
✂️ Step 6: Prune and Train for Year-Round Beauty
Prune in early spring before new growth starts. Remove dead or crossing branches, then cut back one-third of the previous year's growth to encourage bushiness. I always prune just above a leaf node or bud—this ensures new growth will sprout from the right spot. For flowering vines, trim after blooming to maintain shape and productivity.
Train vines by gently weaving new shoots through the trellis or tying them with soft twine every 6-8 inches. Avoid wrapping ties too tightly—they can damage bark as stems thicken. In fall, cut back non-hardy vines to 6 inches above ground, while leaving hardy varieties (like clematis) mostly intact for winter interest.
Tips & tricks for perfect vertical vine gardens
A few simple strategies can turn your vertical vine garden from good to spectacular—here's what I've learned after years of trial and error.
Location Test: Before installing your trellis or fence panel, I swear by the white board test in Step 1. Place it where you plan to put your structure and check sun exposure every few hours. The darkest spots reveal where heat-loving vines like morning glories will thrive best. For cooler climates, this test helps identify partial shade areas perfect for ivy or climbing hydrangea. Real talk: I once ignored this and planted heat-loving vines in a shady spot—they struggled for months before I realized my mistake.
Structure Stability: When installing your 4-foot trellis or 6-foot fence panel in Step 3, don't just eyeball the stability test. Gently push the structure at different angles—it should feel rock solid. For windy areas, I recommend adding guy wires to taller panels immediately. I learned this the hard way when a summer storm bent my first trellis. The 12-18 inch clearance from walls isn't just about looks—proper airflow prevents mildew and encourages stronger growth.
Planting Precision: In Step 4, that 1-2 inch crown positioning above soil level makes all the difference. I measure it every time because burying too deep causes rot while leaving it too high dries out the base. For bare-root vines, the 20-30 minute lukewarm water soak is non-negotiable—it jumpstarts root establishment. I've seen vines take weeks to recover when I skipped this step. And those soft plant ties? They're worth the small investment—they prevent girdling that can strangle your vines as they grow.
Watering Wisdom: The 2-3 times weekly deep watering in Step 5 is critical, but timing matters too. Water in the early morning so leaves have time to dry before evening. I use a soaker hose because it delivers water right to the roots without wetting foliage—this prevents fungal issues. That 2 inches of mulch isn't just decoration; it keeps moisture consistent and suppresses weeds that compete with your vines for nutrients. Yellowing leaves? That's your signal to adjust either your watering or fertilizer routine immediately.
Pro Tips for Garden With Vines
- A few simple strategies can turn your vertical vine garden from good to spectacular—here's what I've learned after years of trial and error.
- Location Test: Before installing your trellis or fence panel, I swear by the white board test in Step 1.
- Structure Stability: When installing your 4-foot trellis or 6-foot fence panel in Step 3, don't just eyeball the stability test.
Frequently asked questions
Got questions about creating a stunning vertical garden with vines? You’re not alone! Here are answers to the most common queries to help you get started and keep your vine garden thriving.
What are the best vines for a vertical garden?
Choose fast-growing, hardy vines like clematis, jasmine, ivy, or wisteria for year-round coverage. For edible options, try pole beans or kiwi vines. Climbing roses add beauty but need more maintenance. Pick based on your climate and sunlight!
How long does it take for vines to cover a trellis?
Most vines take 1–3 years to fully cover a trellis, depending on the species and growing conditions. Fast growers like hops or morning glories can cover it in a single season, while slower climbers (like wisteria) may take longer. Prune regularly to encourage even growth!
Can I use a vertical garden with vines for privacy?
Dense vines like bamboo, ivy, or climbing hydrangeas create natural privacy screens. For faster results, combine vines with a lattice or trellis. Just ensure the structure is sturdy—vines can get heavy!
How do I keep vines from dying in winter?
Cold-hardy vines (like clematis or virginia creeper) survive winter with minimal care. For tender vines, mulch the base, wrap trellises, or cut back dead foliage in spring. Avoid pruning too late—wait until new growth appears!
What if my vines aren’t growing well?
Check for sunlight (most vines need 6+ hours), water (keep soil moist but not soggy), and support (trellises must be secure). Yellow leaves? Overwatering or poor drainage may be the issue. Fertilize lightly in spring for a boost!
Wrapping up and next steps
Creating a vertical garden with vines is more than just a space-saving hack—it’s a lush, ever-evolving privacy screen that brings life and beauty to any corner of your home. 🌿 Whether you’re working with ivy, jasmine, or climbing roses, the key is patience, proper support, and a little creativity.
With the right materials and care, your vine-covered oasis will thrive year-round, offering shade, fragrance, and a serene retreat.
Ready to transform your space? Start small—pick one vine, gather your supplies, and let nature do the rest. Before you know it, you’ll have a thriving vertical garden that’s as functional as it is stunning! Happy planting! 🌱