
Tools
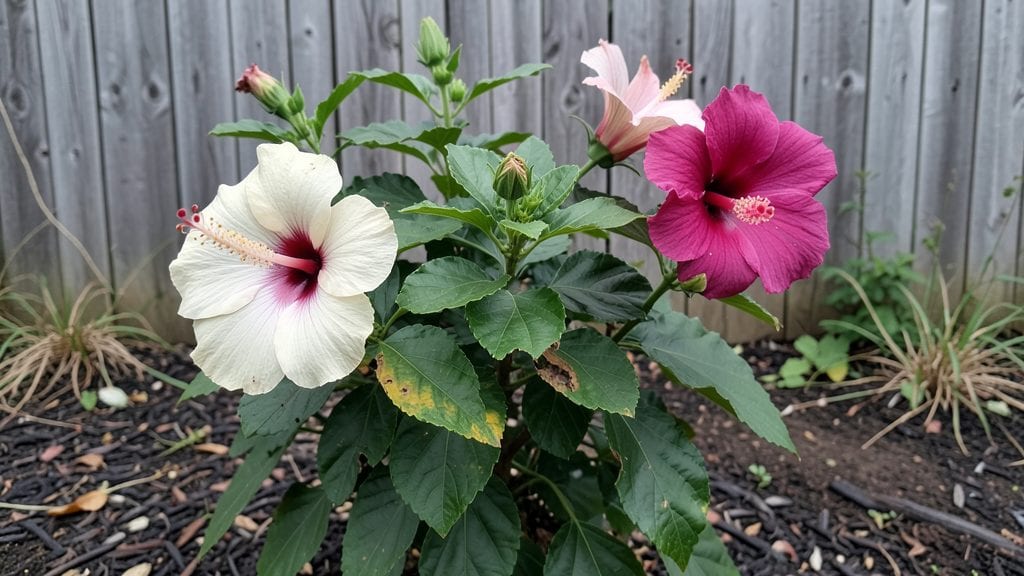
Hibiscus in garden spaces transforms any yard into a tropical paradise with their show-stopping blooms that last from summer through fall. 🌺 I’ve watched my own hibiscus bushes go from a single plant to the centerpiece of my garden, drawing neighbors to pause and admire the vibrant colors.
The key isn’t just planting them—it’s placing them where they’ll shine, surrounded by the right companions to make them stand out even more.
These plants thrive in full sun and well-drained soil, but the real magic happens in how you design around them. Pair deep reds with purple salvias or bright yellows with black mondo grass for a striking contrast that pops in any season.
In warmer climates, hibiscus can even bloom sporadically in winter with the right care, giving you color when other plants rest. The secret is choosing varieties that match your zone—tropical hibiscus for heat, hardy hibiscus for cooler areas.
Imagine your garden in late summer: hibiscus blooms glowing against a backdrop of lush foliage, their petals catching the afternoon light. 🌿 You’ll create a space that feels both wild and intentional, where every visit feels like a celebration.
The best part? These plants grow fast, so you’ll see results within weeks—not years. Let’s make your garden the talk of the neighborhood with these bold beauties as the stars.
Whether you’re working with a small patio or a sprawling backyard, hibiscus adapt beautifully to different spaces. Use them as a privacy screen, a border plant, or even in large containers for patios.
The possibilities are endless once you start playing with placement and companions. Ready to turn heads with your garden? Let’s get planting!
📚 In This Guide
- What you need
- Instructions
- Tips and common mistakes
- Wrapping up and next steps
What you need
- ● Hibiscus plants: 1–3 Hibiscus rosa-sinensis (tropical hibiscus) or Hibiscus syriacus (hardy hibiscus) per desired planting spot
- ○ Seeds (optional, if starting from scratch—germination can be tricky!)
- ● Soil: Well-draining, slightly acidic soil (pH 6.0–6.5) 🌡️ Pro tip: Mix in compost or peat moss for tropical varieties.
- ● 1–2 bags of organic mulch (e.g., pine bark or coconut coir) to retain moisture.
- ● Fertilizer: Balanced granular fertilizer (10-10-10) or a slow-release hibiscus-specific formula.
- ● 1–2 cups of fish emulsion or seaweed extract (for a nutrient boost).
- ● Planting tools: Garden trowel or shovel (for digging holes 2–3x wider than the root ball).
- ● Pruning shears (for trimming dead growth or shaping plants).
- ● Watering supplies: Garden hose with a gentle spray nozzle or a watering can.
- ○ Optional: Drip irrigation system for consistent moisture (hibiscus loves hydration!).
- ● Support structures (for tall varieties): 1–2 bamboo stakes or trellises (if your hibiscus needs climbing support).
- ● Sunlight: Full sun (6+ hours daily) for tropical hibiscus; partial shade (4–6 hours) for hardy varieties.
- ● Climate: Tropical hibiscus: Thrives in USDA Zones 9–11 (or container-grown in cooler climates).
- ● Hardy hibiscus: Suitable for Zones 5–9 (can withstand light frost).
- ○ Protection: Optional: Frost cloth or greenhouse for tropical hibiscus in cold snaps.
Step-by-step guide to planting and caring for hibiscus in your garden
Here's how to grow vibrant hibiscus that blooms reliably from spring through fall.
🌱 Step 1: Choose the Right Location and Prepare the Soil
Hibiscus thrives in full sun, so pick a spot that gets at least 6-8 hours of direct sunlight daily. If your climate is hot and dry, afternoon shade helps prevent leaf scorch. The soil should drain well—hibiscus roots rot quickly in soggy conditions.
Before planting, amend the soil with 2-3 inches of compost mixed into the top 12 inches of soil. Hibiscus loves rich, slightly acidic soil with a pH between 6.1 and 7.5. Test your soil if possible—you can adjust pH with sulfur (to lower) or lime (to raise). Loosen the soil to a depth of 12-18 inches to encourage deep root growth.
🪴 Step 2: Plant Hibiscus at the Correct Depth and Spacing
Dig a hole twice as wide as the root ball but no deeper than the container’s base. Gently remove the plant from its pot and tease apart any circling roots. Place the hibiscus in the hole so the top of the root ball sits 1 inch below soil level—this prevents stem rot from sitting water.
Space plants 4-6 feet apart for dwarf varieties and 6-8 feet apart for larger tropical hibiscus. Mulch around the base with 2-3 inches of organic mulch, keeping it 6 inches away from the stem to avoid moisture buildup. Water deeply right after planting to settle the soil and eliminate air pockets.
☀️ Step 3: Water and Fertilize for Continuous Blooms
Hibiscus needs consistent moisture, especially during flowering. Water when the top 2 inches of soil feel dry, aiming for 1-1.5 inches of water weekly. Avoid overhead watering—water at the base to keep foliage dry and prevent fungal diseases like powdery mildew.
Feed plants every 4-6 weeks during the growing season with a balanced, water-soluble fertilizer (10-10-10 or similar). For extra blooms, switch to a low-nitrogen, high-phosphorus fertilizer (like 5-10-10) when buds form. Stop fertilizing in late summer to encourage dormancy if you're in a cooler climate.
✂️ Step 4: Prune for Shape and Encourage More Flowers
Prune hibiscus in early spring before new growth starts. Remove any dead, diseased, or crossing branches first. Then, cut back 1/3 of the plant’s height to encourage bushier growth. For tropical hibiscus, you can also prune lightly after flowering to shape the plant.
Pinch back new growth to 4-6 inches tall in early summer to promote branching. This creates a fuller plant with more flower buds. Deadhead spent blooms regularly—this redirects the plant’s energy into producing new flowers instead of seed pods.
⏰ Step 5: Protect in Winter and Prepare for Next Season
If you're in a colder climate, mulch heavily around the base with 4-6 inches of straw or leaves once temperatures drop below 30°F. Wrap the plant in burlap or use a frost cloth to shield it from cold winds. Tropical hibiscus may need to be dug up and stored indoors in a cool, dark place.
In late winter, before new growth starts, fertilize lightly with a balanced fertilizer to kickstart spring growth. Remove any dead mulch and check for pests or diseases. This is also the perfect time to divide overcrowded plants—dig up clumps, separate the roots, and replant in fresh soil.
Tips & tricks for perfect hibiscus in your garden
These simple tricks will help you grow hibiscus that blooms abundantly year after year—no green thumb required.
The Sunlight Secret: I can't stress this enough: hibiscus absolutely thrives on that 6-8 hours of direct sunlight daily. If your garden gets intense afternoon sun, watch for leaf scorch—those crispy edges mean it's getting too much. A little afternoon shade in hot climates prevents this while still giving them plenty of light. Trust me, your blooms will thank you for this balance!
Soil Prep That Makes a Difference: When you're amending that 12 inches of soil with 2-3 inches of compost, don't just scratch it in—really mix it well. Hibiscus roots love to spread deep, so breaking up compacted soil to 18 inches deep gives them room to grow strong. Pro tip: Add a handful of bone meal when planting for extra phosphorus—it boosts those vibrant blooms from the start.
Watering Wisdom: The 1-1.5 inches of water weekly guideline works, but timing matters just as much. Water in the morning so leaves have time to dry—wet foliage overnight invites fungal problems like powdery mildew. I've seen hibiscus plants go from thriving to struggling just because of this one change. And always water at the base, not overhead!
Winter Protection That Works: Once temperatures drop below 30°F, that extra 4-6 inches of mulch around your hibiscus acts like a cozy blanket. I've used straw, shredded leaves, or even pine needles—just keep it 6 inches away from the stem. For tropical varieties, dig them up and store in a cool, dark place with just enough moisture to keep roots from drying out.
Pro Tips for Hibiscus In Garden
- These simple tricks will help you grow hibiscus that blooms abundantly year after year—no green thumb required.
- The Sunlight Secret: I can't stress this enough: hibiscus absolutely thrives on that 6-8 hours of direct sunlight daily.
- Soil Prep That Makes a Difference: When you're amending that 12 inches of soil with 2-3 inches of compost, don't just scratch it in—really mix it well.
Frequently asked questions
Got questions about growing hibiscus in your garden? You’re not alone! Here are some of the most common queries—and their straightforward answers—to help you cultivate stunning blooms with confidence.
What’s the best time of year to plant hibiscus?
For tropical hibiscus, plant in spring or early summer after the last frost when soil is warm (60°F+). Hardy hibiscus thrives in spring or early fall, giving roots time to establish before winter. Avoid planting in cold months—hibiscus hates frost!
How often should I water hibiscus plants?
Keep soil consistently moist but not soggy. Water deeply 2–3 times per week in hot weather, more often in containers (they dry out faster). Mulch around the base to retain moisture and protect roots. Yellowing leaves? You might be over- or under-watering!
Can hibiscus grow in containers, and what size pot do I need?
Use a large container (at least 15–20 gallons) with drainage holes. Dwarf varieties fit in 5-gallon pots, while tropical hibiscus needs 18+ inches in diameter. Repot every 2–3 years for fresh soil and space.
Why aren’t my hibiscus flowers opening, and how can I fix it?
Common culprits: too much nitrogen (focus on phosphorus/potassium for blooms), not enough sunlight (6+ hours daily), or stress from transplant shock. Prune leggy stems, fertilize with bloom-specific formula, and ensure full sun exposure.
Are hibiscus plants prone to pests, and how do I prevent them?
Watch for aphids, spider mites, or whiteflies, especially in humid climates. Neem oil or insecticidal soap works well. Keep plants healthy with balanced fertilizer and pruning to improve airflow. Remove damaged leaves promptly to stop infestations.
Wrapping up and next steps
Adding hibiscus to your garden is a rewarding way to bring vibrant color, texture, and even edible delights year-round—whether you’re a beginner or a seasoned gardener! 🌸 These tropical beauties thrive with the right care, and their bold blooms will turn heads (and attract pollinators) in no time.
Start small, experiment with varieties, and don’t forget to enjoy the process—your garden (and future tea cups!) will thank you.
Ready to dive in? Grab your gardening gloves, pick a sunny spot, and plant your first hibiscus today. Your garden’s next masterpiece is just a seedling away!