Tools
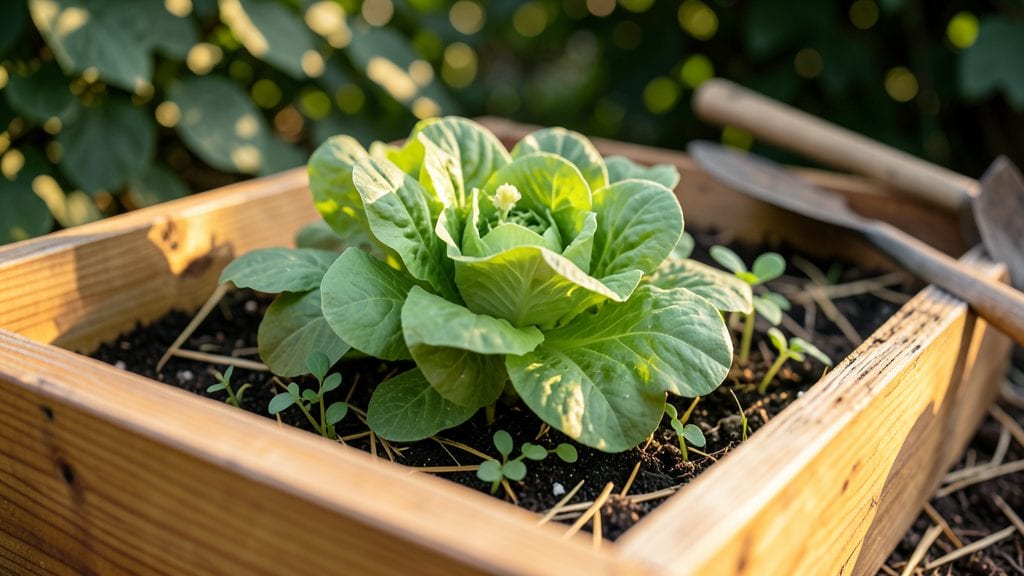
Building homemade garden boxes lets you control soil, drainage, and plant placement—no fancy tools or expensive kits required. I started with scrap cedar planks and a weekend afternoon, and now my raised beds produce more in half the space.
The key isn’t perfection; it’s matching your materials to your yard’s sunlight and soil conditions.
You’ll need basic tools—a saw, drill, and screws—but the real secret is 12-inch deep boxes for root space and 4-inch sides for easy access. Use untreated wood or recycled bricks to avoid rot, and add landscape fabric at the bottom to keep weeds out.
My first box cost under $50 and still looks sturdy after three seasons.
By summer, you’ll be harvesting lush greens, compact tomatoes, and fragrant herbs—all while keeping weeds, pests, and soil compaction at bay. The boxes warm up faster in spring, giving you a 3-4 week head start on in-ground planting.
Plus, they’re movable if your sun shifts or you want to try a new layout.
Works for flower beds, vegetable patches, or even a vertical herb garden against your fence. The same principles apply whether you’re using pallets, cinder blocks, or pressure-treated lumber. Let’s get building—your plants will thank you.
📚 In This Guide
- What you need
- Instructions
- Tips and common mistakes
- Wrapping up and next steps
What you need
- ● Lumber (for framing): 2 pieces – 2x6 or 2x8 boards (8 ft long) for the long sides
- ● 2 pieces – 2x6 or 2x8 boards (6 ft long) for the short sides
- ○ Optional: Cedar or redwood (naturally rot-resistant) for longevity.
- ● Hardware: 3-inch exterior wood screws (100+ pieces)
- ○ Galvanized corner brackets (4-6, optional for extra stability)
- ● Landscape fabric or hardware cloth: (1 roll, to block weeds/burrowing pests)
- ● Soil & amendments: High-quality garden soil or a mix of topsoil, compost, and perlite (1 cubic yard per 4x8 ft box)
- ○ Optional: Slow-release fertilizer (e.g., 10-10-10 blend)
- ● Circular saw or handsaw (for cutting lumber)
- ● Drill/driver (with Phillips bit)
- ● Measuring tape & pencil
- ● Level (to ensure even sides)
- ● Staple gun (for securing landscape fabric)
- ○ Optional: Knee pads (for comfort during assembly!) 😉
- ● A flat, level spot in your yard (avoid low areas where water pools).
- ● Access to a workbench or sawhorses for cutting lumber (or a friend with a truck bed!).
- ● Basic woodworking skills (or a YouTube tutorial—no shame in learning as you go!).
- ● Pro tip: Check local regulations if your box will exceed 3 ft in height (some areas require permits). 💡
Step-by-Step instructions for building homemade garden boxes
Here's how to construct sturdy, functional raised beds that adapt to any yard or climate.
Gather Materials and Prep the Site
Start by selecting a 4-foot by 8-foot footprint for each garden box—this size balances accessibility and planting space. Clear the area of grass, rocks, or debris, then mark the dimensions with stakes and string to ensure straight edges. I like to lay down cardboard over the marked area first; this smothers weeds and prevents grass from sprouting back up through the soil.
Choose a location with at least 6 hours of sunlight daily—most vegetables and herbs thrive with full sun exposure. If your yard is shaded, opt for leafy greens or herbs that tolerate partial shade. Level the ground within your marked area using a shovel or rake, removing any remaining high spots or dips. This ensures your box sits evenly and won’t tilt over time.
Assemble the Frame
Cut your 2x6 lumber into 4-foot lengths for the sides and 8-foot lengths for the ends, using a circular saw or handsaw. Pre-drill ¼-inch holes at each corner to prevent wood from splitting when you attach the screws. Assemble the frame by screwing the 2½-inch deck screws through the pre-drilled holes, ensuring the corners form 90-degree angles for stability.
For extra durability, reinforce the corners by adding 2x4 corner braces on the inside of the frame before securing the screws. This step is critical if you’re building taller boxes—10-12 inches high—where wind or foot traffic could stress the joints. Double-check that all edges are square by measuring diagonally from corner to corner; the measurements should match exactly.
Line the Box and Add Drainage
Lay a landscape fabric layer along the bottom of the frame to block weeds and prevent soil from washing out. Secure it with staple guns or by tucking the edges under the wood. Next, add a 1-inch layer of gravel for drainage—this keeps excess water from pooling at the bottom, which can rot roots. The gravel also helps aerate the soil over time.
If you’re using untreated lumber, line the inside of the box with heavy-duty plastic sheeting to protect the wood from moisture. This isn’t necessary for cedar or redwood, which naturally resist rot. Press the plastic snugly against the sides and overlap the seams by 6 inches, sealing them with duct tape to prevent tears. Leave the bottom open to allow water to drain into the gravel layer.
Fill the Box with Soil Layers
Begin with a 2-inch layer of coarse wood chips or straw on top of the gravel. This acts as a secondary drainage layer and helps break down into nutrient-rich compost over time. Add a 4-inch layer of compost next—this provides essential microorganisms and organic matter for plant growth. I like to mix in a balanced, slow-release fertilizer at this stage to give plants a nutrient boost from the start.
Top off the box with 12 inches of high-quality potting mix, blending in ½ inch of perlite for aeration. Avoid garden soil unless it’s been sterilized—native soil often contains weeds, pests, or diseases that can harm your plants. Gently rake the surface to create a level planting bed, then water thoroughly until the soil is evenly moist but not soggy. This step ensures your plants have a stable foundation to grow.
Plant and Maintain for Long-Term Success
Start by planting slow-growing perennials or root crops along the edges of the box, like carrots or onions, to maximize space. Fill the center with fast-growing annuals or leafy greens, spacing them according to their mature size. Water deeply after planting to settle the soil around the roots, and mulch the surface with 2 inches of straw to retain moisture and suppress weeds.
Monitor the soil moisture weekly—raised beds dry out faster than in-ground plots. Water early in the morning to reduce evaporation and fungal diseases. Rotate crops annually to prevent soil depletion and pest buildup. If you notice the wood warping or splitting after a few years, reinforce it with additional screws or replace the affected sections to extend the box’s lifespan.
Tips & tricks for perfect homemade garden boxes
Building your own raised garden beds is one of the most rewarding ways to create a thriving, low-maintenance garden. Here are the essential tips that will help you avoid common pitfalls and create a structure that lasts for years.
Precision in Step 1 Pays Off: When marking your 4-foot by 8-foot footprint, use a tape measure to verify the diagonals are equal—this ensures perfect square corners. I've found that even a 1-inch discrepancy can cause the box to lean over time. For extra precision, snap chalk lines along the edges before staking, which gives you a visual guide to follow as you clear the area. This attention to detail in the foundation prevents costly adjustments later.
Corner Reinforcement Matters: In Step 2, don't skip the 2x4 corner braces, especially if you're building taller boxes (10-12 inches). I've seen many DIY gardeners skip this step and end up with boxes that wobble or even collapse under weight. The braces distribute stress across the frame, making your structure significantly more stable. For added security, consider using galvanized screws—they resist corrosion better than standard deck screws over time.
Soil Layering Strategy: The 12-inch layer of potting mix in Step 4 is your plant's foundation, so prioritize quality over quantity. I recommend mixing in a handful of worm castings with your compost layer—this introduces beneficial microbes that improve soil structure and plant health. For containers with limited depth, reduce the potting mix to 8 inches and increase the compost layer to 6 inches to maximize nutrient density. The key is maintaining that 2-inch wood chip layer for proper drainage while ensuring adequate root space.
Material Selection Wisdom: While untreated lumber is budget-friendly, cedar or redwood will last significantly longer with minimal maintenance. If you choose untreated wood, apply a non-toxic wood sealant after assembly to extend its lifespan. I've seen untreated boxes degrade in just 2-3 years, while properly sealed cedar boxes remain sturdy for a decade or more. The initial investment in quality materials pays off in longevity and reduced maintenance.
Pro Tips for Homemade Garden Boxes
- Building your own raised garden beds is one of the most rewarding ways to create a thriving, low-maintenance garden.
- Precision in Step 1 Pays Off: When marking your 4-foot by 8-foot footprint, use a tape measure to verify the diagonals are equal—this ensures perfect square corners.
- Corner Reinforcement Matters: In Step 2, don't skip the 2x4 corner braces, especially if you're building taller boxes (10-12 inches).
Frequently asked questions
Got questions about building and maintaining your homemade garden boxes? You’re not alone! Here are some of the most common concerns—and practical solutions—to keep your raised beds thriving year-round.
What’s the best time of year to build my garden boxes?
Spring or early fall are ideal! Building in spring lets you plant immediately, while fall gives your soil time to settle before winter. Avoid winter construction—frozen ground can shift your box, and planting in early spring may be delayed by frost. Pro tip: If you’re in a mild climate, late winter can work too!
How deep should my homemade garden box be?
Aim for 6–12 inches deep for most vegetables, herbs, and shallow-rooted plants. Deeper boxes (12–18 inches) are great for root crops like carrots or potatoes. Shallow boxes (4–6 inches) work for strawberries or lettuce. Drainage is key! Add a 2-inch layer of gravel or landscape fabric at the bottom to prevent waterlogging.
Can I reuse wood from old pallets or fences for my garden boxes?
Yes, but sterilize it first! Pressure-treated wood (like cedar or redwood) is safe and long-lasting. Avoid chemically treated lumber—it can leach toxins into your soil. For pallets, check for stamps like HT (heat-treated) or MB (methyl bromide-treated). Sand rough edges and let the wood weather for a season before planting.
How do I keep pests out of my homemade garden boxes?
Prevention is easier than treatment! Use hardware cloth (1/4-inch mesh) to cover the bottom if burrowing pests (like gophers) are an issue. For above-ground critters, row covers or diatomaceous earth work wonders. Plant pest-repellent companions like marigolds or basil near vulnerable crops. Inspect your box regularly—early action stops small problems!
Do I need to fertilize homemade garden boxes differently than in-ground soil?
Raised beds drain faster, so they need more organic matter upfront. Mix in compost (2–3 inches) and a balanced fertilizer (like 10-10-10) when building. Top-dress with worm castings or aged manure every season. Avoid synthetic fertilizers—they can burn plants in confined spaces. Mulch with straw or wood chips to retain moisture and nutrients!
Wrapping up and next steps
Building your own homemade garden boxes is a rewarding project that unlocks the potential for year-round planting, fresh produce, and a sustainable green space—all without breaking the bank! 🌱 Whether you're a beginner or a seasoned gardener, this blueprint gives you the tools to create sturdy, customizable raised beds tailored to your space and needs.
Now that you’re equipped with materials, tips, and answers to common questions, it’s time to roll up your sleeves and start building. Grab your tools, gather your supplies, and let your creativity (and green thumb!) guide you. Happy planting! 🌿