
Tools
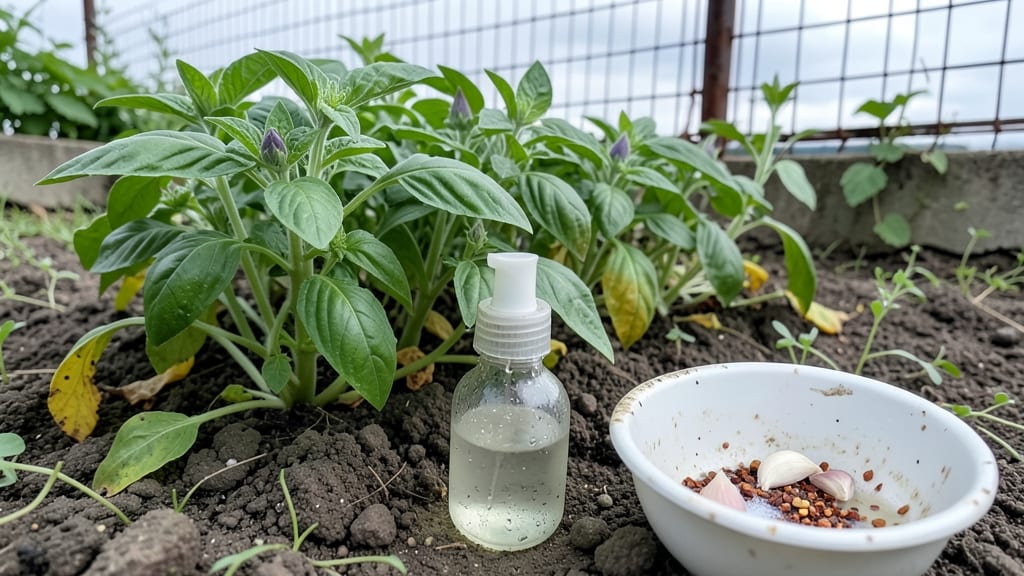
Homemade garden pesticides saved my struggling tomato plants last summer when store-bought sprays failed. 🌱 The key isn’t just mixing ingredients—it’s understanding which pests respond to which solutions and when to apply them for real results.
My garlic-chili spray wiped out aphids in days, while neem oil kept powdery mildew at bay all season.
You don’t need fancy equipment—just a spray bottle, basic kitchen ingredients, and a little patience. Most recipes use what you already have: garlic, chili peppers, dish soap, or even coffee grounds.
The best part? These sprays break down safely, so you can spray right up to harvest without worrying about residue. My 5-minute garlic spray became my go-to for soft-bodied insects.
What you’ll get is plants that stay healthy and productive without harsh chemicals. The tomatoes grew bigger, the roses bloomed longer, and I spent less on pesticides.
The secret is consistency—spray early in the morning or late afternoon when pests are active, and reapply after rain. You’ll notice the difference within a week.
Works for vegetables, flowers, and even houseplants—just adjust the recipe based on the pest. Let’s get those plants thriving naturally!
📚 In This Guide
- What you need
- Instructions
- Tips and common mistakes
- Wrapping up and next steps
What you need
- ● Base Ingredients (Choose 1-2): 1 cup neem oil (or 2 tbsp neem oil per 1 quart water)
- ● 1 tbsp castile soap (unscented, liquid)
- ● 1 cup garlic or onion (blended or minced)
- ● 1 tbsp hot pepper sauce (like cayenne or Tabasco)
- ● 1 cup apple cider vinegar (for fungal issues)
- ● Water: 1 gallon (or 4 quarts) for most recipes
- ● Spray Bottle: 16–32 oz (or a pump sprayer for larger gardens)
- ● Mixing Container: Large bowl or bucket (non-reactive, like stainless steel or glass)
- ● Strainer or Cheesecloth: To filter blended ingredients (e.g., garlic/onion)
- ● Funnel: For easy transfer into spray bottles
- ○ Gloves & Mask: (Optional but recommended for strong-smelling ingredients like garlic or vinegar)
- ● Label & Marker: To tag your spray (e.g., "Neem Oil Mix – Use Within 24 Hours")
Step-by-step instructions for making homemade garden pesticides
Here’s how to whip up effective, non-toxic sprays using common household items—no fancy equipment needed.
💧 Step 1: Choose Your Target Pest and Base Ingredient
First, identify your garden pests—aphids, powdery mildew, or slugs each need a slightly different approach. For soft-bodied insects like aphids, a soapy water spray works best. Mix 1 tablespoon of mild liquid dish soap (like Castile) with 1 quart of water. The soap breaks down the pests’ protective layers while being harmless to plants.
For fungal issues like powdery mildew, opt for a baking soda solution. Combine 1 teaspoon of baking soda, 1 tablespoon of vegetable oil, and 1 quart of water. The oil helps the baking soda stick to leaves, while the baking soda creates an alkaline environment fungi can’t tolerate.
🌿 Step 2: Mix and Strain Your Solution
Use a clean spray bottle (preferably glass or BPA-free plastic) to mix your chosen solution. For the soapy spray, shake gently—don’t overmix, or you’ll create suds that clog the nozzle. For the baking soda spray, stir until the baking soda fully dissolves. If you see undissolved particles, strain the mixture through a fine-mesh sieve or cheesecloth to avoid clogging your sprayer.
I like to label my bottles with the date and pest type—this prevents mix-ups later. Store solutions in a cool, dark place (like a pantry) for up to 5 days, but always shake well before use. If you notice mold or a foul smell, toss it and start fresh.
☀️ Step 3: Apply Spray at the Right Time and Conditions
Spray in the early morning or late afternoon when temperatures are below 85°F—heat can stress plants and reduce effectiveness. Hold the bottle 12-18 inches away from foliage and spray until leaves are lightly damp, not soaking wet. Focus on the undersides of leaves where pests often hide.
For aphids, reapply every 3-5 days until the infestation clears. For fungal issues, spray preventatively every 7-10 days during humid weather. Avoid spraying when plants are wilting or under stress—they’ll be more vulnerable to damage.
✂️ Step 4: Monitor and Adjust as Needed
Check your plants 24-48 hours after spraying for signs of improvement. If aphids persist, try adding 1 tablespoon of neem oil to your soapy mix—neem disrupts their life cycle. For stubborn fungal spots, increase the baking soda to 2 teaspoons per quart and add a dash of horticultural oil for better coverage.
Real talk: If pests or fungi return after a few weeks, rotate your solutions. Overusing the same spray can lead to resistance. I also recommend pairing sprays with physical removal—like handpicking slugs or wiping mildew with a damp cloth—for best results.
Tips & tricks for perfect homemade garden sprays
These practical tips will help you maximize effectiveness while keeping your plants safe and healthy.
Solution Strength: The key to success lies in the concentration of your active ingredients. For the soapy spray, using exactly 1 tablespoon of mild liquid dish soap per quart of water is crucial—too much soap can damage plant leaves, while too little won't effectively break down pests' protective layers. I've found that Castile soap works best as it's gentle yet effective. For the baking soda solution, make sure the baking soda is completely dissolved to avoid clogging your sprayer and ensure even coverage.
Timing Secret: The 24-48 hours after application is when you'll see the most noticeable results. This window allows the active ingredients enough time to work their magic without causing stress to your plants. I recommend checking your plants during this period to assess effectiveness. If you notice pests haven't cleared up after 48 hours, consider adding 1 tablespoon of neem oil to your soapy mix for enhanced results.
Application Technique: When applying your spray, focus on the undersides of leaves where many pests hide. Hold the bottle 12-18 inches away and spray until leaves are lightly damp—not soaking wet. This technique ensures even coverage while preventing waterlogging that can stress plants. I've found that applying in the early morning or late afternoon when temperatures are below 85°F gives the best results, allowing the solution to work without causing heat stress to your plants.
Storage Wisdom: Proper storage extends the shelf life of your homemade sprays. Always store solutions in a cool, dark place like a pantry for up to 5 days. I recommend labeling bottles with both the date and pest type to prevent mix-ups. Before each use, give the bottle a good shake—especially with the baking soda solution—to ensure ingredients are properly mixed. If you notice any mold or foul smell, it's time to toss it and start fresh.
Pro Tips for Homemade Garden Pesticide
- These practical tips will help you maximize effectiveness while keeping your plants safe and healthy.
- Solution Strength: The key to success lies in the concentration of your active ingredients.
- Timing Secret: The 24-48 hours after application is when you'll see the most noticeable results.
Frequently asked questions
Got questions about whipping up your own garden pest control? You’re not alone! Here are some of the most common queries—and straightforward answers—to help you get started with confidence.
How soon can I use homemade pesticides after mixing them?
Most homemade sprays (like neem oil or soap solutions) can be applied immediately after mixing, but some—like compost tea—need 24–48 hours to ferment for maximum effectiveness. Always shake well before spraying for even coverage.
How often should I reapply homemade pesticides?
Reapplication depends on the pest and weather. For soft-bodied insects (aphids, mites), spray every 3–7 days or after rain. For fungal issues, apply weekly or after heavy moisture. Consistency is key—pests rebound fast if you skip treatments!
Will homemade pesticides harm my plants or beneficial insects?
Most recipes are plant-safe when used correctly, but test on a small leaf first—especially citrus oils or garlic sprays, which can burn tender plants. Avoid spraying bees, ladybugs, or lacewings; apply early morning or late evening when pollinators are less active.
Do homemade pesticides work in extreme heat or cold?
Extreme temps can reduce effectiveness. Heat (above 90°F) may evaporate ingredients faster, while cold (below 50°F) can weaken oils. Store sprays in a cool, dark place and apply during mild, overcast days for best results.
What if my homemade spray isn’t working? Troubleshooting tips?
If pests persist, check these fixes:
- Coverage: Spray undersides of leaves where pests hide.
- Timing: Reapply after rain or watering (pesticides wash off).
- Strength: Double the recipe’s potency (e.g., more garlic or neem oil).
- Pest ID: Some bugs (like squash bugs) need targeted solutions—research their life cycle.
Can I mix multiple homemade pesticides together?
Generally, stick to one active ingredient per spray (e.g., neem + soap) to avoid chemical reactions or plant damage. If combining, test a small batch first—some ingredients (like vinegar and citrus oil) can degrade quickly. Layer treatments (e.g., spray neem one week, garlic the next) for stubborn pests.
Wrapping up and next steps
Creating your own homemade garden pesticide is a rewarding way to protect your plants—naturally, safely, and affordably! 🌱 These DIY sprays are just as effective as commercial options but skip the harsh chemicals, keeping your garden (and pollinators) thriving.
Whether you’re battling aphids, powdery mildew, or pests, these recipes prove that simple ingredients can make a big difference.
Ready to take the next step? Start small—test one recipe on a single plant before scaling up. Keep a garden journal to track what works best in your climate, and soon, you’ll have a custom, chemical-free defense system tailored just for your green space! 🌿