Tools
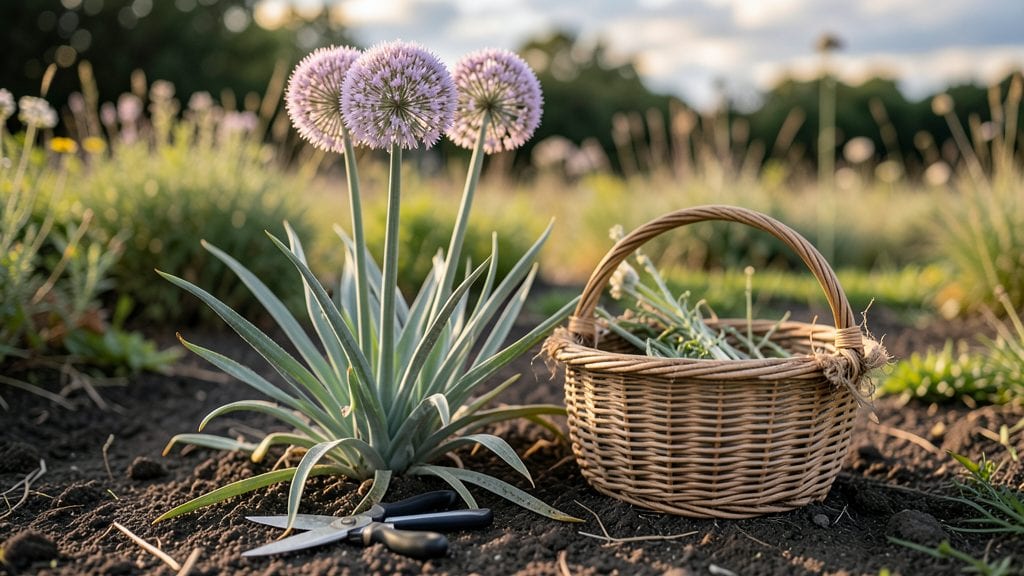
My kitchen garden revival started with a single 4x8-foot patch that now produces more than my old 100-square-foot plot ever did. The secret isn’t space—it’s strategy: stacking plants vertically, choosing fast-growing varieties, and rotating crops to keep the harvest flowing year-round. 🌱
I swapped out ornamental plants for high-value crops like leaf lettuce, radishes, and bush beans that mature in under 60 days. Vertical planters hold cherry tomatoes and cucumbers off the ground, freeing up precious floor space for greens and herbs.
Even in winter, cold-hardy kale and spinach thrive under row covers, proving productivity doesn’t stop when the weather turns chilly.
By summer’s end, you’ll be snipping fresh herbs for cooking, harvesting crisp radishes, and watching tomatoes blush on vines you can reach without bending. The best part? Your garden becomes a living kitchen—beautiful enough for company but packed with ingredients for tonight’s dinner.
Let’s turn that unused corner into your most productive (and delicious) space.
This approach works in apartments, backyards, or even sunny balconies—no matter your starting point. The key is starting small, thinking vertically, and focusing on what you’ll actually eat. Ready to see what a little creativity can grow?
📚 In This Guide
- What you need
- Instructions
- Tips and common mistakes
- Wrapping up and next steps
What you need
- ● Containers or Raised Beds: 3–5 (12"–18" deep, with drainage holes). Opt for lightweight materials like fabric grow bags or wooden crates for flexibility.
- ● High-Quality Soil: 1–2 cubic yards of organic potting mix or container blend (avoid garden soil—it compacts!). Add compost (1–2 bags) for nutrients.
- ● Seeds or Seedlings: Fast-growing crops: Lettuce, radishes, green onions (5–10 plants/container).
- ● Herbs: Basil, parsley, cilantro (3–5 plants).
- ● Compact veggies: Cherry tomatoes, peppers, dwarf beans (1–2 plants/container).
- ● Watering Supplies: Watering can (1–2 quarts) or drip irrigation kit (for precision).
- ● Spray bottle (for seedlings).
- ● Hand Trowel: 1 (ergonomic, 6"–8" blade for planting and weeding).
- ● Pruners: 1 pair (bypass pruners for clean cuts).
- ● Gloves: 1 pair (gardening gloves to protect your hands).
- ● Measuring Tape or Ruler: 1 (for spacing plants correctly).
- ○ Optional (but helpful!): Soil pH test kit (to tweak acidity for picky plants like blueberries).
- ● Garden kneeler/pad (for comfort during long sessions).
- ● LED grow lights (for winter or low-light spaces).
- ● Sunlight Assessment: Identify a spot with 4–6+ hours of direct sunlight daily (south-facing windowsills or balconies work!).
- ● Drainage Plan: Ensure containers have holes or elevate beds to prevent waterlogging.
- ● Climate Check: Know your frost dates (use local agricultural extensions for guidance). Start seeds indoors 6–8 weeks before the last frost!
- ● Time Commitment: Dedicate 10–15 minutes daily for watering and checks (more during germination!).
Step-by-Step instructions for reviving your kitchen garden
Transform a tiny patch into a year-round harvest with these simple, space-smart techniques.
🌱 Step 1: Clear and Prepare the Space
Start by removing any dead plants, weeds, or debris from your chosen area. I like to use a small hand fork to loosen compacted soil—this improves drainage and root growth. If your space is entirely new (like a patio or balcony), skip this and move to leveling the ground.
For existing beds, spread the 1 bag of compost evenly across the surface and gently work it into the top 4-6 inches of soil. This adds nutrients without overwhelming young plants. If your soil feels heavy or clay-like, mix in 1 gallon of perlite to lighten it up—roots will thank you later.
✂️ Step 2: Plan for Year-Round Layers
Divide your space into three zones: cool-season crops (spring/fall), warm-season crops (summer), and evergreen perennials (like herbs). Cool-season plants like lettuce and spinach thrive in 50-65°F temps, while warm-season tomatoes and peppers need 70-85°F. Evergreens like chives or thyme stay productive year-round.
Use the 4 raised bed frames (or containers) to create vertical layers. Plant fast-growing crops like radishes in early spring, then replace them with slower growers like broccoli as temps rise. This "succession planting" keeps your harvests coming without adding space.
💧 Step 3: Install Watering and Drip System
Lay the 20 feet of drip irrigation tubing along the edges of each bed, spacing emitters 12-18 inches apart. Connect it to your hose and run a test—adjust the flow so water drips slowly but steadily. This system delivers moisture directly to roots, reducing waste and keeping leaves dry (which prevents fungal diseases).
For containers, use the 4 self-watering planters and fill the reservoirs with 2 gallons of water each. These keep soil consistently moist without soggy roots. Check water levels weekly—top off as needed, especially during dry spells.
☀️ Step 4: Plant and Mulch for Protection
Start with 1 packet of cool-season seeds (like kale or carrots) in early spring or fall. Sow them ¼ inch deep, spacing seeds 1-2 inches apart. For warm-season plants, transplant seedlings instead of starting from seed—they grow faster and avoid pests. Use the 20 feet of frost cloth to shield tender plants if frost threatens.
Spread the 3 bags of mulch evenly over the soil surface, leaving 1 inch of space around plant stems. Mulch retains moisture, suppresses weeds, and regulates soil temperature. For containers, add a 1-inch layer of mulch on top of the soil—just avoid piling it against the plant base.
🌿 Step 5: Maintain and Rotate Crops
Water deeply 2-3 times per week, adjusting for rain. Let the top 1 inch of soil dry between waterings—this prevents root rot. Fertilize every 4-6 weeks with the 1 bottle of liquid fertilizer, mixing it into your watering can. Avoid overfeeding; too much nitrogen leads to leafy growth but fewer fruits.
Rotate crops annually to prevent soil depletion and pest buildup. Keep a simple log of what you planted where—this ensures no family gets tired of the same veggie in the same spot. In late summer, clear out spent plants and repeat Step 2 for a fall harvest.
Tips & tricks for perfect kitchen garden revival
Here's what I learned the hard way after struggling with my own small-space garden—these tricks will help you maximize every inch.
Soil Prep Secret: In Step 1, don't just spread that 1 bag of compost on top—work it into the top 4-6 inches of soil. I used to just sprinkle it, but mixing it in creates a nutrient-rich zone where roots can thrive. For heavy clay soil, that 1 gallon of perlite makes all the difference—it improves drainage without needing fancy equipment.
Temperature Matters: The 50-65°F range for cool-season crops and 70-85°F for warm-season plants is your golden zone. Use a simple thermometer to check soil temps before planting—this prevents wasted effort. I've planted lettuce when temps were creeping toward 70°F and watched it bolt (go to seed) in days. Timing is everything!
Watering Wisdom: That 20 feet of drip tubing is a game-changer, but spacing emitters 12-18 inches apart is crucial. Too close and you'll get soggy spots; too far and plants near the edges dry out. For containers, those 2 gallons of water in the reservoirs should last about 3-4 days in normal weather—check weekly to adjust. Overwatering is just as bad as underwatering!
Planting Precision: When sowing those cool-season seeds in Step 4, use a ruler to ensure they're exactly ¼ inch deep and 1-2 inches apart. I used to eyeball it, and my radishes always crowded out my carrots. For warm-season transplants, gently tease apart roots before planting—this helps them establish faster. The 1-inch space around stems when mulching prevents rot while keeping weeds at bay.
Pro Tips for Kitchen Garden Revival
- Here's what I learned the hard way after struggling with my own small-space garden—these tricks will help you maximize every inch.
- Soil Prep Secret: In Step 1, don't just spread that 1 bag of compost on top—work it into the top 4-6 inches of soil.
- Temperature Matters: The 50-65°F range for cool-season crops and 70-85°F for warm-season plants is your golden zone.
Frequently asked questions
Got questions about reviving your kitchen garden? We’ve got answers!
Whether you’re a beginner or a seasoned green thumb, these FAQs will help you navigate year-round productivity—even in small spaces. Let’s dig in!
What’s the best way to start a kitchen garden in a tiny space?
Prioritize vertical gardening (trellises, hanging planters) and container gardening to maximize space. Use dwarf or bush varieties of veggies like tomatoes, peppers, and lettuce. Herbs thrive in small pots, too! Start with 4–6 key crops you love, and rotate them seasonally for continuous harvests.
How long does it take to see results in a kitchen garden?
Fast growers like radishes, lettuce, and green onions sprout in 2–4 weeks, while tomatoes and peppers take 60–90 days to mature. Leafy greens and herbs offer quick wins—perfect for staying motivated! Plan ahead by checking seed packets for days to harvest timelines.
Can I grow a kitchen garden year-round, even in cold climates?
Use season extenders like cold frames, row covers, or greenhouses to protect plants. Opt for hardy crops like kale, spinach, and carrots in winter, and swap them for heat-lovers (peppers, basil) in summer. Indoor windowsill gardens work too!
Is a kitchen garden expensive to maintain?
Not at all! Start small with affordable seeds (or save seeds from store-bought organic produce) and reuse containers (buckets, old tires). Compost kitchen scraps to cut fertilizer costs. Pro tip: Swap plants or seeds with neighbors to share resources and reduce expenses!
What do I do if pests or diseases attack my kitchen garden?
Prevent pests with companion planting (e.g., marigolds deter nematodes) and neem oil sprays. Remove affected leaves promptly, and rotate crops yearly to break disease cycles. For severe issues, consult local extension services—they offer free pest ID and solutions!
Can I grow a kitchen garden without soil (hydroponics/aquaponics)?
Yes! Hydroponics and aquaponics are space-efficient and water-wise. Leafy greens, herbs, and strawberries thrive in soilless setups. Start with a simple Kratky method (DIY buckets + nutrient solution) or pre-made hydroponic kits. Bonus: Less weeding and faster growth!
Wrapping up and next steps
The kitchen garden revival isn’t just a trend—it’s a rewarding way to grow fresh, flavorful produce year-round, even in small spaces! Whether you’re a seasoned green thumb or a curious beginner, this guide proves that small spaces can yield big harvests with the right tools, planning, and passion. 🌱
Ready to take the next step? Start small—pick one corner of your balcony, patio, or even a sunny windowsill—and let your garden grow. Share your progress, experiment with new crops, and soon, you’ll be enjoying the satisfaction of homegrown goodness all year long! 🌿