Tools
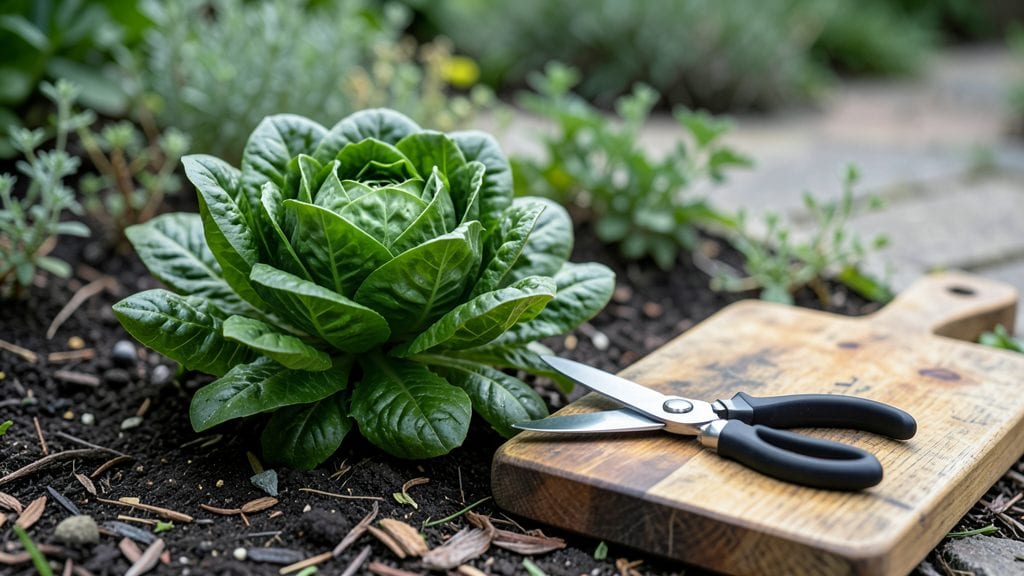
A small kitchen garden can outperform a sprawling plot when you design it right. I’ve turned a 4x4-foot balcony into a year-round herb and salad factory using nothing but smart spacing and the right plants—no fancy tools required. The key isn’t more space, it’s how you arrange what you’ve got.
Start with raised beds or vertical planters to maximize vertical real estate. My setup uses two 2-foot-wide raised beds (one for greens, one for herbs) plus hanging pockets for cherry tomatoes.
Square-foot gardening works perfectly here—just divide your space into 1-foot squares and plant like a grid. Sunlight becomes your most valuable resource, so rotate plants seasonally to avoid shading.
You’ll end up with fresh basil, lettuce, and radishes within 3-4 weeks, plus herbs that stay productive for months. The best part? No weeding, no bending over—everything’s within arm’s reach. Even my neighbor’s “too small to bother” patch now yields more than their backyard garden.
Works for apartments, patios, or even a sunny windowsill. The same principles apply whether you’re growing in containers or repurposed crates. Let’s get that tiny plot working harder than ever before.
📚 In This Guide
- What you need
- Instructions
- Tips and common mistakes
- Wrapping up and next steps
What you need
- ● Containers or Raised Beds: 5–10 gallon pots (for herbs, greens, or cherry tomatoes) – 3–5 units
- ○ 1–2 raised beds or troughs (12"–18" deep, 2’x4’ max) – 1–2 units (optional for root crops like carrots)
- ● Fabric grow bags (10–20 gallons) – 2–4 units (great for vertical gardening)
- ● Growing Medium: Potting mix (lightweight, organic) – 1–2 cubic feet per container
- ● Compost or worm castings (for nutrient boost) – ½ cup per pot
- ○ Perlite or vermiculite (for drainage) – small handful per container (optional)
- ● Seeds or Seedlings: Fast-growing varieties: lettuce, radishes, green onions, basil, or microgreens – 5–10 seeds per pot
- ● Compact plants: bush beans, dwarf tomatoes, or peppers – 1–2 plants per container
- ● Basic Tools: Trowel or small hand shovel – for planting and soil prep
- ● Pruners or scissors – for harvesting and trimming
- ● Watering can or spray bottle (1–2 gallon capacity) – 1 unit
- ○ Gloves (optional but handy!) – 1 pair
- ○ Optional Upgrades: Vertical planters or trellises (for climbing plants like peas or cucumbers)
- ● Self-watering system (wick-based or drip irrigation)
- ● Soil moisture meter – to avoid over/under-watering
- ● Lighting (LED grow lights) – if indoors or low-light conditions
- ● ✅ Sunlight: At least 4–6 hours of direct sun daily (south-facing is ideal in the Northern Hemisphere).
- ● ✅ Drainage: Ensure containers have drainage holes or use a tray underneath.
- ● ✅ Access to Water: A nearby sink or hose for easy watering.
- ● ✅ Space Planning: Sketch a rough layout—group plants by water needs and height (tallest in back!).
Instructions for designing a high-yield small kitchen garden
Here’s how to transform even the tiniest space into a productive, organized garden that delivers fresh herbs, greens, and veggies all season long.
Assess Sunlight and Space for Strategic Plant Placement
Begin by mapping your space for at least 6 hours of direct sunlight—the non-negotiable baseline for most kitchen garden crops. Use a 12-inch square grid to visualize planting zones: mark areas receiving full sun (6+ hours), partial sun (3-6 hours), and shade (less than 3 hours). Tall plants like tomatoes or peppers need the sunniest spots, while leafy greens tolerate partial shade.
If your space is truly limited—think balconies or windowsills—prioritize vertical growing. Install wall-mounted planters or hanging baskets for herbs and trailing plants like cherry tomatoes. I’ve seen a 4-foot-square balcony produce enough basil, lettuce, and radishes for a family of four by stacking containers and using every inch of wall space.
Select Compact, High-Yield Varieties for Small Gardens
Skip the sprawling plants and opt for bush varieties or determinate types that stay contained. For example, bush beans and bush cucumbers grow in 12-inch squares instead of vining across 6 feet. Herbs like thyme, oregano, and chives thrive in 6-inch pots, while lettuce and spinach can be harvested repeatedly from 8-inch-wide containers. Always check seed packets for "compact" or "dwarf" labels—they’re your best friends in small spaces.
Interplant fast growers with slower ones to maximize yield. Radishes mature in 30 days, giving you time to tuck in carrots or beets (which take 60 days) in the same spot. This succession planting trick ensures no soil sits empty and your harvests stay continuous. I’ve used this method to fit 16 plants into a 4-square-foot raised bed by staggering planting dates.
Build or Repurpose Containers for Optimal Drainage and Soil
Use 5-gallon buckets with drainage holes for tomatoes, 10-inch-deep troughs for root crops like carrots, and shallow trays (4-6 inches deep) for greens. If repurposing containers, ensure they’re food-safe and sterilized—soak in a 1:10 bleach-water solution for 10 minutes, then rinse thoroughly. Line the bottom with 1 inch of gravel or broken pottery to prevent root rot from poor drainage.
Fill containers with a lightweight potting mix (never garden soil—it compacts and suffocates roots). Amend with compost or worm castings for nutrients, and mix in perlite or vermiculite to improve aeration. The soil should crumble easily when squeezed—if it forms a tight ball, add more organic matter. I’ve found that self-watering containers with reservoir bases cut watering time by half while preventing overwatering.
Implement a Vertical or Tiered Layout for Maximum Efficiency
For raised beds, divide space into 12-inch squares and assign each to a single plant type to avoid competition. Use trellises or cages for vining plants like cucumbers or pole beans to save floor space. In container gardens, group plants by watering needs: succulents and herbs (drought-tolerant) together, leafy greens (moisture-loving) in separate trays.
Create tiered levels with stacked crates or vertical planters to grow upwards. For instance, dwarf peppers can sit on a top shelf, bush beans in the middle, and radishes in the bottom tray. This not only saves space but also makes harvesting easier—no more bending or reaching. I’ve designed a 3-tiered tower that fits in a corner and produces 20 pounds of greens per season.
Maintain with a Consistent Watering and Fertilizing Schedule
Water early in the morning to reduce evaporation and fungal risks. Use drip irrigation or soaker hoses to deliver moisture directly to the roots without wetting leaves. Aim for 1 inch of water per week, adjusting for heat—containers dry out faster than in-ground beds. I’ve found that self-watering systems with moisture sensors prevent underwatering or drowning roots, especially in intense summer heat.
Fertilize every 3-4 weeks with a balanced liquid fertilizer (10-10-10) or fish emulsion for organic gardens. Side-dress heavy feeders like tomatoes and peppers with compost tea mid-season to boost yields. Prune regularly to encourage bushier growth: pinch back new growth tips on herbs, and remove suckers from tomatoes. This keeps plants compact and productive in limited space.
Tips & tricks for perfect small kitchen garden layouts
Designing a high-yield kitchen garden in limited space requires strategic thinking—here are the game-changing approaches I’ve perfected over years of maximizing tiny plots.
Sunlight Optimization: In Step 1, when mapping your 12-inch square grid, don’t just mark sunlight zones—actually test them. Place a ruler in different spots and track sunlight hours for 3 days before planting. I discovered my "full sun" balcony spot actually received only 5 hours of direct sunlight, so I adjusted my tomato placement to the true sunniest corner. This simple test prevents wasted space on sun-loving plants that won’t thrive.
Container Selection Strategy: For Step 3’s container recommendations, consider the plant’s mature size when choosing dimensions. A 5-gallon bucket might seem perfect for tomatoes, but bush varieties will outgrow it by mid-season. I now use 7-gallon containers for tomatoes and peppers, which gives roots room to expand without requiring more floor space. The extra 2 gallons makes a surprising difference in yield and stability.
Succession Planting Calendar: Building on Step 2’s 30-day radish to 60-day carrot rotation, create a planting calendar that accounts for your local frost dates. I plant radishes every 2 weeks from spring to fall, then fill those same spots with beets or carrots when radishes finish. This ensures continuous harvests without adding square footage. For a 4-square-foot bed, this method gives me enough radishes for 12 salads over summer.
Vertical Space Hacks: When implementing tiered layouts in Step 4, think beyond just stacking containers. Install a freestanding trellis between your raised beds to grow pole beans vertically through the center, saving floor space while adding nitrogen to the soil. I’ve also used over-the-door shoe organizers as hanging pockets for herbs—each pocket holds 3 plants, and they’re easily accessible for harvesting.
Pro Tips for Kitchen Garden Small
- Designing a high-yield kitchen garden in limited space requires strategic thinking—here are the game-changing approaches I’ve perfected over years of maximizing tiny plots.
- Sunlight Optimization: In Step 1, when mapping your 12-inch square grid, don’t just mark sunlight zones—actually test them.
- Container Selection Strategy: For Step 3’s container recommendations, consider the plant’s mature size when choosing dimensions.
Frequently asked questions
Got questions about squeezing a thriving kitchen garden into small spaces? You’re not alone! Here are answers to the most common concerns—from planning to troubleshooting—so you can grow big harvests without the big footprint.
What are the best crops for a small kitchen garden?
Opt for compact, high-yield plants like leafy greens (spinach, kale), herbs (basil, cilantro), radishes, bush beans, and dwarf tomatoes. These thrive in containers or raised beds with minimal space. Vertical gardening with peas or cherry tomatoes also maximizes output!
How quickly can I expect a harvest in a small garden?
Fast-growing crops like radishes (3–4 weeks), green onions (2–3 weeks), and lettuce (4–6 weeks) deliver quick rewards. Slower growers (e.g., tomatoes, peppers) take 2–3 months but fit well in succession planting. Plan your layout to balance speed and sustainability—prioritize what you’ll eat soonest!
Is a small kitchen garden cost-effective compared to buying produce?
Yes! A well-planned small garden pays off in long-term savings. For example, growing 10 tomato plants saves ~$50/year vs. store-bought. Factor in startup costs (soil, containers) but budget for seed swaps and composting to cut expenses. Even 1–2 harvests cover the initial investment!
How do I protect my small garden from pests or bad weather?
Use row covers, mesh netting, or DIY cloches for pests. For weather, choose hardy varieties (e.g., cold-resistant kale) and place containers near a wall or under eaves for wind protection. Deter pests naturally with companion planting (e.g., marigolds repel aphids) or homemade sprays (neem oil).
Can I start a small kitchen garden in an apartment with no yard?
Balconies, windowsills, and patios work perfectly with containers, hanging pots, or vertical planters. Sunlight is key—south-facing spots get the most light. Herbs, microgreens, and dwarf veggies thrive in 6–12" pots. Just ensure proper drainage and rotate containers for even growth!
What’s the biggest mistake beginners make with small gardens?
Overcrowding! Plants need breathing room—check seed packets for spacing needs. Another pitfall? Ignoring soil quality. Use high-quality potting mix or amend garden soil with compost. Start small, monitor growth, and scale up as you learn!
Wrapping up and next steps
A small kitchen garden doesn’t mean small rewards! With the right smart layouts, space-saving techniques, and a dash of creativity, you can grow a bountiful harvest—even in the tiniest of spaces.
Whether you’re using vertical planters, container gardening, or square-foot gardening, the key is to work with what you have and focus on high-yield, low-maintenance crops.
Ready to turn your tiny patch into a thriving garden? Start small, experiment with different setups, and don’t forget to share your progress—you might inspire others to grow too! 🌱✨