Tools
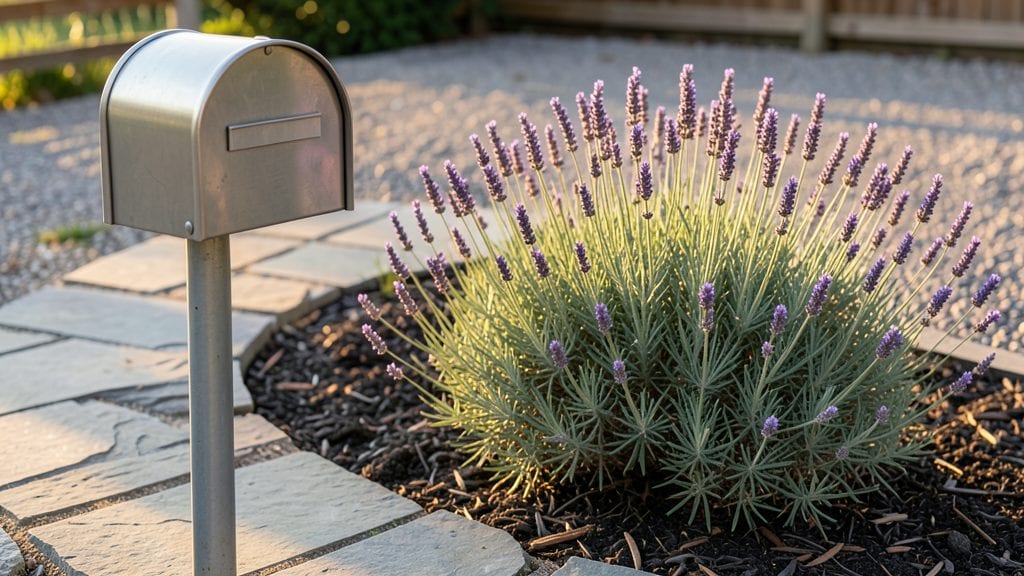
A mailbox in garden isn’t just functional—it’s the first impression your outdoor space makes. I transformed mine from an eyesore into a rustic focal point by blending it with native plants and a simple stone pathway.
The right placement turns a basic necessity into a charming garden feature that neighbors notice (and maybe even envy).
Start with the mailbox itself—opt for vintage styles with weathered metal or painted wood that complements your garden’s aesthetic. Then, frame it with low-maintenance perennials like lavender or ornamental grasses that thrive in your climate.
A curved stone border or two strategically placed boulders adds texture without overwhelming the design. Even a small raised bed nearby can showcase seasonal blooms that keep the area vibrant year-round.
You’ll end up with a spot that feels intentional, not accidental. The mailbox becomes part of the landscape rather than an afterthought, creating a welcoming entryway that ties your garden to the street.
Plus, the right placement makes retrieving mail a quick, pleasant stroll through your own curated space. Let’s make yours stand out!
This works for any yard size—urban front yards, suburban driveways, or even rural homesteads. The key is balancing functionality with design so your mailbox becomes a garden feature, not just a utility. Ready to elevate your curb appeal?
📚 In This Guide
- What you need
- Instructions
- Tips and common mistakes
- Wrapping up and next steps
What you need
- ● Wood: 1x 4x4 post (4–6 ft long) – for the base/post
- ● 1x 2x4 board (8 ft long) – for framing
- ● 1x 1x6 board (8 ft long) – for the mailbox front/back
- ● 1x 1x4 board (8 ft long) – for trim or decorative accents
- ● Hardware: 3–4 3-inch exterior wood screws (for assembly)
- ● 2 hinges (for the mailbox door)
- ● 1 mailbox latch (rustic or decorative style)
- ○ 1 mailbox flag holder (optional but charming!)
- ● Extras for Style: Stain or paint (weather-resistant, e.g., semi-transparent stain)
- ● Wood glue (for extra reinforcement)
- ● Sandpaper (80–120 grit for smoothing)
- ● Roofing material (e.g., cedar shingles or corrugated metal for a sloped roof)
- ● Decorative hardware (e.g., wrought-iron hinges, vintage-style knobs)
- ● Landscape lighting (solar-powered for a magical nighttime glow)
- ● Potted plants or flowers (to frame the mailbox like a mini garden)
- ● Weatherproof sealant (for extra longevity)
Step-by-step guide to installing a garden mailbox with rustic appeal
Transforming a plain mailbox into a charming garden feature takes just a few hours and adds instant curb appeal.
Choose and Prepare the Mailbox Location
Pick a spot along your driveway or garden path where the mailbox will be both functional and visually appealing. Mark the location with a stake and string line to ensure it’s level—uneven placement will make your mailbox look off-kilter. For a rustic look, I like to position mine near a stone path or under a mature tree where it blends seamlessly with the landscape.
Check local regulations first—many areas require mailboxes to be placed a specific distance from the road or sidewalk. Dig a hole about 12 inches deep and 12 inches wide using a shovel. The hole should accommodate the mailbox post securely while allowing room for concrete or gravel to stabilize it.
Install the Mailbox Post and Base
Place the mailbox post into the hole and use a level to ensure it stands perfectly vertical. Adjust the depth slightly if needed to achieve this—most mailbox posts come with measurement guides to help. Once aligned, fill the bottom 6 inches of the hole with a mixture of gravel and sand to improve drainage and prevent shifting over time.
Pour a 4-inch layer of concrete around the post, tamping it down firmly to eliminate air pockets. Allow the concrete to set for at least 24 hours before attaching the mailbox. If you’re working with a pre-cast base, follow the manufacturer’s instructions for securing it to the post. This step is critical—skipping it will leave your mailbox wobbly in wind or rain.
Attach the Mailbox and Add Rustic Touches
Once the base is fully cured, slide the mailbox onto the post and secure it with the provided hardware. If your mailbox has decorative elements like wrought iron detailing or wood accents, this is where you can get creative. I like to wrap the post in bamboo stakes or twine for a natural, rustic feel—just make sure the mailbox remains accessible for deliveries.
Add a small stone border around the base or plant low-growing perennials like creeping thyme or sedum to soften the edges. A well-placed solar-powered garden light near the mailbox adds both safety and charm, especially for evening deliveries. Avoid overcrowding the area—keep the space clean and uncluttered so the mailbox remains the focal point.
Final Touches and Maintenance
Give the mailbox a final inspection to ensure all hardware is tight and the post is stable. If your mailbox has a flag or decorative finial, attach it last—this is often the most delicate part. For a weathered, vintage look, lightly sand any painted surfaces and apply a clear outdoor sealant to protect against rain and sun.
Schedule a quick maintenance check every 6 months to tighten screws and remove any debris that might accumulate around the base. If you notice the mailbox leaning slightly over time, dig around the base to check for soil erosion and add more gravel or concrete as needed. A little upkeep ensures your garden mailbox stays both beautiful and functional for years.
Tips & tricks for perfect garden mailbox installation
A few small details can make all the difference between a functional mailbox and a stunning garden focal point.
The Leveling Secret: Don't just eyeball your level—use a string line stretched between two stakes to create a perfectly straight reference line. This ensures your mailbox post stays perfectly vertical from the very beginning, especially important when you're digging that 12-inch hole. I've seen many mailboxes tilt slightly because the installer didn't use this simple trick, and it makes a huge difference in the final look.
Concrete Curing Strategy: While the instructions specify waiting at least 24 hours for the concrete to set, I recommend giving it a full 48 hours if possible, especially in cooler weather. The concrete needs time to fully harden and bond with the post. If you're impatient, you can use a hairdryer on low heat to gently warm the concrete for the last 10 minutes of curing—just don't overdo it or it could crack.
Rustic Touches That Make a Difference: For that authentic garden charm, consider adding a small wooden plaque with your address or a simple metal sign near the base. I've also seen people wrap the post with weathered twine or even old garden tools for a vintage look. Just remember to keep all decorations at least 6 inches away from the mailbox itself so they don't interfere with deliveries.
Maintenance Pro Tip: The 6-month maintenance check is crucial, but I've found that adding a thin layer of gravel around the base helps prevent erosion between checks. This simple step can save you from having to dig up the concrete later if your mailbox starts to lean. Also keep a small bag of concrete mix on hand—you'll be glad you did if you need to make quick repairs.
Pro Tips for Mailbox In Garden
- A few small details can make all the difference between a functional mailbox and a stunning garden focal point.
- The Leveling Secret: Don't just eyeball your level—use a string line stretched between two stakes to create a perfectly straight reference line.
- Concrete Curing Strategy: While the instructions specify waiting at least 24 hours for the concrete to set, I recommend giving it a full 48 hours if possible, especially in cooler weather.
Frequently asked questions
Got questions about adding a mailbox to your garden? You’re not alone! Here are some of the most common inquiries—plus straightforward answers to help you plan like a pro.
What’s the best material for a garden mailbox?
A garden mailbox blends style with durability. Wood (like cedar or redwood) offers rustic charm but needs sealing; metal (wrought iron or steel) resists weather but may rust over time; resin or composite is low-maintenance and pest-proof. Choose based on your climate and aesthetic—think timeless vs. trendy!
Can I install a garden mailbox year-round?
Ideally, install it in spring or early fall when soil is workable but not frozen. Avoid winter (frost heaves) or peak summer (dry ground). If you’re in a hurry, rent a post-hole digger for faster setup. Pro tip: Call 811 first to check for underground utilities!
Do I need a permit for a decorative mailbox?
It depends on your local HOA or city codes. Some areas require permits for non-standard mailboxes (especially over 36" tall). Check with your municipal building department or HOA before digging. When in doubt, ask!—skipping permits can lead to fines or removal requests.
What if my mailbox keeps getting damaged or stolen?
Secure it with a heavy-duty base (like concrete footings) and consider a lockable design or motion-sensor lights. If theft is recurring, switch to a wall-mounted or hidden box near your door. Document incidents with your postal service—they may offer solutions or surveillance options.
Can I use a garden mailbox for plants or storage?
While creative, mailboxes are not structurally designed for heavy planters or tools. If you love the look, opt for a freestanding planter or a multi-functional post (like a combo mailbox + lantern). For storage, try a decorative shed or outdoor bench with hidden compartments instead.
Wrapping up and next steps
A mailbox in your garden isn’t just a functional necessity—it’s a chance to express your style and boost your home’s curb appeal with rustic charm.
Whether you opt for a classic wooden design, a sleek metal piece, or a whimsical custom creation, the right mailbox can transform your outdoor space into a welcoming entrance. With the right materials and a little creativity, you’re well on your way to making a statement that’s uniquely yours!
Ready to take the next step? Sketch your vision, gather your tools, and start building—or browse local suppliers for inspiration! 🌿✨