Picking
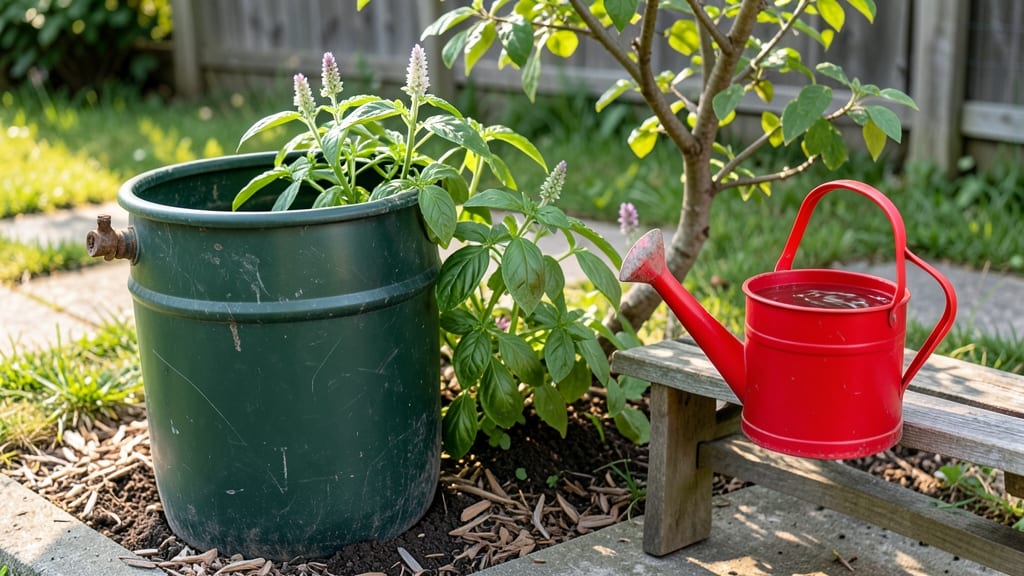
A rainwater harvesting garden design cuts your water bill while keeping plants thriving—no fancy setups required. I started with a single 55-gallon barrel under my downspout, and now my garden runs on free, filtered rainwater even in drought years.
The key isn’t expensive equipment but smart placement and plant choices that stretch every drop.
You’ll need basic supplies: food-grade barrels, a first-flush diverter to keep debris out, and a simple pump or gravity-fed system to distribute water. Drought-tolerant plants like lavender, yarrow, and native grasses thrive on harvested rain, while veggies like tomatoes and peppers just need occasional top-ups.
The setup takes a weekend, and the savings add up fast—imagine paying $0 for irrigation once it’s installed.
By summer’s end, you’ll have lush, self-sufficient beds that never flag during dry spells. The soil stays moist without puddling, roots run deep for nutrients, and you’ll spot fewer pests—dry conditions deter many garden problems.
Plus, every gallon harvested means less runoff polluting local waterways. It’s gardening that works with nature, not against it.
Works for urban balconies or half-acre homesteads—just scale the barrels and adjust filtration. Whether you’re watering herbs in pots or a full vegetable patch, this system adapts. Ready to turn your downspouts into a free resource? Let’s design it step by step.
📚 In This Guide
- What you need
- Instructions
- Tips and common mistakes
- Wrapping up and next steps
What you need
- ● Rainwater collection system: 1–3 55-gallon food-grade barrels (or larger, depending on roof size)
- ● First-flush diverter (to filter out debris—highly recommended!)
- ● Gutters and downspouts (if not already installed; ensure they’re 10–12 feet long)
- ● Filtration: Fine mesh screen (for gutters, ~¼-inch mesh)
- ● Sediment filter (100–200 micron for barrels)
- ● Pumps & hoses: Submersible pump (12V, 1–2 GPM flow rate for small gardens)
- ● Garden hose (½-inch diameter, 25–50 ft long)
- ● Hardware: Stainless steel or PVC pipes (for connections, ½–¾ inch)
- ● Hose clamps & sealant (for leak-proof joints)
- ● Drill & bits (for barrel holes and gutter mounting)
- ● Safety & storage: Ladder (for gutter installation, 6–8 ft tall)
- ● Mosquito dun (to cover barrels and prevent pests)
- ● Advanced filtration: Carbon filter (removes chemicals) or UV sterilizer (for drinking-safe water)
- ● Automatic overflow system (to redirect excess water to plants or a rain garden)
- ● Solar-powered pump (for off-grid sustainability)
- ● Barrel stand or rack (elevates barrels for better pressure)
- ● Water level indicator (floats or digital gauge)
Simple rainwater harvesting garden setup for year-round efficiency
Here's how to design a functional system that captures and stores rainwater with minimal complexity.
Select and Position Your Collection Surface
Choose a roof or patio area measuring at least 400 square feet—this provides enough surface to collect meaningful volumes during average rainfall. I recommend using a metal roof if possible, as its smooth surface sheds water efficiently without trapping debris. Position your collection point near the garden's dripline to minimize pipe runs and pressure loss.
Measure the roof's slope carefully. A minimum 4:12 pitch ensures water flows freely without pooling. If your roof is flatter, create small channels with roofing cement to direct water toward downspouts. Avoid positioning collection points under overhanging trees—fallen leaves and pine needles clog systems quickly and require constant cleaning.
Install Primary Collection Components
Attach a 4-inch diameter PVC downspout to your roof's gutter system, extending it directly to your storage barrel. Use corrosion-resistant fittings and seal all joints with silicone caulk to prevent leaks. I place a first-flush diverter at the top of the downspout—this simple 5-gallon bucket with a ball valve captures the first 5 gallons of runoff, which contains the highest concentration of roof dust and contaminants.
Position your storage barrel on a stable, level surface at least 6 inches above ground to prevent rodent access and allow for proper drainage. Elevate it further if you'll use gravity-fed irrigation. Wrap the barrel in insulating foam if temperatures drop below 40°F—this prevents freezing and cracking during winter months.
Set Up Filtration and Distribution
Install a fine mesh screen over the barrel's inlet to block leaves and debris while allowing water to flow freely. Below the screen, add a sediment filter rated for 200-micron particles—this removes the fine silt that clogs irrigation systems over time. I like to use a collapsible fabric filter sleeve that fits over the inlet pipe and can be rinsed clean monthly.
Connect a drip irrigation system or soaker hose to the barrel's outlet, using a pressure regulator if your system exceeds 20 psi. For gravity-fed setups, maintain a minimum 12-inch vertical drop between the barrel and irrigation point to ensure proper flow. Label all connections clearly—future you will thank you when troubleshooting becomes necessary.
Implement Overflow and Safety Systems
Equip your barrel with a overflow spout positioned 2 inches below the rim to prevent spillage during heavy storms. Direct the overflow to a permeable swale or rain garden rather than back into the storm drain—this maximizes your system's ecological benefit. I also install a manual overflow valve that allows me to divert excess water to thirsty plants during dry periods.
Add a mosquito fish (like gambusia) to your barrel if you live in a warm climate—they eat larvae without harming plants. In colder regions, install a fine mesh cover with ¼-inch holes to prevent mosquito breeding while allowing rain to enter. This simple addition transforms what could be a breeding ground into a functional part of your water system.
Monitor and Maintain Seasonally
Check your system weekly during rainy seasons and biweekly during dry periods, looking for clogs in the downspout or filter housing. I keep a small shop vacuum handy to clear debris from the first-flush bucket—this takes less than 5 minutes and prevents sediment from entering your storage. Flush the system quarterly by running clean water through all pipes to remove accumulated minerals.
Test water quality annually using a simple pH test kit—ideal rainwater for gardens falls between 5.5 and 7.0. If your water tests acidic (below 5.5), add crushed limestone to the barrel to buffer the pH naturally. In drought years, supplement with compost tea to provide micronutrients your plants might miss from rainwater alone.
Tips & tricks for perfect rainwater harvesting garden systems
A few strategic enhancements can transform your basic setup into a highly efficient, low-maintenance water system that works year-round.
Surface Area Optimization: While the instructions specify a minimum 400 square feet, I've found that adding a secondary collection point—like a small patio or deck—can increase your system's capacity by 30% without significant additional cost. Position these secondary surfaces to capture water from different directions, especially if your primary roof has shaded areas that receive less rainfall. The key is maximizing surface area while maintaining the 4:12 pitch requirement for proper drainage.
Filtration Upgrade: The 200-micron sediment filter mentioned is excellent for basic use, but I recommend adding a 100-micron cartridge filter downstream if you're using the water for sensitive plants or vegetables. This extra layer removes finer particles that can clog drip emitters over time. The collapsible fabric sleeve you'll use monthly can be supplemented with a permanent cartridge filter that only needs replacement every 6-12 months, depending on your roof's condition.
Winterization Strategy: The instructions mention insulating foam for temperatures below 40°F, but I've developed a more robust winterization approach. In addition to insulating, I install a submersible aquarium heater (set to 45°F) in the barrel during freeze threats. This prevents complete freezing while remaining energy-efficient. For systems without electricity access, I've successfully used heating cables wrapped around the barrel's base, controlled by a thermostat. Both methods cost under $50 and have saved multiple systems from winter damage.
Pro Tips for Rainwater Harvesting Garden
- A few strategic enhancements can transform your basic setup into a highly efficient, low-maintenance water system that works year-round.
- Position these secondary surfaces to capture water from different directions, especially if your primary roof has shaded areas that receive less rainfall.
- Filtration Upgrade: The 200-micron sediment filter mentioned is excellent for basic use, but I recommend adding a 100-micron cartridge filter downstream if you're using the water for sensitive plants or vegetables.
Frequently asked questions
Got questions about rainwater harvesting in your garden?
You're not alone! Here are answers to the most common concerns to help you get started confidently.
What’s the best time of year to install a rainwater harvesting system?
Install your system before the rainy season starts—typically late summer or early fall in most climates. This gives you time to test leaks, fine-tune filters, and ensure everything’s ready for the first downpours. If you’re in a dry region, even a small setup in spring can help you prepare for summer water shortages!
How much space do I need for a rainwater harvesting garden setup?
Space needs vary! A basic 55-gallon barrel system fits under a downspout and requires just a few square feet. Larger systems (like cisterns) need more room—plan for at least 10–20 square feet per 1,000 gallons of storage. Urban gardens often use vertical or wall-mounted solutions to save space.
Can I use harvested rainwater for all my plants, or are some unsafe?
Rainwater is generally safe for edible plants (veggies, herbs, fruits) if collected properly—just avoid storing it in metal containers (which can leach toxins) and use first-flush diverters to skip the first dirty runoff. Never use it for plants sensitive to pH changes, like blueberries or azaleas, unless you test and treat the water.
What do I do if my harvested water smells or looks cloudy?
Cloudy water? It’s likely silt or algae—install a fine mesh filter or let it settle before use. Funky smells? Stagnant water breeds bacteria. Add a small pump or aerator, clean your tank annually, and consider a barley straw treatment (natural algae inhibitor) to keep it fresh.
Are there alternatives if I can’t install a full system?
Start small with DIY swales (shallow trenches to redirect rainwater) or permeable pavers in walkways. Even a leaky hose buried in a planting bed can slowly distribute water. For apartments, use collapsible fabric tanks or repurpose buckets with diverters.
Wrapping up and next steps
Creating a rainwater harvesting garden isn’t just an eco-friendly move—it’s a smart, sustainable way to save water, cut costs, and nurture your green space year-round. 🌧️🌱 With simple systems and a few key materials, you can transform even small spaces into water-wise oases.
Whether you’re a seasoned gardener or just starting, every drop counts!
Ready to take the next step? Start small—assess your space, gather supplies, and design a system that fits your needs. Your garden (and the planet) will thank you!