Tools
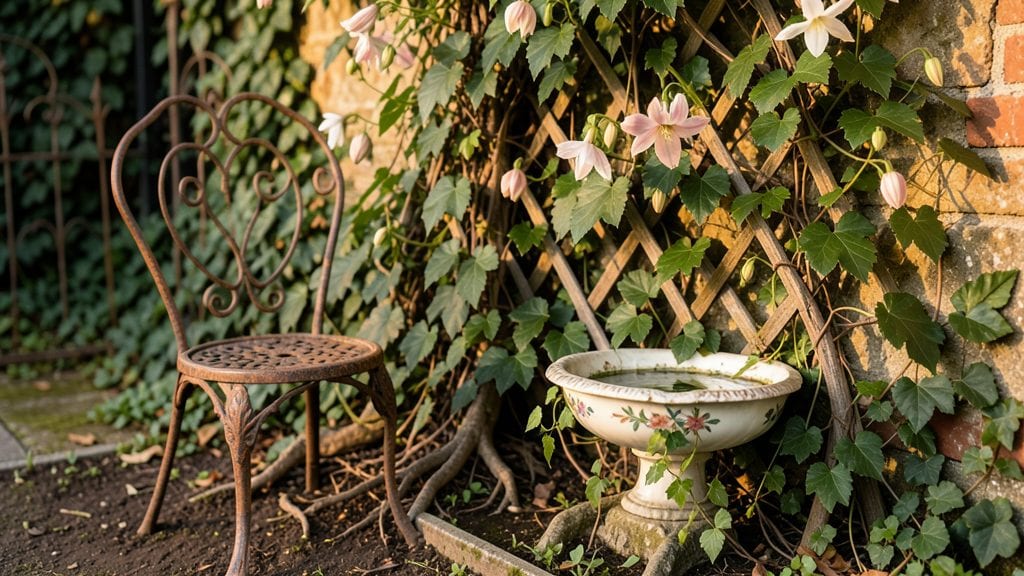
Transforming a forgotten corner into a secret garden room lets you reclaim privacy and beauty without sacrificing yard space. I stumbled upon this idea after my urban backyard felt too exposed—until I built a cozy nook behind my shed, screened by climbing roses and bamboo.
The result? A quiet retreat where I can sip tea surrounded by fragrant jasmine, all while keeping the neighbors at bay.
This isn’t about grand designs—just clever vertical layouts. You’ll need trellises, lattice panels, or even repurposed furniture with built-in shelves for plants. Fragrant climbers like clematis or sweet peas add scent without taking up ground space, while tall grasses or ivy create natural privacy screens.
The best part? It works in 10x10-foot areas or smaller, proving that hidden gardens aren’t just for estates.
Imagine stepping into a world where sunlight filters through dappled leaves, and the air hums with the scent of blooming flowers. Your secret garden room could feature a built-in bench, a hanging chair, or even a mini greenhouse corner.
The key is layering plants—tall backdrops, mid-height shrubs, and trailing vines—to create depth and intrigue. Every visit feels like discovering a new secret.
This approach works for any yard size, from cramped city lots to suburban backyards. Start small—maybe a single trellis with morning glories—and expand as you go. The magic happens when you blend function (privacy, seating) with nature’s quiet charm. Ready to carve out your own little escape?
📚 In This Guide
- What you need
- Instructions
- Tips and common mistakes
- Wrapping up and next steps
What you need
- ● Wooden pallets or framing lumber – 4–6 pallets (or 2x4s/2x6s for custom builds) for vertical structures.
- ● Plywood or OSB sheets – ½" to ¾" thick, cut to fit your design (e.g., 4’x8’ panels for walls/ceilings).
- ● Exterior-grade screws/nails – 2"–3" deck screws (100–200 pieces) for durability.
- ● Waterproof sealant – 1 gallon (e.g., spar urethane or exterior wood stain) to protect against moisture.
- ● Garden fabric or landscape fabric – 10’x10’ roll (to line pallets and prevent soil loss).
- ● Potting soil or hydroponic mix – 2–4 cubic feet (depending on plant volume).
- ● Plants! – Trailing vines (e.g., ivy, pothos), herbs (basil, thyme), or flowers (petunias, ferns).
- ● Hinges and latches – 2–4 (for foldable or access-panel designs).
- ○ Solar-powered LED lights – 2–4 (optional but magical for ambiance!).
- ● Power drill/driver – Cordless for convenience.
- ● Circular saw or miter saw – For precise cuts (rent if needed).
- ● Measuring tape & level – Essential for alignment.
- ● Paintbrush or roller – For applying sealant.
- ● Staple gun – To secure garden fabric.
- ● Safety gear – Gloves, goggles, and ear protection.
- ● Decorative trim or lattice – For a polished look.
- ● Small bench or stool – Fits snugly inside your garden room.
- ● Automatic watering system – Drip irrigation kit for low-maintenance greenery.
- ● Moss or living wall panels – Pre-grown for instant lushness.
- ● Privacy screen or sheer curtain – Adds a cozy, secluded vibe.
Instructions for creating space-saving vertical layouts in small yards
Turn limited space into a lush, functional garden paradise with these vertical design strategies.
Assess Your Space and Choose Vertical Structures
Start by measuring your yard's dimensions and identifying vertical surfaces like walls, fences, or trellises. I focus on structures that can support weight—wooden pallets, metal grids, or sturdy wire frames work best. For a 4-foot tall wall, a 3-foot wide tiered planter adds valuable growing space without crowding the ground. Look for spots that receive at least 6 hours of sunlight daily, as most vertical gardens thrive in bright conditions.
If you're working with a shady area, opt for shade-tolerant plants like ferns, ivy, or hostas. The key is to match your vertical structure to the sunlight your space receives. For example, a south-facing wall is ideal for sun-loving herbs and vegetables, while an east-facing fence suits plants that prefer morning light.
Install Support Systems and Prepare Growing Medium
Begin by securing your vertical structure to the wall or fence using L-brackets or heavy-duty screws—this prevents tipping, especially after watering. For wooden pallets, I drill drainage holes in the bottom to avoid waterlogging. Once installed, line the structure with landscape fabric to block weeds and retain moisture. Fill each pocket or tier with a lightweight potting mix designed for containers, as it drains well and won’t compact over time.
Don’t skip the drainage layer—place 1-2 inches of gravel or perlite at the bottom of each section to prevent root rot. This small step makes a huge difference in keeping plants healthy. If you’re using a pre-made vertical garden system, follow the manufacturer’s instructions for assembly and filling, but always prioritize drainage.
Select Plants for Vertical Growth
Choose plants that naturally thrive in vertical spaces, such as trailing vines, compact shrubs, or herbs with bushy growth habits. For example, nasturtiums, strawberries, and cherry tomatoes cascade beautifully from hanging pockets, while rosemary, thyme, and mint grow well in shallow tiers. I avoid heavy plants like pumpkins or large squash in vertical setups—they’ll weigh down the structure over time.
When planting, space smaller plants like herbs 4-6 inches apart and larger vines 8-12 inches apart to allow airflow and prevent disease. Water thoroughly after planting to help roots establish in the new medium. If you’re using succulents or drought-tolerant plants, reduce the potting mix’s moisture retention by mixing in sand or pumice for better drainage.
Water and Maintain Your Vertical Garden
Water your vertical garden deeply 2-3 times per week, depending on your climate and plant types. I use a gentle spray nozzle to avoid displacing soil or damaging delicate plants. Check the moisture level by sticking your finger 1 inch into the soil—if it feels dry, it’s time to water. Drip irrigation systems work well for vertical gardens, delivering water directly to the roots without waste.
Fertilize every 4-6 weeks with a balanced, water-soluble fertilizer to support growth. Prune leggy or overgrown plants regularly to maintain shape and encourage bushier growth. For example, pinching back the tips of basil or thyme keeps them compact and productive. Watch for pests like aphids or spider mites, which can hide in the crevices of vertical structures—treat them early with neem oil or insecticidal soap to avoid infestations.
Expand and Rotate Plants Seasonally
As your vertical garden matures, rotate plants seasonally to keep it thriving. In early spring, swap out winter-hardy plants like pansies for warm-season favorites such as peppers, eggplants, or basil. Use the space efficiently by growing fast-maturing crops like radishes or lettuce in the cooler months, then transitioning to tomatoes or cucumbers as temperatures rise.
Add vertical elements like trellises for climbing beans or peas to maximize space further. If you notice any plants struggling, such as yellowing leaves or stunted growth, adjust their position or provide additional support. A well-maintained vertical garden can produce harvests year-round with the right planning and care.
Tips & tricks for perfect vertical garden layouts
Transforming your small yard into a functional vertical garden doesn't have to be complicated—these practical tips will help you maximize every inch of space while avoiding common pitfalls.
Structure Stability: When securing your vertical structures to walls or fences, use at least two L-brackets or heavy-duty screws per section. I learned this the hard way after watching a 4-foot tall pallet planter tip forward during a watering session. For extra security, add a third anchor point at the top, especially if you're growing heavy plants like strawberries or tomatoes in the upper tiers. The key is to distribute weight evenly and prevent any wobbling that could damage your plants or the structure itself.
Drainage is Non-Negotiable: The 1-2 inches of gravel or perlite at the bottom of each section isn't just a suggestion—it's essential for preventing root rot. I recommend using a mix of both materials: gravel for initial drainage and perlite to maintain air pockets in the soil. For wooden pallets, drill holes not just at the bottom but also along the sides if you're creating multiple planting pockets. This ensures water can escape from all angles, preventing waterlogged soil that smothers roots.
Sunlight Strategy: The 6 hours of daily sunlight requirement is a guideline, but don't just take my word for it—test your space first. Use a simple sunlight tracker app to monitor how much light different areas receive throughout the day. South-facing walls typically get the most consistent sunlight, but east-facing areas often provide perfect morning light for plants that prefer cooler conditions. If you're working with limited sunlight, choose shade-tolerant plants like ferns or ivy, but be prepared for slower growth compared to sun-loving varieties.
Plant Spacing Matters: Those 4-6 inch and 8-12 inch spacing recommendations aren't arbitrary—they're based on how plants grow in vertical spaces. Herbs like rosemary and thyme can handle the closer 4-6 inch spacing because they grow in compact bushes, while vining plants need the extra room to spread without crowding their neighbors. Pro tip: When planting in shallow tiers, create small mounds of soil in the corners to give plants more root space without taking up valuable growing area in the center.
Pro Tips for Secret Garden Rooms
- Transforming your small yard into a functional vertical garden doesn't have to be complicated—these practical tips will help you maximize every inch of space while avoiding common pitfalls.
- Structure Stability: When securing your vertical structures to walls or fences, use at least two L-brackets or heavy-duty screws per section.
- Drainage is Non-Negotiable: The 1-2 inches of gravel or perlite at the bottom of each section isn't just a suggestion—it's essential for preventing root rot.
Frequently asked questions
Got questions about transforming your small yard into a lush, space-saving secret garden room? Here are some of the most common inquiries—and their answers—to help you get started with confidence!
What’s the best way to maximize space in a secret garden room?
Prioritize vertical growth with trellises, wall-mounted planters, and tiered shelves. Use multi-functional furniture like foldable benches with built-in storage or wall-mounted tables. Even small spaces can feel expansive with strategic lighting (e.g., solar-powered path lights) and mirrors to create depth.
How long does it take to build a secret garden room?
Timing depends on complexity! A basic DIY project with pre-fabricated materials (like modular planters or a small greenhouse kit) can take 1–3 weekends. Custom builds with masonry, irrigation, or unique structures may require 4–8 weeks. Plan for seasonal weather delays if planting live greenery.
Are there affordable alternatives to expensive garden rooms?
Start with upcycled materials—pallets for vertical gardens, old windows as shelves, or repurposed crates. Thrift stores often have affordable planters, and DIY kits (like bamboo trellis systems) cut costs. Even a $50–$100 investment in climbing plants (e.g., ivy or jasmine) can transform a corner into a green oasis.
How do I protect my secret garden room from rain or pests?
Use weather-resistant materials like cedar wood, galvanized metal, or treated bamboo. Add a clear polycarbonate roof or tarp for overhead protection, and install fine mesh screens on vents. For pests, opt for natural deterrents like marigolds (repel insects) or companion planting (e.g., basil near tomatoes). Regularly check for moisture buildup to prevent mold.
What’s the most common mistake beginners make?
The top error? Overcrowding plants or ignoring drainage. Without proper spacing, plants compete for sunlight/nutrients, and poor drainage leads to root rot. Start with 3–5 key plants (e.g., herbs, succulents, or trailing vines) and use containers with drainage holes. Sketch a layout first—even a rough sketch—to visualize growth patterns!
Wrapping up and next steps
Transforming your small yard into a lush, functional secret garden room is all about creativity and smart planning! These vertical layouts maximize space while adding charm and serenity—perfect for cozy retreats, hidden workspaces, or tranquil escapes.
Whether you’re a DIY enthusiast or dreaming of a pro-built oasis, the key is starting small and letting your vision grow.
Ready to turn your vision into reality? Sketch your layout today—jot down ideas, measure your space, and explore materials. Then, dive into building or designing your dream garden room! 🌿✨