
Tools
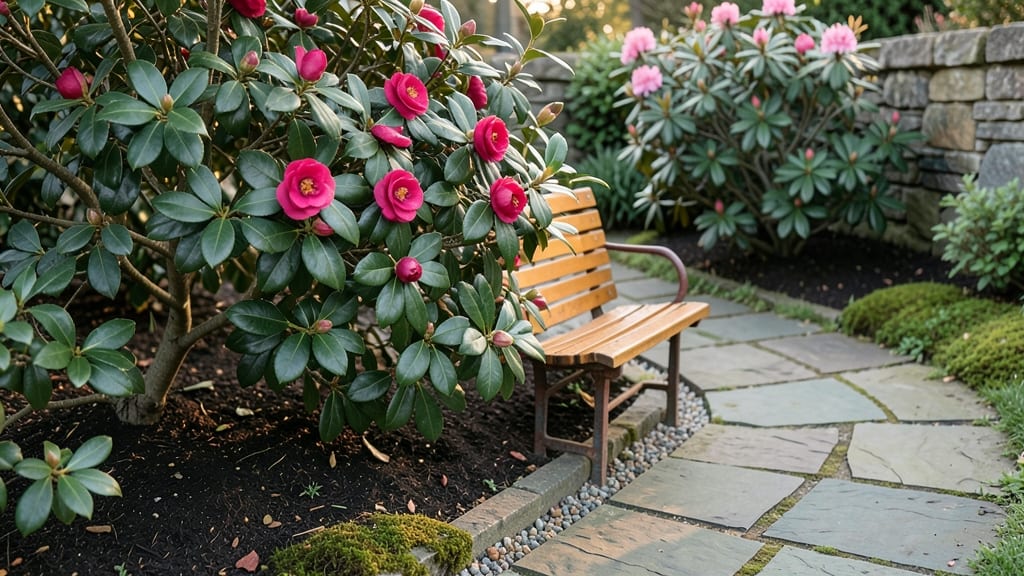
Your tea garden layout should feel like stepping into a secret world where every path invites you to pause and sip. I designed mine around winding gravel paths that weave through camellia bushes and bamboo screens, creating intimate nooks perfect for afternoon tea.
The key is balancing structure with softness—stone steps lead to tiered seating areas, while water features add the gentle sound of a trickling stream to complete the ambiance.
Start with a focal point, like a small pavilion or a decorative stone lantern, to anchor your design. Use gravel or stepping stones for pathways to keep maintenance low while adding texture, and layer plants for seasonal interest—think hostas for shade, hydrangeas for color, and ornamental grasses for movement.
Climate matters too: in hotter zones, add shade cloth or fast-growing vines to protect seating areas from midday sun.
You’ll end up with a space that’s both functional and dreamy—where the scent of jasmine lingers in the air and every seat feels like a private retreat. The layout works for small urban courtyards or sprawling backyard escapes, as long as you prioritize cozy corners over grand vistas.
Think of it as a garden that hugs you back.
Fair warning: once you build one, you’ll want to add more nooks. My original plan had two seating areas—now there are four. The magic happens in the details, like a mosaic stepping stone here or a hand-painted screen there. Start small, and let the space grow with you.
📚 In This Guide
- What you need
- Instructions
- Tips and common mistakes
- Wrapping up and next steps
What you need
- ● Soil & Fertilizer: Topsoil (2–3 cubic yards, depending on garden size)
- ● Compost or well-rotted manure (1–2 bags or 1 cubic yard)
- ● Balanced organic fertilizer (e.g., 10-10-10, 10 lbs)
- ● Plants & Greenery: Tea plants (Camellia sinensis or ornamental varieties, 5–10 plants)
- ● Privacy shrubs (e.g., boxwood, hydrangea, or bamboo; 10–20 plants)
- ● Flowering plants (e.g., azaleas, roses, or clematis for color; 5–15 plants)
- ● Ground cover (e.g., ivy, clover, or moss; 1–2 bags)
- ● Structural Elements: Garden trellises or arbors (2–4, depending on layout)
- ● Tiered planters or raised beds (1–3, for tea plants)
- ● Decorative stones or pebbles (1–2 bags, for pathways)
- ● Shovel and spade (for digging)
- ● Garden trowel (for precision planting)
- ● Wheelbarrow (for hauling soil and plants)
- ● Pruning shears (for shaping plants)
- ● Measuring tape and stakes (for layout planning)
- ● Garden hose with spray nozzle (for watering)
- ● Level (to ensure even pathways and structures)
- ○ Optional: String and stakes (for marking pathways or plant spacing)
- ● Whimsical decor: Wind chimes, vintage teacups, or fairy lights
- ● Comfortable seating: Wicker chairs, a hammock, or a cozy bench
- ● Shade solutions: Umbrellas, pergolas, or sun sails
- ● Tea station: A small table with a kettle, teapot, and cups
Step-by-Step instructions for designing a tea garden layout
Creating a cozy tea garden feels like crafting a secret retreat—here’s how to shape pathways and nooks that invite lingering.
Define Your Core Seating Areas
Start by identifying where you’ll place your 4 seating spots—these anchor the entire layout. I like to use a mix of built-in benches, vintage chairs, and small tables for variety. Position them where morning sun spills in, or where afternoon breezes carry the scent of herbs. The key is privacy: arrange seating so each spot feels secluded, even if they’re close together.
Sketch a rough outline on paper first. Mark each seating area with a circle, then draw lines between them to visualize pathways later. This prevents awkward gaps or cramped spaces. I’ve found that 3-foot-wide paths between seats create just enough room for easy movement without overwhelming the garden’s intimate feel.
Plan Whimsical Pathways Between Spots
Forget straight lines—tea gardens thrive on curves. Use stepping stones, gravel, or winding brick paths to connect your seating areas. I prefer stepping stones because they add a playful, uneven rhythm, but gravel works beautifully for a softer, more natural look. The goal is to make the garden feel like a journey, not a straight route.
Leave 18-inch-wide paths around seating areas for easy access. Test your design by walking through it—if you feel cramped or exposed, adjust the curves or add a small hedge for screening. Here’s the thing: the best tea gardens feel like a series of little surprises around every bend.
Create Tiered Privacy Nooks
Privacy is everything in a tea garden. Use tall shrubs, trellises with climbing roses, or even a small arbor to frame each seating area. I often plant ornamental grasses or bamboo along path edges—they sway gently and add texture without blocking views. For instant privacy, a 6-foot-tall lattice panel draped with ivy works wonders.
Add vertical layers with small pergolas or arbors over seating areas. These not only provide shade but also create a cozy, enclosed feeling. Place them where they’ll cast dappled light—perfect for sipping tea on sunny days. If you’re short on space, even a tall, narrow evergreen can act as a living room divider.
Incorporate Functional and Decorative Plants
Tea gardens need both beauty and utility. Plant fragrant herbs like lavender, mint, or lemon balm near seating areas—their scents enhance the experience. I also include low-growing perennials like creeping thyme or ajuga to soften pathways and fill gaps. These plants stay lush with minimal care and add color year-round.
Add a few statement plants—like a small tree with interesting bark or a climbing rose—to draw the eye. These focal points make the garden feel intentional, not random. Avoid overcrowding; give each plant 12-24 inches of space depending on its mature size. You’ll love how the garden evolves over time, with layers of color and texture.
Add Finishing Touches for Ambiance
Lighting transforms a tea garden into a magical evening retreat. Install solar-powered path lights along walkways and small lanterns near seating areas. String fairy lights overhead for a whimsical glow. I also place wind chimes or a small fountain to add soothing sounds—nothing sets the mood like the gentle tinkle of water.
Finally, add personal touches like a small chalkboard menu for tea flavors or a vintage teapot display on a shelf. These details make the garden feel like your sanctuary. Step back and admire your work—you’ve just designed a space where every sip feels like a celebration.
Tips & tricks for perfect tea garden layout
A few thoughtful adjustments can transform your tea garden from ordinary to extraordinary—here’s how to elevate every detail.
Visualize Before You Plant: Grab a large sheet of paper and sketch your tea garden layout to scale. Use different colored markers for seating areas, pathways, and plantings—this helps you spot awkward gaps or awkward sightlines before you dig. I’ve found that placing seating areas along the longest views of your garden creates the most satisfying experience, especially when morning light illuminates them.
Pathway Proportions: The 3-foot-wide paths between seating areas in Step 1 are perfect for two people to walk comfortably side by side, but don’t forget to leave those 18-inch-wide service paths around each spot. These narrow paths allow you to easily reach your teapot or refreshments without disturbing the peaceful atmosphere. For a more intimate feel, consider alternating between stepping stones and gravel paths—this creates visual interest while maintaining functionality.
Privacy Layering: When creating tiered privacy nooks in Step 3, think vertically first. A 6-foot-tall lattice panel might seem tall, but it’s actually perfect for creating instant privacy while still allowing light to filter through. For even more coziness, add climbing roses that will eventually drape over your pergolas or arbors—this creates a living canopy that changes with the seasons. I’ve seen gardens where people added a second layer of bamboo screening behind seating areas, which works beautifully for wind protection too.
Plant Placement Strategy: In Step 4, those fragrant herbs like lavender and mint aren’t just for looks—they should be placed where you’ll actually sit. The scent of lemon balm wafting up when you pour your tea makes the experience truly special. For statement plants, position them where they’ll frame your seating areas rather than compete with them. A small tree with interesting bark makes a stunning focal point when placed at the end of a pathway, drawing the eye naturally.
Pro Tips for Tea Garden Layout
- A few thoughtful adjustments can transform your tea garden from ordinary to extraordinary—here’s how to elevate every detail.
- Visualize Before You Plant: Grab a large sheet of paper and sketch your tea garden layout to scale.
- Pathway Proportions: The 3-foot-wide paths between seating areas in Step 1 are perfect for two people to walk comfortably side by side, but don’t forget to leave those 18-inch-wide service paths around each spot.
Frequently asked questions
Got questions about designing your dream tea garden layout?
You’re not alone! Here are some of the most common queries—and their practical answers—to help you craft a space that’s as functional as it is enchanting.
What’s the best size for a tea garden layout?
A cozy tea garden can start as small as 10x10 feet for a intimate seating area, while larger layouts (20x30+ feet) allow for tiered terraces, shaded nooks, and even a mini water feature. Prioritize space for seating, pathways, and plants—aim for at least 3-4 feet between seating and plants for easy movement. If space is tight, vertical gardens or hanging planters can maximize greenery!
When is the ideal time to plant and arrange a tea garden?
The best times are early spring (after frost) or early fall when temperatures are mild. Start with perennials (like lavender or hydrangeas) in spring, then add seasonal annuals (e.g., impatiens or begonias) for year-round color. If you’re laying pathways or hardscapes, do that 6-8 weeks before planting to let soil settle. Pro tip: Mulch after planting to retain moisture and suppress weeds!
How can I create privacy in a tea garden without blocking views?
Use tiered planting—layer shrubs (e.g., bamboo or boxwood) at different heights to create natural screens. For a softer look, try ornamental grasses or climbing vines (like clematis) on trellises. If you love open views, opt for lattice panels or semi-transparent screens that add texture without full obstruction. A low hedge (2-3 feet tall) along pathways also adds charm while keeping things airy!
What are some low-maintenance alternatives to traditional tea garden materials?
Skip the high-upkeep options! Swap stone pathways for gravel or decomposed granite (easy to repair and drains well). Use plastic or composite decking instead of wood for seating—it resists rot and pests. For planters, fiberglass or lightweight ceramic containers need less watering than wood. And choose drought-tolerant plants (e.g., succulents, rosemary, or sedum) to cut back on irrigation. Bonus: Self-watering planters reduce chores too!
Troubleshooting: My tea garden layout feels cramped—how can I fix it?
If your space feels tight, edit ruthlessly—remove overgrown plants or bulky furniture. Add mirrors or reflective surfaces to create the illusion of more room. Opt for multi-functional furniture, like benches with storage underneath. For pathways, widen them slightly (even by 1 foot) to improve flow. If all else fails, go vertical! Add hanging chairs, wall-mounted planters, or a pergola to free up floor space. Quick fix: A pop of bright paint on a fence or trellis can make small areas feel bigger.
Wrapping up and next steps
Designing your dream tea garden is all about blending functionality with enchantment—whether that’s winding pathways for serene strolls or cozy nooks for sipping Earl Grey in the sun. 🌿 With the right layout, you’ll create a space that’s as practical as it is magical, perfect for relaxation or entertaining guests.
Ready to bring your vision to life? Start small—sketch a rough design, gather your materials, and take the first step toward crafting your own tranquil retreat. Your perfect tea garden awaits!