
Tools
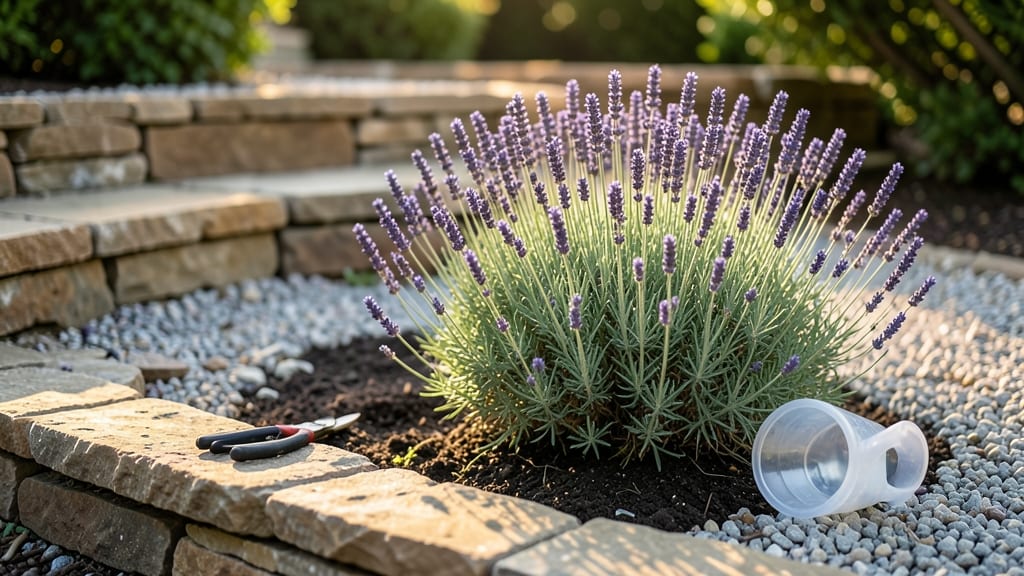
A terraced hillside garden turns steep slopes into stunning, functional layers that stop erosion and create drama. 🌿 I’ll never forget the first time I saw how terraces tamed a wild, muddy hillside into a lush, walkable garden—it changed how I thought about challenging spaces.
The key isn’t just building walls; it’s designing each tier to work with gravity, rain, and sunlight to keep plants thriving all year.
You’ll need sturdy materials—stone, wood, or concrete blocks—to create stable edges, along with fabric or gravel for drainage. Native plants with deep roots (like creeping juniper or switchgrass) anchor the soil, while ornamental choices add color and texture.
I’ve seen terraces in dry climates packed with drought-tolerant lavender and in rainy zones bursting with ferns—adaptability is the real secret weapon.
By the end, you’ll have a garden that feels like a masterpiece, not a chore. Imagine stepping through tiers of blooms, harvesting herbs at every level, or simply enjoying the way sunlight dances across the layered greenery.
The best part? Once built, terraces need minimal upkeep—just occasional weeding and replanting to keep them vibrant.
Perfect for rocky yards, steep backyards, or even small urban lots with elevation changes. Let’s get those slopes transformed into something breathtaking—and functional—year after year.
📚 In This Guide
- What you need
- Instructions
- Tips and common mistakes
- Wrapping up and next steps
What you need
- ● Retaining Walls: Natural stone (e.g., limestone, sandstone) – 200–500 lbs per tier, depending on size
- ● Timber (cedar or redwood) – 2x6 or 2x8 boards, 8–12 ft long
- ● Concrete blocks (interlocking) – Quantity based on tier dimensions
- ● Soil & Drainage: Topsoil – 1–2 cubic yards per tier
- ● Gravel (1/2"–1") – 1–2 bags per tier for drainage
- ● Landscape fabric – Enough to line tiers (10–20 ft rolls)
- ● Plants & Mulch: Native shrubs/perennials (e.g., lavender, sedum) – 5–10 plants per tier
- ● Mulch (wood chips or straw) – 2–3 bags per tier
- ● Shovel & spade – For digging and leveling
- ● Wheelbarrow – For hauling soil/gravel
- ● Level & measuring tape – Precision is key!
- ● Wheelbarrow or dolly – For moving heavy materials
- ● Safety gear (gloves, goggles, knee pads) – Because hillsides are no joke!
- ● Erosion control blankets – For steep slopes
- ● Drip irrigation kit – For low-maintenance watering
- ● Decorative edging (metal or stone) – For polished tiers
- ● Outdoor lighting (solar-powered) – For nighttime ambiance
Instructions for building a terraced hillside garden
Here's how I transform steep slopes into lush, functional terraces that stop erosion and bloom year-round.
🪴 Step 1: Design and Mark Terrace Levels
Start by sketching your design on paper first. I like to use a 2-3 foot vertical drop between each terrace for manageable planting depth and good drainage. Measure the slope's total height and divide it by your chosen drop height to determine how many terraces you'll need.
Use a string line stretched between two stakes to mark the first terrace's top edge. Drive a stake at the bottom of your marked level, then use a 4-foot level to transfer the line downhill. Adjust until the line is perfectly horizontal—this ensures even water flow and prevents erosion. Repeat this process for each terrace level, stepping downhill with each new line.
💧 Step 2: Build Retaining Structures
For natural-looking terraces, I use stacked stone walls filled with retained soil. Start with the lowest terrace first, working your way uphill. Lay the first course of stones with the largest, flattest rocks on the bottom for stability. Use smaller stones to fill gaps between larger ones, packing them tightly with landscape fabric behind to prevent soil from seeping through.
Leave drainage gaps every 3-4 feet along the wall to allow water to flow through. These gaps should be about 4-6 inches wide and filled with larger rocks. For steeper slopes, consider using pre-cast concrete blocks with built-in drainage holes—they're faster to install and equally effective.
☀️ Step 3: Install Drainage and Soil Layers
Before adding soil, lay down landscape fabric across each terrace to prevent weeds from growing up through the layers. Then, add a 4-inch layer of gravel for drainage. This layer is critical—it prevents water from pooling at the base of your plants and keeps roots healthy. I like to use pebbles or crushed stone because they allow water to flow freely while still supporting plant roots.
Next, add 6-8 inches of high-quality topsoil mixed with compost for nutrients. For slopes, I blend in hydro-mulch to help hold the soil in place while plants establish. Spread the mix evenly across the terrace, creating a slight crown in the center to encourage water to flow toward the edges and into the drainage gaps.
🌱 Step 4: Plant for Stability and Beauty
Start with deep-rooted ground covers like creeping phlox, sedum, or ornamental grasses along the edges of each terrace. These plants will help stabilize the soil immediately. For the center of each terrace, plant a mix of perennials, shrubs, and small trees that suit your climate. I like to use layered planting—tall plants in the back, medium-height in the middle, and low-growing plants in front.
Space plants according to their mature size, leaving 12-18 inches between each plant for smaller perennials and 3-5 feet for shrubs and trees. Water deeply after planting to settle the soil and encourage roots to grow into the new space. Mulch with 2-3 inches of organic mulch to retain moisture and suppress weeds.
⏰ Step 5: Maintain and Expand Over Time
Check your terraces after heavy rains to ensure water is flowing through the drainage gaps as intended. If you notice erosion or soil slipping, add more landscape fabric or reinforce the edges with additional stones. I also like to top-dress with compost every spring to replenish nutrients and encourage lush growth.
As your plants mature, you'll notice some terraces may need widening or additional support. This is normal—terraces evolve with your garden. Over time, you can add walkways, seating areas, or even small water features to enhance the beauty and functionality of your hillside garden.
Tips & tricks for perfect terraced hillside gardens
Transforming a steep slope into a stunning terraced garden takes careful planning—and these tips will help you avoid common pitfalls while creating a landscape that thrives year-round.
Design Tip: In Step 1, when sketching your terrace levels, consider adding a slight 1-2% slope within each terrace toward the drainage gaps. This subtle angle helps water naturally flow toward the edges, preventing pooling in the center. I've found this small detail makes all the difference in preventing water damage and keeping plants healthy.
Material Strategy: For Step 2, if you're using natural stones, collect them from your property first to save money and reduce environmental impact. If you need to purchase stones, look for flat, irregularly shaped rocks with good weight—they'll interlock better and provide stronger support. For the drainage gaps, I recommend using larger river rocks that won't get clogged with soil over time.
Soil Preparation: When installing your soil layers in Step 3, mix in 10-20% perlite or coarse sand with your topsoil and compost. This improves drainage while maintaining moisture retention—critical for terraces where water can pool. I also recommend testing your soil's pH before planting; most ornamental plants prefer a slightly acidic to neutral range (pH 6.0-7.0).
Plant Selection: In Step 4, choose plants with deep taproots for the terrace edges—these will anchor the soil immediately. For the center planting, select a mix of drought-tolerant perennials and native shrubs—they'll require less maintenance once established. I've had great success with lavender, Russian sage, and butterfly bush in my own terraces because they thrive in well-drained conditions.
Pro Tips for Terraced Hillside Garden
- Transforming a steep slope into a stunning terraced garden takes careful planning—and these tips will help you avoid common pitfalls while creating a landscape that thrives year-round.
- Design Tip: In Step 1, when sketching your terrace levels, consider adding a slight 1-2% slope within each terrace toward the drainage gaps.
- Material Strategy: For Step 2, if you're using natural stones, collect them from your property first to save money and reduce environmental impact.
Frequently asked questions
Got questions about creating or maintaining a terraced hillside garden?
Here are answers to some of the most common ones to help you get started—or troubleshoot—with confidence!
What’s the best time of year to start building terraces?
The ideal time is early spring or fall when the ground is workable but not frozen. Spring lets you plant immediately, while fall gives roots time to establish before winter. Avoid rainy seasons—muddy soil makes digging and leveling harder! If you’re in a mild climate, you can also start in late winter.
Are terraced gardens more expensive than flat gardens?
Yes, they often cost more upfront due to labor, materials (like retaining walls), and soil delivery for hilly areas. However, terraces reduce erosion, save water, and extend growing seasons, so they can pay off long-term. Start small if budget is tight—focus on one terrace first and expand gradually!
How do I prevent erosion between terraces?
Use a mix of gravel, mulch, or ground covers (like creeping thyme or clover) to stabilize soil. Install swales (shallow trenches) to redirect water flow, and ensure terraces have a slight backward slope (1-2%) to channel rainwater inward. Regularly check for gaps in retaining walls or drainage pipes!
Can I use terraces for vegetables, or are they just for ornamental plants?
Terraces are perfect for veggies—they improve drainage, reduce pests, and let you grow crops like tomatoes, peppers, or herbs in sunny spots. Just ensure each terrace has well-draining soil (amend with compost) and space for root growth. Raised beds within terraces work especially well for heavy feeders like corn or squash.
What should I do if my terraces are sinking or collapsing?
Check for poor drainage, root damage, or shifting soil first. Reinforce retaining walls with landscape fabric or additional stones, and add more backfill soil if gaps appear. For severe issues, consult a local erosion specialist—they can assess whether deeper support (like helical piers) is needed. Act fast to prevent further erosion!
Wrapping up and next steps
Creating a terraced hillside garden transforms steep slopes into stunning, functional spaces that thrive year-round—whether you dream of lush greenery, vibrant blooms, or a cozy retreat. With the right planning, materials, and a dash of creativity, you’ve got everything you need to turn your vision into reality. 🌿✨
Ready to take the next step? Start small—pick one terrace, gather your tools, and let your green thumb guide you. Before you know it, your hillside will be a masterpiece of layered beauty that neighbors will envy!