
Propagation
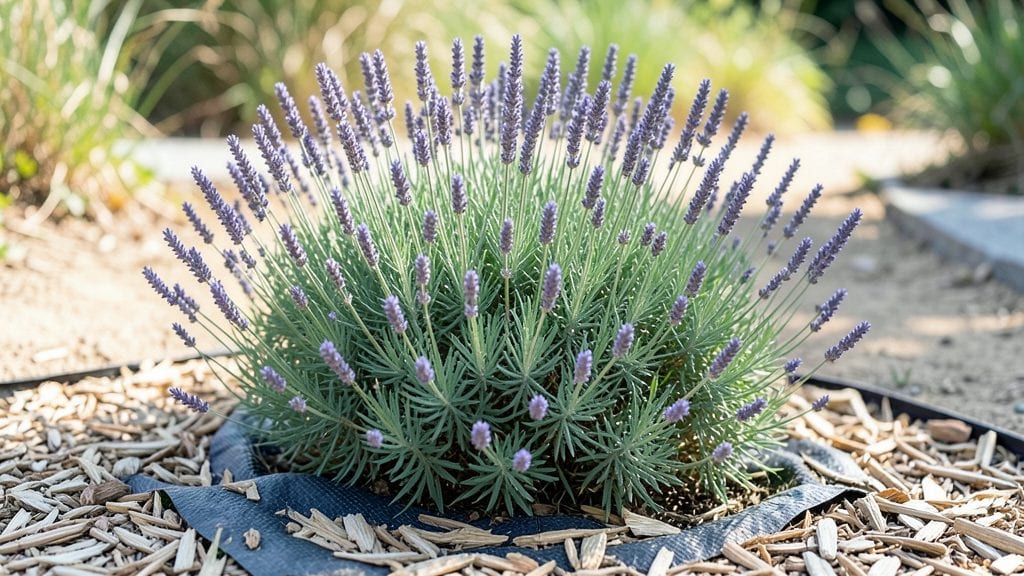
Mastering how to stop weeds from growing in garden is like winning a silent battle—no one sees the effort, but the results speak for themselves. 🌱 I learned the hard way that pulling weeds one by one is just a temporary fix. fix; the real solution is smothering them with layered mulch that cuts off sunlight and chokes their growth permanently.
The secret isn’t just piling up straw or leaves—it’s combining materials to create a dense, long-lasting barrier. Start with cardboard or thick newspaper to block light, then add 3-4 inches of shredded leaves or straw, and top it with 2-3 inches of wood chips or pine needles.
This setup stays in place for months, breaking down slowly while keeping weeds at bay.
Within weeks, you’ll notice fewer weed sprouts pushing through, and the soil stays moist longer, reducing future growth. The mulch also feeds your plants as it decomposes, turning a chore into a two-for-one victory.
Once you see how much easier garden maintenance becomes, you’ll never go back to weeding by hand.
Works for flower beds, vegetable patches, and even between stepping stones—just adjust the thickness based on your weed pressure. The key is consistency: refresh the mulch layer every 6-12 months, and you’ll have a weed-free garden that actually stays that way.
📚 In This Guide
- What you need
- Instructions
- Tips and common mistakes
- Wrapping up and next steps
What you need
- ● Cardboard or thick newspaper – At least 4-6 sheets per 10 sq. ft. (avoid glossy ink).
- ● Compost or well-aged manure – 2-3 inches (enriches soil while blocking light).
- ● Straw or wood chips – 3-4 inches (organic mulch breaks down slowly).
- ● Garden shears or scissors – For cutting cardboard/newspaper to size.
- ● Garden hose or watering can – To moisten layers (prevents shifting).
- ● Gloves – Protects hands from prickly mulch and sharp edges.
- ○ Optional: Landscape fabric – Heavy-duty (3-4 oz. per sq. yd.) if weeds are stubborn.
- ● Pine needles or leaves – Adds acidity-loving plants prefer.
- ● Compost tea or mulch activator – Speeds up decomposition.
- ● Rocks or gravel – Top layer for pathways (keeps mulch in place).
- ● Weed barrier cloth – Reusable for long-term suppression.
Step-by-Step guide to creating a permanent weed barrier with layered mulch
Here's the foolproof method I use to choke out weeds for good—no digging, no chemicals, just smart layering.
🪴 Step 1: Clear Existing Weeds and Debris
Start by removing any existing weeds, grass, or debris from your garden bed. I like to use a sturdy garden fork to loosen the soil and pull weeds at the root—this prevents regrowth. Work in sections about 2 feet wide to avoid exhausting yourself. If you spot stubborn weeds like dandelions, pull them first—they'll spread seeds if left behind.
Rake the area smooth afterward, removing any remaining roots or stones. The goal is a clean, even surface where your mulch layers will settle perfectly. If you're working in a sunny spot, do this early in the morning to avoid wilting plants or overheating the soil.
🌱 Step 2: Lay Down a Thick Layer of Cardboard or Newspaper
Cover the entire bed with overlapping sheets of cardboard or thick newspaper, ensuring no gaps where weeds could poke through. I use the flat side down for cardboard—this prevents it from curling up as it decomposes. Shiny paper sides should face upward to block light from reaching weed seeds below.
For corners or edges, tuck the layers under slightly to create a seamless barrier. This step is critical—if light sneaks through, weeds will still sprout. If you’re covering a large area, weigh down the edges with rocks or bricks temporarily until you add the next layer.
✂️ Step 3: Add a 2-3 Inch Layer of Coarse Mulch
Spread a 2-3 inch layer of coarse mulch—like wood chips or shredded bark—over the cardboard. This layer blocks light completely while allowing water and air to penetrate the soil below. I like to use wood chips because they break down slowly, maintaining the barrier for years.
Rake the mulch evenly so it’s about 1 inch deep in the center and slightly thicker at the edges. This prevents erosion and keeps the barrier intact during rain. Avoid using fresh grass clippings or untreated sawdust—they can mat down and create a weed-friendly environment.
💧 Step 4: Top With a 1-2 Inch Layer of Fine Mulch
Finish with a 1-2 inch layer of finer mulch, like straw or composted leaves. This top layer helps retain moisture, keeps the coarse mulch in place, and adds nutrients to the soil as it decomposes. I often mix in a little compost here to feed my plants without inviting weeds.
Gently press the mulch down with your hands or a rake to eliminate air pockets. The final layer should look neat and even—no clumps or bare spots. Water lightly afterward to settle everything and encourage the mulch to stay put. Over time, the cardboard will decompose, but the mulch layers will continue blocking weeds.
☀️ Step 5: Maintain and Refresh as Needed
Check your mulch bed every few months to ensure it’s still at least 2-3 inches thick. If it breaks down or shifts, add more coarse mulch to maintain the barrier. I usually refresh mine in early spring and fall—just rake back the top layer, check for weeds, and add fresh mulch as needed.
This system works year-round, even in winter. The thick layers insulate soil, protect plants, and keep weeds from ever getting a foothold. Real talk: once you’ve done this, you’ll wonder why you ever pulled weeds by hand!
Tips & tricks for permanent weed control with layered mulch
Here's what I've learned after years of battling weeds—these tricks make all the difference between a temporary fix and a true weed-free victory.
Layering Matters: The secret to permanent weed control lies in the thickness of your layers. In Step 3, when you're adding that 2-3 inch layer of coarse mulch, think of it as creating a fortress. Light can't penetrate through 3 inches of wood chips, but if you skimp on the 1-2 inch fine mulch layer, you risk gaps forming. I've found that combining both layers creates an impenetrable barrier that even the most determined weed seeds can't crack through.
Cardboard Selection: Not all cardboard works equally well. For Step 2, choose plain, uncoated cardboard without glossy finishes—those shiny sides can reflect light and create gaps where weeds might sprout. I always use plain moving boxes or cereal box cardboard, avoiding anything with wax or tape. If you're using newspaper, make sure it's at least 4-5 sheets thick in any given spot to block light completely.
Edge Management: The edges are where most weed barriers fail. In Step 2, when you're tucking the cardboard under at corners, press firmly to eliminate any gaps. For large beds, I use bricks or pavers to weigh down the edges temporarily until the mulch settles. This prevents wind from lifting the cardboard and creating openings for weeds. A little extra effort here saves hours of weeding later.
Seasonal Refresh Strategy: The maintenance step in Step 5 is where most people give up. I've found that refreshing your mulch in early spring and fall—right before weed seeds germinate—is the key. Set a reminder on your phone for these times. When you rake back the top layer, you'll often find a few weeds that slipped through. Pull these immediately and add a fresh 1-inch layer of coarse mulch to restore the barrier.
Pro Tips for Stop Weeds From Growing In Garden
- Here's what I've learned after years of battling weeds—these tricks make all the difference between a temporary fix and a true weed-free victory.
- Layering Matters: The secret to permanent weed control lies in the thickness of your layers.
- Cardboard Selection: Not all cardboard works equally well.
Frequently asked questions
Got questions about keeping weeds at bay? You’re not alone—here are the most common concerns and straightforward answers to help you maintain a lush, weed-free garden with ease.
What’s the best time of year to apply mulch to prevent weeds?
Apply mulch in early spring (before weeds sprout) or late fall (after plants die back). For perennial weeds like dandelions, mulch in spring when soil is workable but weeds are still small. Replenish mulch every 6–12 months to maintain weed suppression.
How long does it take for mulch to stop weeds from growing?
With a 3–4 inch layer of layered mulch (straw + wood chips + cardboard), you’ll see a noticeable reduction in weeds within 2–4 weeks. For stubborn weeds, it may take 3–6 months of consistent coverage to fully smother them. Patience pays off!
Can I use regular grass clippings as mulch to kill weeds?
Grass clippings alone won’t smother weeds effectively—they decompose too quickly and can mat, trapping moisture (which encourages weeds). Instead, mix them with cardboard or straw for better weed control. For a stronger barrier, opt for shredded leaves or wood chips layered over cardboard.
What do I do if weeds keep growing through the mulch?
If weeds poke through, don’t panic! Add a fresh layer of mulch (especially cardboard or newspaper) over the problem areas. For persistent weeds, hand-pull them before they seed, then reapply mulch. If the issue persists, check for gaps in coverage—weeds thrive where light sneaks through.
Is layered mulching expensive compared to herbicides?
Not at all! A DIY mulch system costs $20–$50 per season (depending on materials), while herbicides can run $30–$100+ annually—and they harm beneficial insects. Mulching also improves soil health and reduces watering needs, saving you money long-term. Win-win!
Wrapping up and next steps
Stopping weeds doesn’t have to be a battle—it’s about strategy! By layering mulch, you’ve taken a proactive step toward a low-maintenance, lush garden that thrives without the hassle. Remember, consistency is key: check your mulch regularly, and soon, you’ll enjoy a weed-free paradise where your plants shine.
Ready to see the magic happen? Start small—pick one bed or corner and apply your mulch layers today. Before you know it, your garden will be the envy of the neighborhood! 🌱✨