
Tools
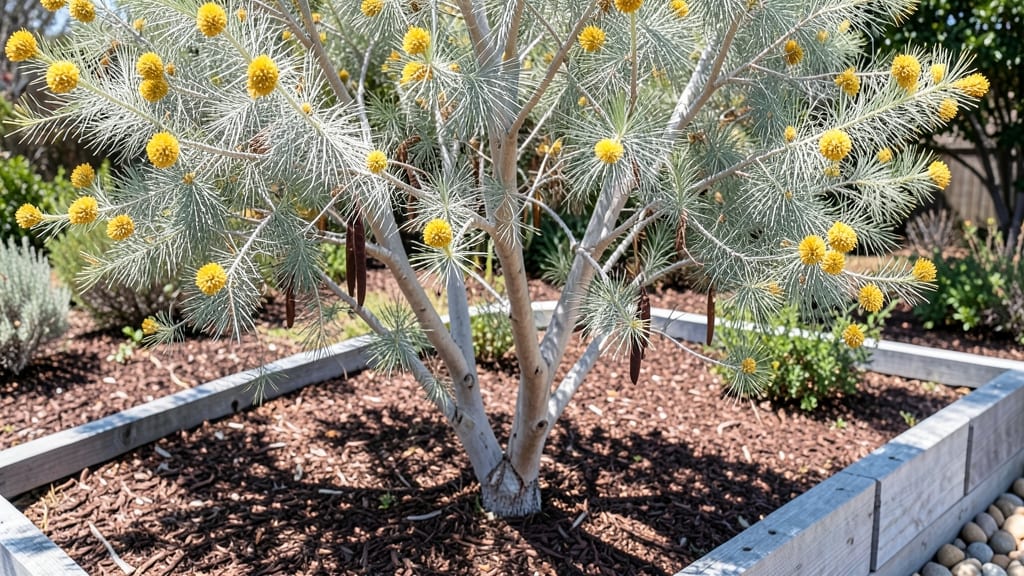
A wattle garden bed transforms bare soil into a lush, living privacy screen that thrives year-round. 🌿 I built mine last spring after struggling with flimsy fences and invasive weeds—this system keeps everything contained while adding beauty and function.
The woven wattle frames create natural barriers that stabilize soil, prevent erosion, and frame plants perfectly, whether you're growing climbers or shrubs.
The best part? It works with native plants that need minimal care. Pair wattle with drought-resistant ground covers like creeping thyme or ornamental grasses for a low-maintenance border. You'll love how it softens hard lines in your yard while providing wildlife habitat for birds and beneficial insects.
The structure lasts for years, and the greenery stays vibrant even in winter.
Once installed, your wattle garden bed becomes the backbone of a thriving landscape. The woven frames add texture and movement, while the plants you choose determine the color and scent.
I used mine to highlight a climbing rose—now it's the star of my backyard without needing a fence. The setup takes just a weekend, and the payoff is immediate.
Perfect for small spaces, slopes, or anywhere you want to blend function with beauty. Whether you're framing a vegetable patch or creating a decorative border, wattle makes it easy. Here's how to get started with the right materials and plant pairings!"
📚 In This Guide
- What you need
- Instructions
- Tips and common mistakes
- Wrapping up and next steps
What you need
- ● Wattle branches: 20–30 fresh, flexible branches (1–2 inches in diameter) from willow, hazel, or other bendy native species. (Pro tip: Harvest from sustainably managed sources or your own yard!)
- ● Stakes: 4–6 wooden or metal stakes (1–2 feet long) to anchor the structure.
- ● Twine or wire: 100 feet of jute twine (¼-inch thick) or galvanized wire for weaving.
- ● Garden soil: 2–3 cubic yards (or 10–15 bags of premium potting mix) for filling the bed.
- ● Compost: 1–2 bags to enrich the soil and boost plant growth.
- ● Mulch: 1–2 bags of wood chips or straw to retain moisture and suppress weeds.
- ● Watering can or hose: For hydration during setup and early growth.
- ● Pruners: A sharp pair to trim branches as needed.
- ● Gloves: Heavy-duty work gloves to protect your hands.
- ● Native plants or seeds (e.g., lavender, rosemary, or wildflowers) for extra greenery.
- ● PVC pipes or bamboo poles for a sturdier frame (if your wattle needs extra support).
- ● Decorative stones or pebbles to line the base for a polished look.
- ● A spray bottle for misting plants during hot weather.
- ● Post-hole digger (if stakes need deeper anchoring).
Step-by-Step instructions for building a wattle garden bed
Here's how to create a sturdy, natural wattle frame that forms the backbone of your living privacy screen.
🪴 Step 1: Gather and Prepare the Willow Branches
Collect 4-6 foot long, flexible willow branches with green shoots—these are your wattle sticks. Remove any leaves or side shoots to keep them clean. Soak the branches in water for at least 4 hours to make them pliable. This step is crucial: dry branches snap like twigs, but soaked ones bend easily into your design.
Bundle the branches by size—thicker ones for the frame, thinner ones for weaving. I like to separate them into two piles: one for the vertical stakes and another for the horizontal weaving. Keep them moist with a damp towel while you work; dry branches undo all your weaving efforts.
🌱 Step 2: Build the Frame Structure
Dig 6-inch deep holes at each corner of your garden bed, spacing them 3-4 feet apart for a 4-foot wide bed. Insert the thickest branches vertically, leaving 12-18 inches above ground. Tie them together at the top with a sturdy piece of twine or more willow branches, creating a square or rectangular frame.
For extra stability, add diagonal supports between opposite corners. Weave additional branches horizontally between the vertical stakes, about 6 inches apart. This creates a lattice that will hold your soil and plants. Test the frame's strength by gently pushing on it—it should hold its shape without wobbling.
💧 Step 3: Weave the Wattle Layer
Start weaving the thinner branches horizontally between the vertical stakes, working from the bottom up. Use an over-under pattern, securing each layer with a knot or by tucking the ends into the lattice. Space the woven layers 3-4 inches apart to create pockets for soil and roots.
Leave the top 6 inches of the frame open to make planting easier. I like to weave a little tighter at the bottom where the soil will be heaviest. Once finished, your wattle should look like a sturdy basket with an open top. This structure will hold the soil and plants while allowing roots to grow through naturally.
☀️ Step 4: Fill and Plant the Garden Bed
Fill the woven pockets with a mix of topsoil and compost, leaving 2 inches at the top for mulch. Plant your chosen greenery—evergreen shrubs, climbers, or ornamental grasses work beautifully. Space plants 12-18 inches apart to allow room for growth and airflow.
Water thoroughly after planting to help the soil settle and roots establish. Mulch the surface with straw or wood chips to retain moisture and suppress weeds. Over time, the plants will grow through the wattle, creating a lush, natural privacy screen that blends seamlessly with your landscape.
Tips & tricks for perfect wattle garden bed construction
Building a wattle garden bed is all about patience and preparation—here are the secrets to making yours sturdy and long-lasting.
The Soaking Secret: That 4-hour soak in Step 1 is non-negotiable! I've tried cutting corners with shorter soaks, and trust me—it ruins everything. The branches need this time to become truly pliable. If you're in a hurry, you can soak them overnight, but don't skip the minimum 4 hours. Keep them submerged in a bucket or tub of water, and give them a little stir every hour to ensure even flexibility.
Frame Stability Trick: In Step 2, when you're building your frame, don't just rely on the vertical stakes. I always add those diagonal supports between opposite corners—it makes a world of difference. Think of it like a bridge: without proper cross-bracing, even the sturdiest structure can wobble. Test your frame by gently pushing on the sides before proceeding to the weaving stage. If it feels unstable, add more horizontal weaves or additional diagonal branches.
Weaving Wisdom: The 3-4 inch spacing between woven layers in Step 3 is crucial for root growth and drainage. I like to use a simple trick to maintain consistency: wrap a piece of twine around my weaving tool (a stick works great) at the 3-inch mark, then use that as a guide for each new layer. This creates uniform pockets that will hold soil perfectly while still allowing roots to penetrate naturally. Remember to weave tighter at the bottom where the soil will be heaviest.
Planting Preparation: Before you start planting in Step 4, give your wattle frame a good soaking with water. This helps settle the structure and prevents it from shifting when you add soil and plants. I also like to add a layer of landscape fabric along the bottom of the woven pockets before filling with soil—this helps prevent soil from falling through the gaps while still allowing roots to grow through naturally.
Pro Tips for Wattle Garden Bed
- Building a wattle garden bed is all about patience and preparation—here are the secrets to making yours sturdy and long-lasting.
- The Soaking Secret: That 4-hour soak in Step 1 is non-negotiable!
- Frame Stability Trick: In Step 2, when you're building your frame, don't just rely on the vertical stakes.
Frequently asked questions
Got questions about creating a stunning wattle garden bed? Here are some of the most common ones—and their answers!
What’s the best time of year to plant a wattle garden bed?
Plant your wattle garden bed in early spring or late fall for the best results. This gives roots time to establish before extreme summer heat or winter cold. If you’re in a mild climate, spring is ideal—just avoid frost-prone periods.
Do I need to fertilize my wattle garden bed?
Wattles are hardy and don’t require heavy fertilization, but a light application of organic compost or slow-release fertilizer in early spring can boost growth. Avoid over-fertilizing—too much nitrogen can reduce flowering. Mulch around the base to retain moisture and nutrients!
Can I use other plants besides wattle in my garden bed?
Mix wattle with native grasses, shrubs, or flowering plants like grevilleas or banksias for added texture and color. Just ensure they share similar water and sunlight needs. Pro tip: Choose drought-tolerant plants to keep maintenance low!
Will wattle attract pests like bees or termites?
Wattle is a pollinator magnet (great for bees!), but it’s not a termite attractor. To deter pests, keep the area well-drained and avoid overwatering. If you’re concerned, opt for termite-resistant species like Acacia pycnantha (golden wattle).
How do I keep my wattle garden bed looking neat year-round?
Regular pruning (2-3 times a year) keeps wattle compact and tidy. Trim back leggy branches in late winter and shape as needed. For a manicured look, use hedge shears, while a wild, natural style thrives with minimal trimming. Mulch helps suppress weeds too!
Wrapping up and next steps
Creating a wattle garden bed is a fantastic way to add year-round greenery and natural privacy to your space while embracing sustainable gardening. With the right materials and a little effort, you’ll enjoy a low-maintenance, eco-friendly solution that thrives in any season. Ready to transform your outdoor area?
🌱 Your Next Step:
Start small—sketch your design, gather supplies, and dive in! Whether you’re a seasoned gardener or a beginner, this project is rewarding and easy to customize. Plant your first wattle today and watch your garden flourish! 🌿