
Tools
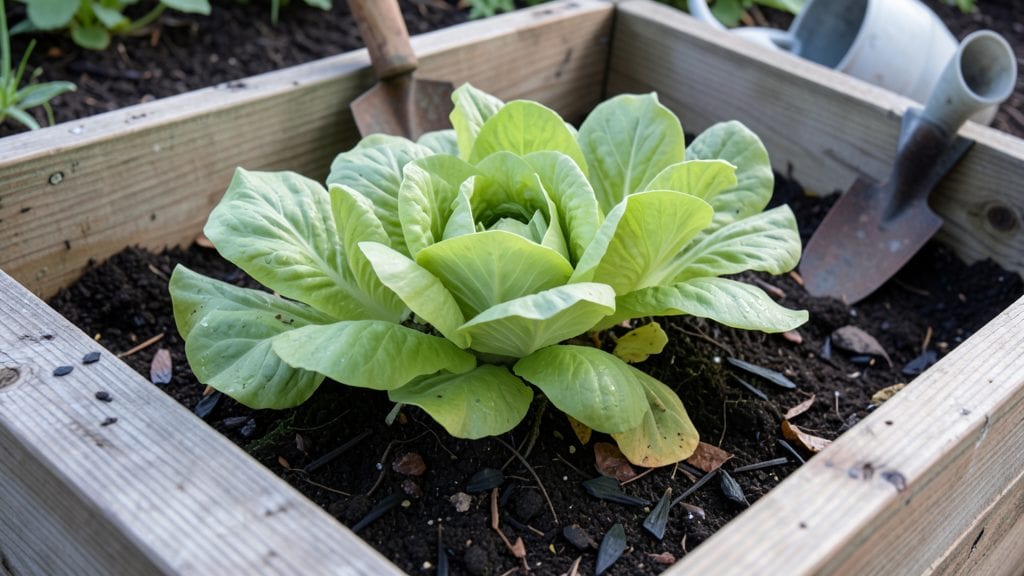
To learn to garden is to unlock a skill that feeds both body and soul—starting with your first thriving plants in just 30 days. 🌱 I remember my first failed attempt with wilted seedlings and overwatered soil, but this method works even for those of us who’ve killed more plants than we’ve grown.
The key isn’t perfection; it’s understanding the basics that actually matter.
You’ll need five simple tools—a trowel, gloves, a watering can, pruners, and a small shovel—and either a sunny windowsill, balcony, or patch of yard. Soil matters more than most beginners realize: a mix of 60% topsoil and 40% compost gives roots the perfect start.
We’ll focus on easy-to-grow plants like lettuce, basil, and marigolds that forgive mistakes while teaching you the fundamentals.
By day 30, you’ll be harvesting crisp greens or fragrant herbs, with plants that stand tall and proud—not drooping or yellowing. The secret lies in consistent watering (not drowning), smart sunlight placement, and knowing when to pinch back leggy growth.
Even my blackest thumb can’t kill these plants when done right.
This works for indoor pots, raised beds, or in-ground patches—no green thumb required. The same principles apply whether you’re growing in 5-gallon containers or a 4-foot-by-8-foot plot. Let’s turn those first plants into a confidence-building success story.
📚 In This Guide
- What you need
- Instructions
- Tips and common mistakes
- Wrapping up and next steps
What you need
- ● Garden Space: 6–12 sq. ft. of soil (or containers with drainage holes, 10–12" deep)
- ● Sunlight access: 6+ hours/day (check your plants’ needs!)
- ● Soil & Fertilizer: 1–2 bags of high-quality potting mix or garden soil (sterilized)
- ● Organic compost (1–2 lbs per plant) or slow-release fertilizer (e.g., 10-10-10)
- ● Seeds or Seedlings: 3–5 easy-to-grow plants (e.g., lettuce, basil, marigolds, or cherry tomatoes)
- ● OR pre-started seedlings (check local nursery for hardiness zones)
- ● Basic Tools: 1 pair of gardening gloves (nitrile-coated for durability)
- ● 1 hand trowel (6–8" long) for planting
- ● 1 small watering can (1–2 gallons) or hose with adjustable nozzle
- ● 1 pruning shears (for trimming)
- ● Mulch (straw or shredded leaves) to retain moisture
- ● Plant markers (popsicle sticks + labels) for tracking
- ● Kneeling pad or small stool for comfort
- ● pH test kit (to check soil acidity, ~$10)
- ● Lightweight wheelbarrow (for hauling soil/compost)
Instructions: your first 30 days of gardening success
Here’s how to launch your garden with confidence—no prior experience needed.
🌱 Step 1: Start Small With Easy, Fast-Growing Plants
Pick four beginner-friendly plants like lettuce, basil, marigolds, or nasturtiums. These tolerate mistakes, grow quickly, and reward you with visible progress. Avoid fussy crops like tomatoes or peppers until you’ve mastered basics. I always choose plants with 30-45 day harvest times—that way, you’ll see tangible results before motivation fades.
Check seed packets for "days to maturity" and select varieties labeled "easy" or "beginner." For your first try, stick to plants that thrive in full sun to partial shade—this gives you flexibility in placement. Write each variety name on a popsicle stick and tuck it into the soil beside the plant. You’ll forget what’s what in a week, and labels save you from guessing.
🪴 Step 2: Prepare Your Growing Space
Clear a 4x4-foot area of weeds and debris—this gives you room to move without crowding. Work the soil to a depth of 6 inches with a garden fork or trowel, breaking up compacted layers. Add 2 inches of compost to the top layer and mix it in lightly. Overworking the soil isn’t necessary; just loosen it enough for roots to penetrate easily.
For containers, use 5-gallon pots with drainage holes. Fill them with sterile potting mix (never garden soil—it’s too dense and may harbor diseases). Place pots where they’ll get at least 6 hours of sunlight daily, even if that means moving them closer to a sunny window as the season progresses. I like to set up a temporary marker with a stick and string to track sun exposure before planting.
💧 Step 3: Plant and Water With Precision
Follow seed packet instructions for depth—usually twice the seed’s diameter—or plant seedlings at the same depth they grew in their nursery pots. Space them 12-18 inches apart to allow airflow and prevent disease. Press the soil gently around the roots to eliminate air pockets, but don’t pack it down too firmly. Roots need room to expand.
Water deeply right after planting—1 inch of water should soak into the soil. Use a watering can with a narrow spout to direct moisture to the base, not the leaves. Check soil moisture daily by sticking your finger 1 inch deep; if it feels dry, water again. The first week is critical—keep the soil consistently moist but never soggy. Overwatering is the fastest way to kill young plants.
☀️ Step 4: Monitor Light, Water, and Progress Daily
Observe your plants for 30 minutes each morning to spot issues early. Look for bright green leaves (a sign of healthy growth) and yellowing (usually a water or nutrient problem). If leaves wilt in the afternoon but perk up in the morning, your plants need more water. If they stay wilted all day, they’re getting too much sun or not enough.
Rotate containers or turn pots a quarter turn every few days so plants grow straight toward the light, not lopsided. Adjust watering based on weather—water every 2-3 days in hot, dry conditions, but extend to 4-5 days if rain is forecasted. Keep a small notebook nearby to track what you plant, when, and how it responds. You’ll spot patterns in no time.
✂️ Step 5: Harvest and Learn From Your First Successes
When your plants reach their harvest-ready stage (check seed packets for specifics), pick leaves or flowers regularly to encourage more growth. For example, snip basil leaves just above a pair of leaves to promote bushiness. Harvest in the morning when flavors are most intense, and always use clean, sharp scissors or fingers to avoid damaging stems.
Take photos of your progress each week and compare them to your notebook. Note what worked and what didn’t—like which plants thrived in partial shade or which needed more frequent watering. Celebrate the wins, no matter how small. By day 30, you’ll have a thriving mini-garden, a deeper understanding of plant care, and the confidence to expand. That’s the real harvest.
Tips & tricks for perfect beginner gardening success
Real talk: even the simplest garden can become overwhelming if you don't set yourself up for success from the start. Here's what nobody tells you about making your first 30 days actually work.
Plant Selection Strategy: The 30-45 day harvest window isn't just about timing—it's about psychological momentum. I've seen beginners abandon gardening after 2 weeks when their plants take 60 days to mature. Stick to varieties like 'Black Seeded Simpson' lettuce (30 days) or 'Genovese' basil (30 days) that deliver visible results before motivation fades. Pro tip: Check seed packets for "days to maturity" and calculate backward from your first frost date to ensure you'll get that harvest before cold weather arrives.
Soil Preparation Secret: That 6-inch soil depth in Step 2 isn't arbitrary—it matches the root zone of most beginner plants. But here's what I learned the hard way: don't just loosen the soil, aerate it properly. Use a garden fork to create vertical channels rather than just stirring the top layer. This creates pathways for roots to grow deeper and access moisture during dry spells. For containers, tap the sides of your 5-gallon pots gently after filling with potting mix to eliminate air pockets that can stunt root growth.
Watering Precision: The "1 inch of water" rule in Step 3 is critical, but timing matters just as much. Water in the early morning (before 9 AM) so leaves have all day to dry, preventing fungal diseases. I use the "sponge test" for containers: press your finger 1 inch deep—if it's dry, water until you see moisture emerge from the drainage holes. For in-ground plants, use a rain gauge or tuna can to measure exactly 1 inch of water. Overwatering is the #1 killer of beginner gardens, so when in doubt, wait another day.
Light Tracking System: That 6-hour sunlight minimum isn't a hard rule—it's a baseline. Use a simple string-and-stick method to track actual sunlight hours: place a stick vertically in your planting area, tie a string at the top, and mark the string where the stick's shadow ends at noon each day. This visual map shows you exactly where sunlight hits (and where it doesn't) throughout the day. I've moved plants 2 feet closer to windows based on these readings and seen dramatic differences in growth patterns.
Pro Tips for Learn To Garden
- Real talk: even the simplest garden can become overwhelming if you don't set yourself up for success from the start.
- Plant Selection Strategy: The 30-45 day harvest window isn't just about timing—it's about psychological momentum.
- Soil Preparation Secret: That 6-inch soil depth in Step 2 isn't arbitrary—it matches the root zone of most beginner plants.
Frequently asked questions
Got questions? You’re not alone—every gardener starts somewhere! Here are answers to the most common queries to help you grow with confidence.
What’s the best time of year to start gardening for beginners?
For most regions, spring (after the last frost) is ideal for planting warm-season crops like tomatoes and peppers, while fall works for cool-season veggies like lettuce and kale. If you’re in a mild climate, you can garden year-round! Start with fast-growing herbs (like basil) to test your skills before tackling bigger projects.
How much does it cost to start a small garden?
Costs vary, but a basic setup can range from $20–$100 for seeds, soil, pots, and tools. Reuse containers (like yogurt cups) or repurpose household items to save money. Check local swap groups or dollar stores for affordable supplies—your first garden doesn’t need to be fancy!
What if I don’t have sunny space or a yard?
No problem! Container gardening or balcony farming works perfectly for small spaces. Choose herbs (mint, parsley) or leafy greens (spinach, arugula) that thrive in partial shade. A south-facing window or a sunny patio (even 4–6 hours of light) can support a thriving mini-garden.
How do I deal with pests without chemicals?
Start with prevention: healthy soil, proper spacing, and companion planting (e.g., marigolds repel pests). For mild infestations, try neem oil, soapy water sprays, or handpicking bugs. Encourage natural predators like ladybugs or birds by adding plants they love (e.g., dill, fennel).
Can I really see results in 30 days?
Fast growers like radishes (25–30 days), green onions (3–4 weeks), and bush beans (4–6 weeks) will show progress quickly. Even if your tomatoes take longer, you’ll learn soil prep, watering, and troubleshooting—skills that compound over time. Track your progress with a simple journal or photos!
What if my plants die? Is it a total failure?
Not at all! Gardening is a learning process. Overwatering, underwatering, or even too much love (like over-fertilizing) can harm plants. Use failures as feedback: adjust your watering schedule, research your plant’s needs, and try again. Every “failed” plant teaches you what to do next time—and that’s a win!
Wrapping up and next steps
You’ve taken the first step toward growing your own thriving garden—congratulations! 🌱 Whether you’re nurturing herbs, veggies, or flowers, remember that every gardener started exactly where you are now. The key is patience, curiosity, and a willingness to learn from both successes and setbacks.
Ready to dive deeper? Start small: Pick one plant to master this week, then expand your green thumb with new varieties. Next, explore seasonal planting guides or join a local gardening community for inspiration. Your garden—and your confidence—will grow together!