Tools
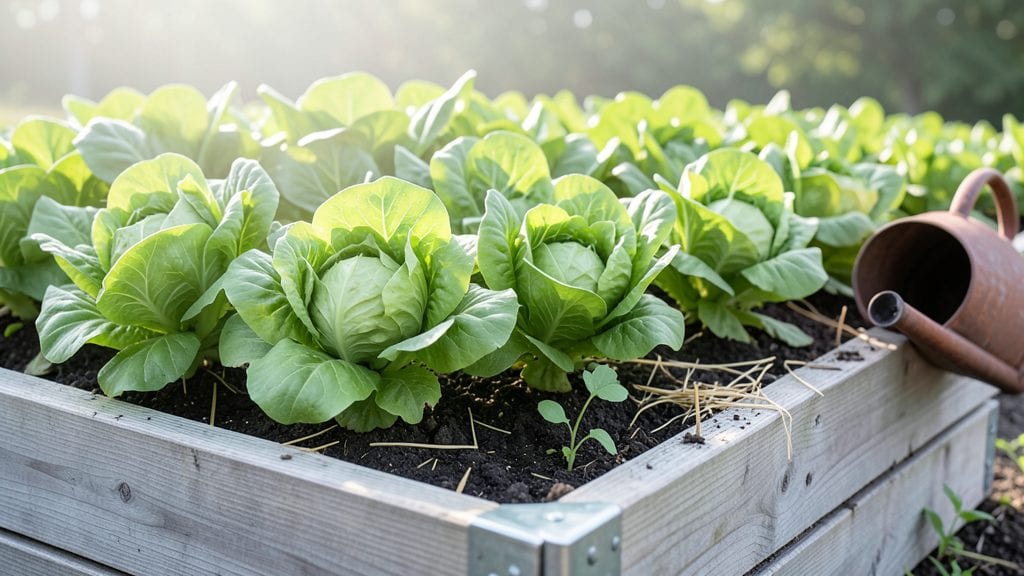
A modular raised garden gives you a garden that grows with you—literally. I built mine last spring, and now I can expand or rearrange it whenever I want, without digging up my yard every time I add a new bed.
The key is using interlocking panels that stack like building blocks, so you’re not stuck with a permanent layout.
You’ll need cedar or redwood panels (they resist rot), corner connectors, and a sturdy base like gravel or pavers. My 4-by-8-foot setup cost under $200 and fits my small backyard perfectly. The best part?
You can start with just one bed and add more as your confidence—or hunger—grows. Herbs, lettuce, and radishes thrive in these shallow beds, while tomatoes and peppers need deeper ones.
By summer’s end, you’ll have a garden that’s both productive and adaptable. The soil stays loose and warm, so crops mature faster, and you’ll never struggle with compacted earth or weeds.
Plus, the raised edges keep critters out, so your harvest stays safe. Think of it as a garden that evolves with your needs—no more wasted space or half-finished projects.
Works for urban balconies, sloped yards, or even sidewalks. Whether you’re a beginner or a seasoned gardener, this system lets you customize without the hassle. Ready to build yours?
📚 In This Guide
- What you need
- Instructions
- Tips and common mistakes
- Wrapping up and next steps
What you need
- ● Modular Raised Garden Kit (or pre-cut lumber): 2x4s (for framing) – 8–12 pieces, depending on bed size
- ● 1x6 or 2x6 boards (for sides) – 12–24 ft per bed
- ○ Optional: Cedar or redwood (naturally rot-resistant)
- ● Hardware: Galvanized screws (2.5–3 inches) – 100+ screws
- ○ Corner brackets (optional for extra stability) – 4–8 brackets
- ● Landscape Fabric – 1 roll (to block weeds)
- ● Garden Soil Mix: Topsoil – 2–3 cubic feet per square foot of bed
- ● Compost – 1–2 cubic feet per square foot
- ○ Perlite/vermiculite (optional for drainage) – 1 bag
- ● Measuring tape
- ● Drill & drill bits
- ● Saw (hand saw or circular saw)
- ● Level (to keep beds even!)
- ● Staple gun (for landscape fabric)
- ○ Optional: Knee pads, gloves, and a wheelbarrow for hauling soil
- ● Flat, stable ground (or a patio/deck if elevated)
- ● Sunlight access (6+ hours daily for most veggies)
- ● Water source nearby (hose or drip irrigation)
- ● Pro Tip: Check local regulations—some areas require permits for raised beds over a certain height! 💡
Step-by-Step instructions for building a modular raised garden
Here's how to create a flexible, expandable garden that adapts to your space and growing needs.
Plan Your Layout and Measure the Space
Start by sketching your garden area on paper, marking permanent features like fences, walkways, or trees. I like to draw a simple grid—each square represents a 4-foot by 8-foot bed, the most efficient size for most plants. Measure your space carefully, leaving at least 2 feet of walking space between beds for easy access and maintenance.
Consider how you'll expand later. Modular beds let you start small and add sections as needed. For example, you might begin with two 4-foot by 4-foot beds and later connect them with a 4-foot by 8-foot extension. Use a tape measure to mark the outline of your first bed on the ground, adjusting for level ground—uneven terrain can cause drainage issues.
Choose and Assemble Your Raised Bed Frames
Select frames made from rot-resistant wood like cedar or redwood, or durable materials like composite lumber or galvanized metal. For a 4-foot by 8-foot bed, you'll need four 8-foot long side panels and four 4-foot long end panels. Assemble the frames using 2.5-inch exterior screws or galvanized nails, ensuring corners are square by measuring diagonally—both measurements should be equal.
If you're using pre-cut panels, follow the manufacturer's instructions for assembly. For custom builds, pre-drill screw holes to prevent wood splitting. Leave a small gap (about ¼ inch) between panels if you plan to add more sections later—this makes connections easier. Double-check that all edges are flush and the frame is sturdy enough to hold soil and plants without sagging.
Prepare the Base and Add Landscape Fabric
Place your assembled frame in the marked location and check for level using a 2-foot level. If the ground isn't even, adjust by adding or removing soil beneath the frame until it sits flat. Cut a piece of landscape fabric to fit underneath the bed, extending it 6 inches beyond the frame on all sides. This prevents weeds from growing up into your garden and reduces competition for nutrients.
Secure the fabric with staple guns or landscape staples, ensuring it lies flat without wrinkles. If your soil is particularly weed-prone, you can also add a 1-inch layer of gravel beneath the fabric for extra weed suppression. This step is often overlooked, but it saves hours of weeding later. Once the base is ready, you're ready to fill the bed with soil.
Fill the Bed with the Right Soil Mix
Fill the bed with a 3-inch layer of coarse material like hardwood mulch or small gravel at the bottom for drainage. Then, add 6 inches of high-quality garden soil, followed by 4 inches of compost to enrich the mix. For a 4-foot by 8-foot bed, you'll need about 1 cubic yard of soil and ½ cubic yard of compost. Mix these layers together lightly with a garden fork to avoid compacting the soil.
Top the bed with 2-3 inches of finished compost or aged manure to provide immediate nutrients. Water the soil thoroughly after filling to settle it and remove air pockets. Avoid walking on the bed until the soil has had a chance to compact naturally—this usually takes 24-48 hours. The final soil level should be 6-12 inches below the top edge of the frame to allow for mulch and plant growth.
Arrange and Plant Your Garden Layout
Plan your planting scheme by grouping plants with similar light, water, and nutrient needs together. For example, place leafy greens like lettuce and spinach near the front where they’ll be easy to reach, and taller plants like tomatoes or peppers toward the back. Use a planting map or sketch to visualize the layout before digging.
Dig small holes for each plant, placing them at the depth recommended on the seed packet or transplant tag. Water each hole before inserting the plant to help settle the roots. After planting, add a 1-2 inch layer of mulch around the base of plants to retain moisture and suppress weeds. Water the bed deeply to encourage root growth, and you're ready to maintain your modular garden with ease.
Tips & tricks for perfect modular raised garden layouts
A few key strategies will help you avoid common pitfalls and create a garden that grows with you over time.
Start Small, Think Big: In Step 1, when planning your layout, I recommend beginning with the smallest practical bed size—like the suggested 4-foot by 4-foot beds—rather than jumping straight to full 4-foot by 8-foot sections. This gives you flexibility to expand later without wasting materials. I've seen gardeners regret starting too large when they realize they can't maintain the space properly. The quarter-size starting beds let you test different soil mixes and planting schemes before committing to larger sections.
Precision Matters in Assembly: When you reach Step 2 assembling your frames, take extra time to verify square corners by measuring diagonally. I learned this the hard way after building a bed that looked square but had one corner slightly off—it caused uneven soil distribution and made planting difficult. Use a 2-foot level to check both directions (length and width) before securing your panels. The small gap you leave between panels (about ¼ inch) isn't just for expansion—it's also easier to connect additional sections later if you've planned for this space.
Soil Compaction is Your Enemy: After filling your bed in Step 4, resist the urge to walk on it immediately. That 24-48 hour settling period is crucial for proper soil structure. I've seen gardeners skip this step and end up with compacted soil that prevents root growth. Instead, use a garden fork to gently fluff the soil after the initial settling period. This creates ideal air pockets for roots while maintaining good drainage through the 3-inch coarse material layer at the bottom.
Planting Strategy for Year-Round Success: In Step 5, when arranging your plants, consider the "successive planting" technique. Plant quick-maturing crops like lettuce and radishes in the front rows, then follow with slower-growing plants like tomatoes and peppers. This way, you'll have continuous harvests throughout the season. I've also found that placing taller plants like trellised cucumbers along the back edges prevents them from shading smaller front-row crops.
Pro Tips for Modular Raised Garden
- A few key strategies will help you avoid common pitfalls and create a garden that grows with you over time.
- This gives you flexibility to expand later without wasting materials.
- Precision Matters in Assembly: When you reach Step 2 assembling your frames, take extra time to verify square corners by measuring diagonally.
Frequently asked questions
Got questions about modular raised garden beds? You’re not alone! Here are answers to the most common concerns—from setup to maintenance—to help you grow with confidence.
How deep should a modular raised bed be?
Aim for 10–12 inches deep for most vegetables (like lettuce, herbs, and radishes) and 18–24 inches for deeper-rooted plants (tomatoes, carrots, or potatoes). Deeper beds improve drainage and root growth, while shallower ones work for lightweight crops. Pro tip: Check your modular kit’s specs—some designs allow stacking or extending depth!
When is the best time to assemble and plant?
Assemble your modular bed 4–6 weeks before your last frost date to give plants time to establish roots. For year-round harvests, start cool-season crops (spinach, kale) in early spring/fall, and warm-season plants (peppers, cucumbers) after frost risk passes. Bonus: Use row covers to extend growing seasons!
Are modular raised beds more expensive than in-ground gardens?
Upfront costs vary: Modular kits (especially cedar or composite) average $50–$200 per bed, while in-ground gardens require soil amendments (compost, fertilizer) and tools. However, modular beds save long-term by reducing weeds, improving yields, and lasting 10+ years with minimal upkeep.
How do I prevent pests and weeds in modular beds?
Start with clean, sterile soil and use landscape fabric at the base to block weeds. Deter pests with companion planting (e.g., marigolds repel nematodes) or organic sprays (neem oil). Elevating beds also reduces slug/snail access. Pro tip: Mulch with straw to retain moisture and confuse burrowing pests!
Can I expand or relocate my modular bed later?
Yes! Most modular systems are designed for flexibility. Connect new sections to existing beds or disassemble/reassemble them for relocation (just protect joints with weatherstripping). Warning: Avoid moving beds mid-season—plants may stress. Plan expansions in early spring or fall for best results.
Do modular beds get too hot or cold for plants?
Modular beds warm up faster in spring (great for early planting!) but can overheat in summer. Mitigate heat with shade cloth or mulch, and insulate with straw or cardboard in winter. Alternative: Plant heat-loving crops (okra, peppers) in beds with afternoon shade.
| Quick Troubleshooting | Solution |
|---|---|
| Poor drainage | Add gravel or perlite to the base layer. |
| Warping or cracking | Use pressure-treated wood or composite materials. |
| Uneven height | Level the ground beneath with landscaping fabric and adjust bed supports. |
Wrapping up and next steps
Modular raised garden beds are your ticket to a flexible, productive, and low-maintenance growing space—no matter your backyard size or skill level! 🌱 Whether you're a seasoned gardener or just starting, these expandable layouts make it easy to grow fresh produce year-round while adapting to your needs.
The best part? You can start small and grow bigger as your green thumb (and garden!) flourish.
Ready to dig in? Start by sketching your layout—grab a pencil, measure your space, and let your creativity (and veggie dreams!) guide you. Happy planting! 🌿